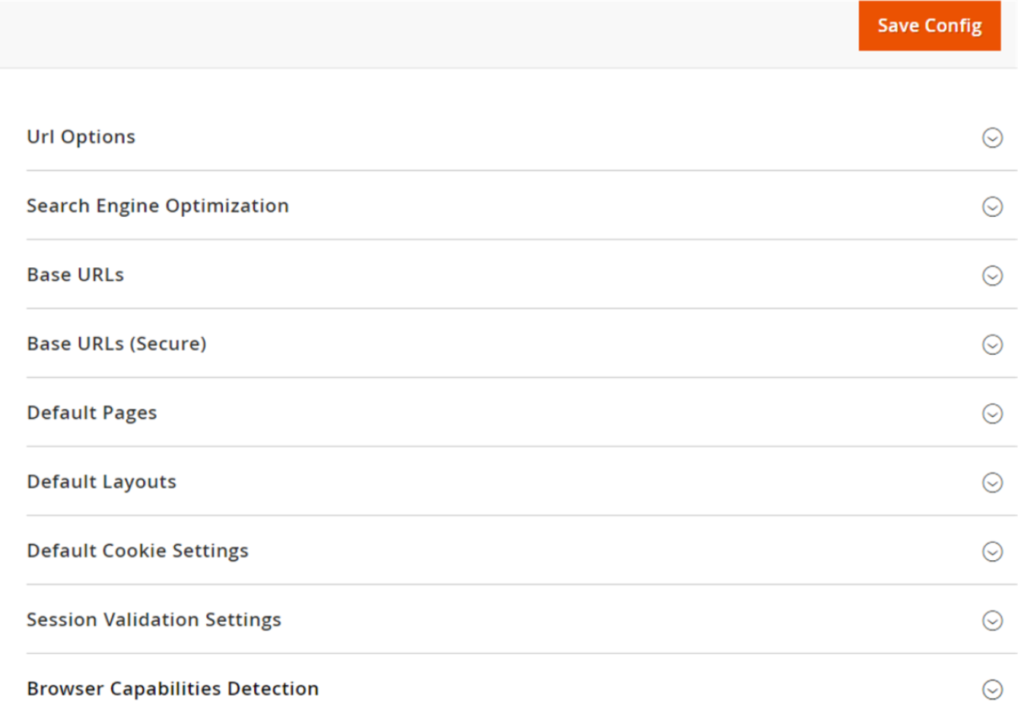
There are following below steps need to follow, Magento 2 Admin
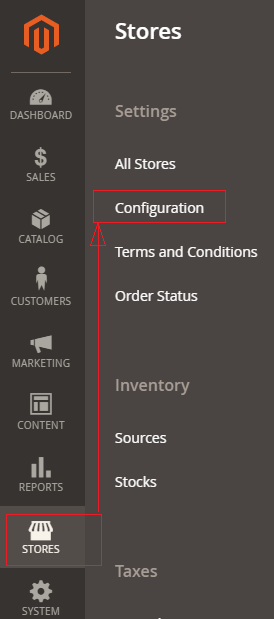
[1]- Go To STORES > Configuration, redirects on configuration.
[2]- Left Panel Clicked on General > Currency Setup, redirects on [Right Panel]
[3]- Once redirection on [Right Panel]
[4]- Once clicked / expanded, Currency Options [Right Panel]
Each Input field (Select Box Values), defined as
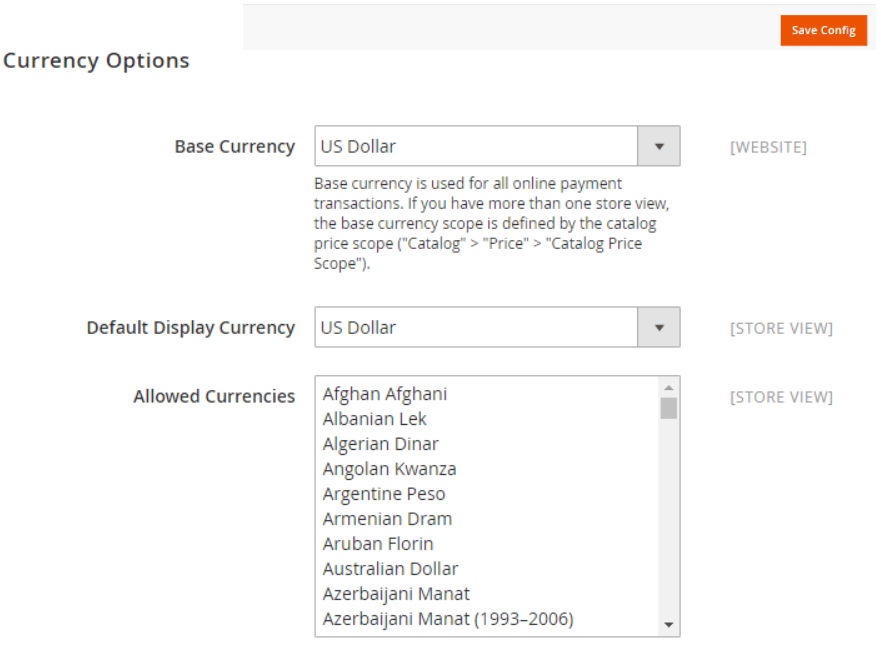
[4.1]- Base Currency : Select Base Currency (Main Currency) for online payment transaction, By Default US Dollar Selected
[4.2]- Default Display Currency :Select Default Display Currency that Store Owner(Admin) want to display pricing in store.
By Default US Dollar Selected.
[4.3]- Allowed Currencies : Select list of currencies that Store Owner(Admin) want to allow, in case of Multiple Currency( By Using to hold the ctrl key and then selecting the currency options).
During above operation, if message as cache refreshment display, then close it and refresh it.
[5] Set scope of the base currency:
[5.1]- Once clicked on Left Panel (Catalog > Catalog)
[5.2]- Display Right Panel (Price)
Select Catalog Price Scope as either “Global” or “Website”
Magento 2 performs fully operations, if most of browser enabled both Cookies and JavaScript, As per Browser’s Capabilities Detection, require both Cookies and JavaScript must be enabled stage for Fully Functional Magento 2 Store.
sometimes, Users already set the browser to the highest privacy setting that cookies and JavaScript are not allowed. Magento 2 Admin can configure website store to check the capabilities of each visitor’s browser (either cookies and JavaScript enabled or not), if cookies and JavaScript not enabled send a notification to user’s browser to enable for Fully Functional Magento 2 Store.
There are following below steps need to follow for Browser Capabilities Detection.
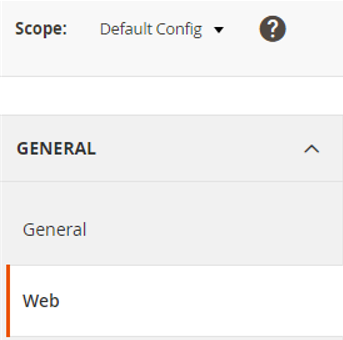
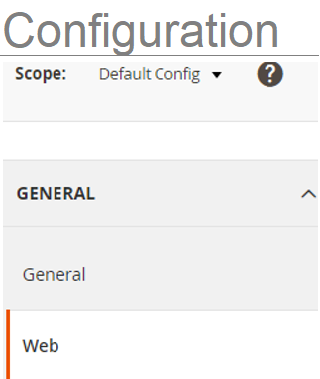
[1]- Go To STORES > Configuration, redirects on configuration.
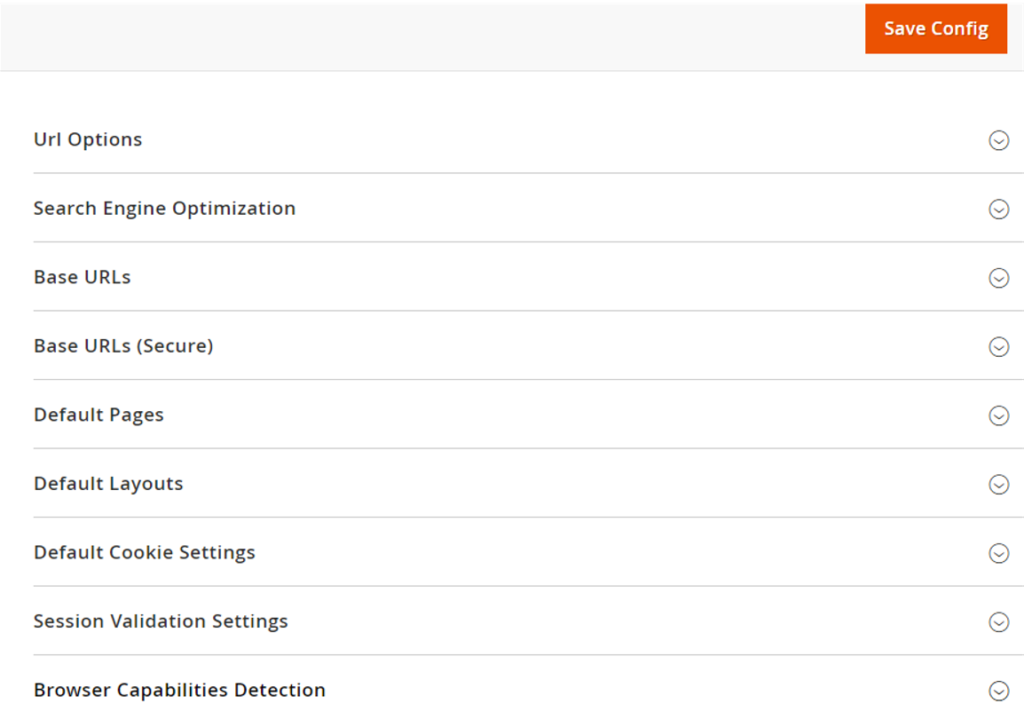
[2]- Left Panel Clicked on General > Web, redirects on [Right Panel]
[3]- Once redirection on [Right Panel]
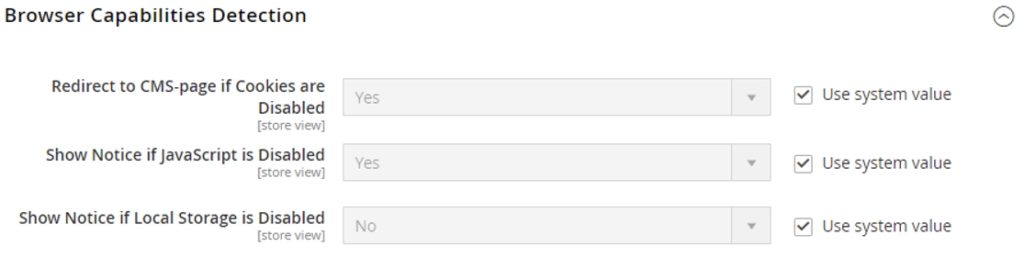
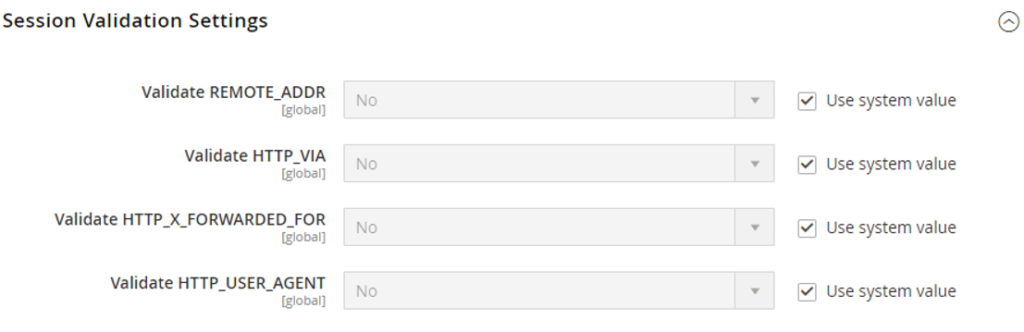
[4]- Once clicked / expanded, Browser Capabilities Detection [Right Panel]
Each Input Field (Drop Down Value) of Browser Capabilities Detection [Right Panel] defined as.
[4.1] Redirect to CMS-page if Cookies are Disabled : By Default selected Yes, It is allowed to display instructions & guidelines that describe how to configure the browser to allow Cookies , browser’s Cookies disabled.
[4.2] Show Notice if JavaScript is Disabled : By Default selected Yes, It is allowed to display instructions & guidelines as Alert notification banner above header that describe how to configure the browser to allow JavaScript, browser’s JavaScript disabled.
[4.3] Show Notice if Local Storage Disabled : By Default selected No
It is allowed to display instructions & guidelines as Alert notification , if Local Storage Disabled
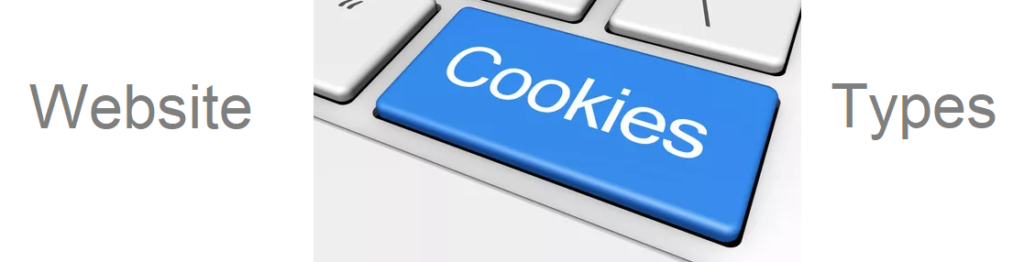
Persistent(Permanent) Cookies : Once Cookie stored in small Text File in hard disk of the computer defined as Persistent(Permanent) Cookies
Non Persistent(Temporary)Cookies : Once Cookie stored in Browser’s Memory defined as Non Persistent(Temporary) or Per-Session Cookies or Session Cookies, These Cookies automatically discarded when the Web browser is closed.
Third-Party Cookies : Those are set by domains & not directly visited by the user. These cookies will be integrated by web advertisers, web publishers add third-party elements (if chatbot, social plugins, or advertisement etc) on the website.
Once User enabled Cookies on a website, It stores user’s data (Username & Password as unique identifiers, preferred language or location) in Browser’s Memory or as small Text File, Client’s cookies interconnected server to transmit data, These stored information making shopping experience very wonderful, once user again visited store site.
There are following below steps need to follow Cookie Settings in Magento 2 Admin
[1]- Go To STORES > Configuration, redirects on configuration.
[2]- Left Panel Clicked on General > Web, redirects on [Right Panel]
[3]- Once redirection on [Right Panel]
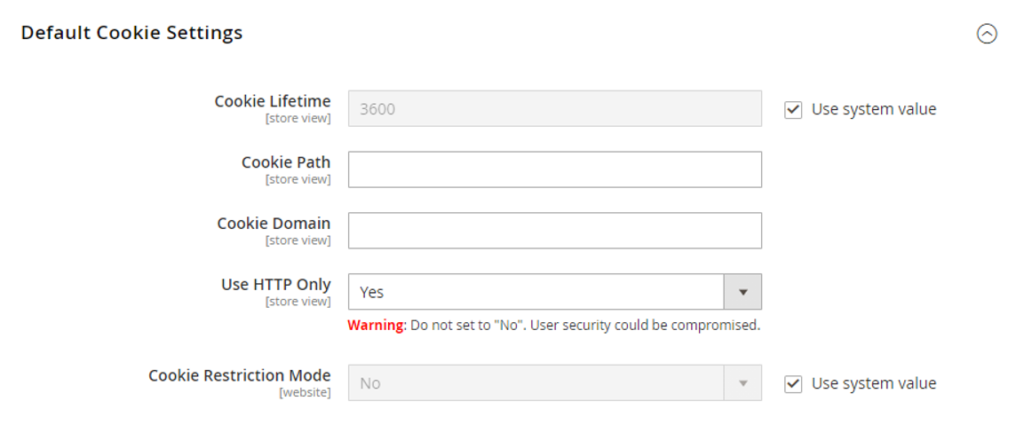
[4]- Once clicked / expanded, Default Cookie Settings [Right Panel]
Each Input Field of DefaultCookie Settings defined as
[4.1]- Cookie Lifetime : By Default It’s 3600 Second (1 Hour), In case customer Cookie Lifetime, need to put custom value (in seconds) as per store requirement.
[4.2]- Cookie Path : If admin want to keep cookies available to other folders, need to put forward slash to keep the cookies available anywhere on the site.
[4.3]- Cookie Domain : If admin want to enable cookies for some specific subdomain. Enter something like “.domain.com” to enable cookies for all the subdomains. Remember, put dot(.) before domain name.
[4.4]- Use HTTP Only : By Default selected Yes, to prevent scripting languages from gaining access to cookies.
General Data Protection Regulation (GDPR) and California Consumer Privacy Act (CCPA) require online merchants to make the process of collecting customer personal data secure, transparent, and with customer consent. To protect cookies from thefts, Admin should apply the HttpOnly attribute, which protects cookies from being accessed by JavaScript.
By default, Magento 2 examines whether HTTPS is enabled and sets a Security Flag automatically.
HttpOnly Attribute or Flag indicates, Always Use HTTP Only , select as Yes
Never try Use HTTP Only as select No as per Security Vulnerability Issue.
[4.5]- Cookie Restriction Mode : By Default selected No , to enable Cookie Restriction Mode, select Yes
” Cookie Restriction Mode prevents web store from collecting cookies data of customers, so full-featured operations cannot be enabled. In this mode, customers have to confirm that website needs cookies to allow full-featured operations & making wonderful shopping experience “
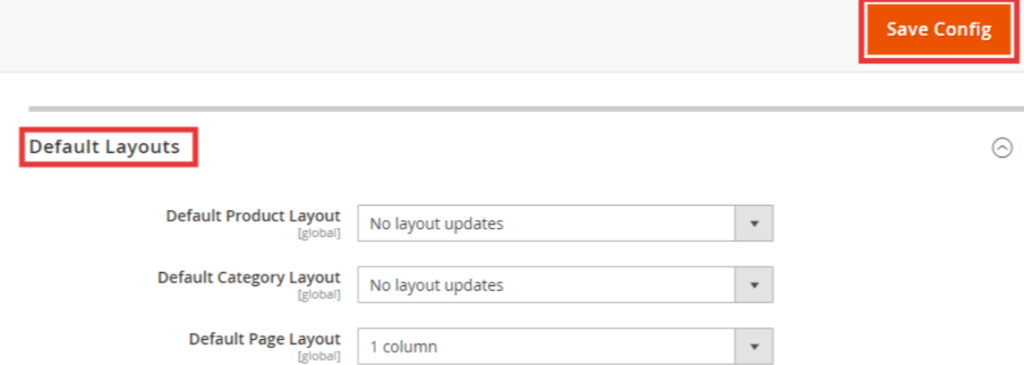
[5]- Click on Save Config button & run CLI command Flush
Magento 2 design pages having collection of layouts, containers, blocks. headers, footers etc. each page having its own design set as per store requirement. Magento 2 Admin provides facility to change pages design set.
There are following below steps need to follow, Magento 2 Admin
[1]- Go To STORES > Configuration, redirects on configuration.
[2]- Left Panel Clicked on General > Web, redirects on [Right Panel]
[3]- Once redirection on [Right Panel]
[4]- Once clicked / expanded, Default Layouts [Right Panel]
Each Layout defined as
[4.1] Default Product Layout : This layout allow to select the layout option for the product pages
[4.2] Default Category Layout : This layout allow to select the layout option for the category pages
[4.3] Default Page Layout : This layout allow to select the layout option for the default pages
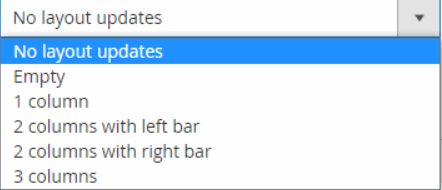
Each Drop Down Value of Default Product Layout, Default Category Layout & Default Product Layout defined as below
[a]- No layout updates : Layout updates are not available for product or category pages.
[b]- Empty : Uses a blank layout for product or category pages.
[c]- 1 column : Uses a single column layout for product or category pages .
[d]- 2 columnswith left bar : Uses a two-column layout with the sidebar on the left for category pages.
[e]- 2 columns with right bar : Uses a two-column layout with the sidebar on the right product or category pages.
[f]- 3 columns : Uses a three-column layout with sidebars on the left and right for product or category pages.
Magento 2 default page, which is appeared as Home Page, once user typing URL & specified URL page found as “Page Not Found” error occurs, the default page will be displayed.
Finally, Magento 2 Home Page & Error Page “Page Not Found” defined as Default Pages.
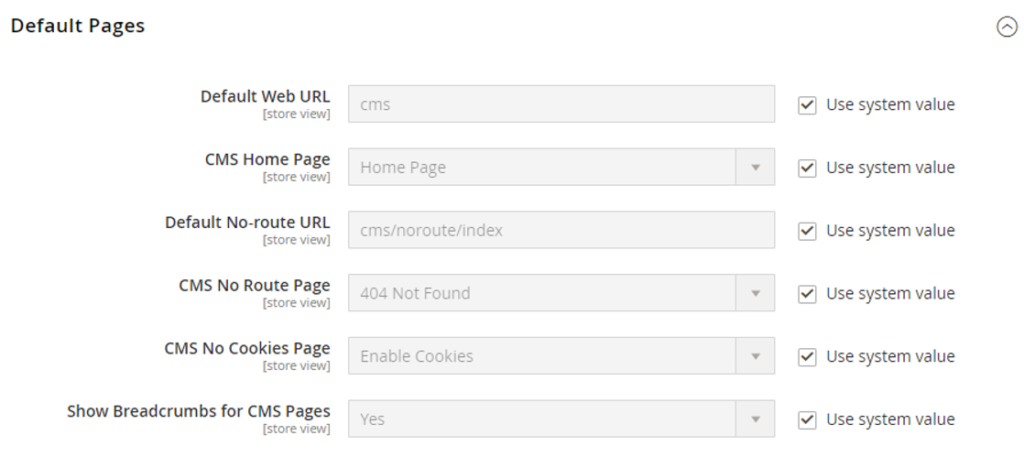
There are following below steps to follow to configure Default Pages.
[1]- Go To STORES > Configuration, redirects on configuration.
[2]- Left Panel Clicked on General > Web, redirects on [Right Panel]
[3]- Once redirection on [Right Panel]
[4]- Once clicked / expanded, Default Pages [Right Panel]
Each Input Field of Default Pages defined as below
[4.1]- Default Web URL : By Default cms or enter other value as per Store Requirement.
[4.2]- CMS Home Page : By Default Home Page selected or select other page from drop as per Store Requirement.
[4.3]- Default No-route URL : By Default “cms/index/noRoute” or enter other value as per Store Requirement.
[4.4]- CMS No Cookies Page : By Default “404 Page Not Found” selected or select other page from drop as per Store Requirement.
[4.5]- CMS No Cookies Page : By Default “Enable Cookies” selected or select other value from drop as per Store Requirement.
[4.6]- Show Breadcrumbs for CMS Pages : By Default “Yes” selected, if do not want display Breadcrumbs for CMS Pages, select No.
There are following database SQL query need to run
To change the base URLs, run the following SQL Query:

update core_config_data set value = 'http://mage2db.com/' where path = 'web/unsecure/base_url';
To change the secure base URLs, run the following SQL Query:

update core_config_data set value = 'https://mage2db.com/' where path = 'web/secure/base_url';