Top 8 Best Diagramming Software Architecture Tools

Diagramming software allows users to create detailed diagrams – such as flow charts and floor plans – out of data and images. Diagramming tools often include templates for building diagrams in addition to enabling users to create diagrams from scratch

The following steps define Top Best Diagramming Software Architecture Tools

Step [1] – Diagrams.net:: Diagrams.net (formerly draw.io) is a collaborative online diagramming tool with an offline desktop app for added security.

It includes features such as:

  • Real-time collaboration
  • Offline desktop app
  • Store diagrams locally in the browse
  • Storage in Google Drive, Sharepoint, OneDrive, GitHub, GitLab, Dropbox or Notion
  • Support for UML, C4, ArchiMate, BPMN and SysML shapes
  • AWS, Azure, GCP, Cisco and Kubernetes icon packs
https://app.diagrams.net/

Step [2] – Lucidchart.com:: is a collaborative diagramming tool with templating and shape types to create many diagram types, such as flow charts, process flows, mind maps and more.

Available for both Free & Paid

Best for teams collaborating on quick and flexible diagrams.

It includes features such as:

  • Real-time collaboration to work with your team
  • Connect to data
  • Integrate with other tools in your stack
  • Templates to help guide you
  • A learning campus to learn what you can do in the tool
https://lucidchart.com/

Step [3] – Excalidraw.com:: is a collaborative virtual whiteboarding tool with the paid option of Excalidraw+

Best for teams who want to sketch diagrams using pre-existing components quickly.

It includes features such as:

Available for both Free & Paid

  • Rapid sketching with handwriting style
  • Simple and minimalist interface
  • Libraries to quickly add pre-existing components
  • End-to-end encryption
  • Share drawings by links
  • NPM library to integrate into your app
  • Comments, versioning and search included with Excalidraw+
https://Excalidraw.com/

Step [4] – tldraw.com:: is a collaborative online tool for sketching diagrams.

Available for Free and open source

It includes features such as:

  • Flexible sketching of shapes and lines
  • Change sketch style
  • Sticky notes
  • Multiplayer mode for collaboration
https://tldraw.com

Step [5] – Gliffy.com is a collaborative drag-and-drop diagramming tool.

Best for larger teams who want to diagram software architecture and have enterprise requirements.

Available for Paid

It includes features such as:

Real-time collaboration
Support for UML, ER, data flow, process and C4 modelling
Cloud architecture diagrams
Integration with Jira, Confluence and Google Drive

Gliffy.com

Step [6] – OmniGraffle.com:: is a macOS and iOS desktop application for diagramming and prototyping.

Best for individuals who want their diagrams stored on their local machine and want to manipulate many file types.

Available for Paid

It includes features such as:

  • Layered documents, grids and auto layout
  • SVG import and paste
  • Visio import and export
  • Apple Pencil support
  • Object metadata
  • PNG, JPG, GIF, BMP, TIFF, PDF, EPS and PSD file types

Step [7] – Miro.com:: is a collaborative whiteboarding tool with templating and team-based tooling to help facilitate workshops.

Best for teams collaborating on diagrams and facilitating workshops.

Available both for Free & Paid

It includes features such as:

  • Real-time editing on an interactive whiteboard
  • Mouse over collaboration to see who’s viewing your diagram
  • Workshop facilitation tools such as timers and voting
  • Community-made templating
miro.com

Step [8]:: – CloudSkew.com is an online tool for drawing cloud architecture diagrams.

Best for individuals wanting to quickly create architecture and network diagrams for the major cloud platforms.

It includes features such as:

  • Icons for AWS, Azure, GCP, Kubernetes, IBM Cloud, Alibaba Cloud and OCI
  • Autosaved to the cloud
  • Architecture diagrams, network diagrams and flowcharts
  • Diagram templates
https://cloudskew.com/

How To Install Docker in WSL Windows 11 & Lando Package & Docker

Follow the below steps to install WSL in Windows 10 or above version

Step [1] – Click on Windows Power Shell

Step [2] – Once Windows Power Shell opened, run below command

wsl --install -d ubuntu

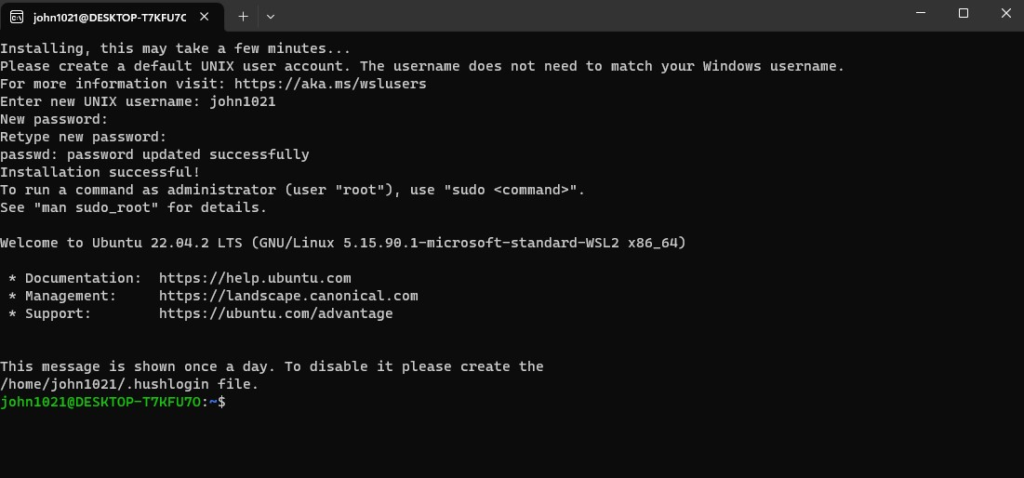
It will run another Windows Power Shell, where asking to create Unix Credentials (Username & Password) and once installed Message will be displayed on Both Window,

as created as

Enter new UNIX username: john1021
New Password: 1234@abcd
Retype new password: 1234@abcd

Step [3] – Once Installed, you can open as below Ubuntu

Finally check version as below command

Step [4] – Installation of Lando Package

Once WSL Installed, need to install lando as below

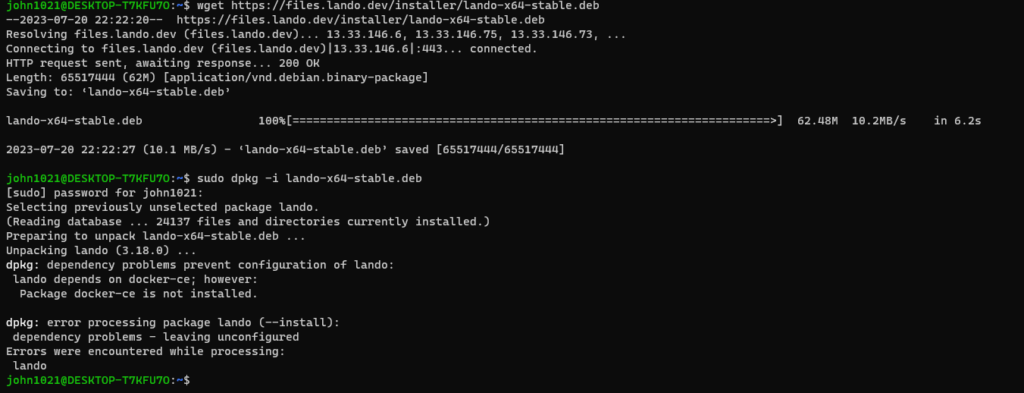
wget https://files.lando.dev/installer/lando-x64-stable.deb

Once Lando install successfully as below

Step [5] – Once Lando Package has been installed, need to run below command

 sudo dpkg -i lando-x64-stable.deb

After running this command error must be display as below

Error Indicates, Your Windows WSL System ready for Docker Installation

Step [6] – Installation of Docker Package

Step [6.1] – Update the apt package index and install packages to allow apt

sudo apt-get update

Step [6.2] – Install Docker CA Certificate

sudo apt-get install ca-certificates curl gnupg

Step [6.3] – Add Docker’s official GPG key:

sudo install -m 0755 -d /etc/apt/keyrings

curl -fsSL https://download.docker.com/linux/ubuntu/gpg | sudo gpg --dearmor -o /etc/apt/keyrings/docker.gpg

sudo chmod a+r /etc/apt/keyrings/docker.gpg

Step [6.4] – Use the following command to set up the repository

echo \
“deb [arch=”$(dpkg –print-architecture)” signed-by=/etc/apt/keyrings/docker.gpg] https://download.docker.com/linux/ubuntu \
“$(. /etc/os-release && echo “$VERSION_CODENAME”)” stable” | \
sudo tee /etc/apt/sources.list.d/docker.list > /dev/null

Step [6.5] – Installation Docker Engine

Step [6.6] – Update the apt package index by below command

sudo apt-get update

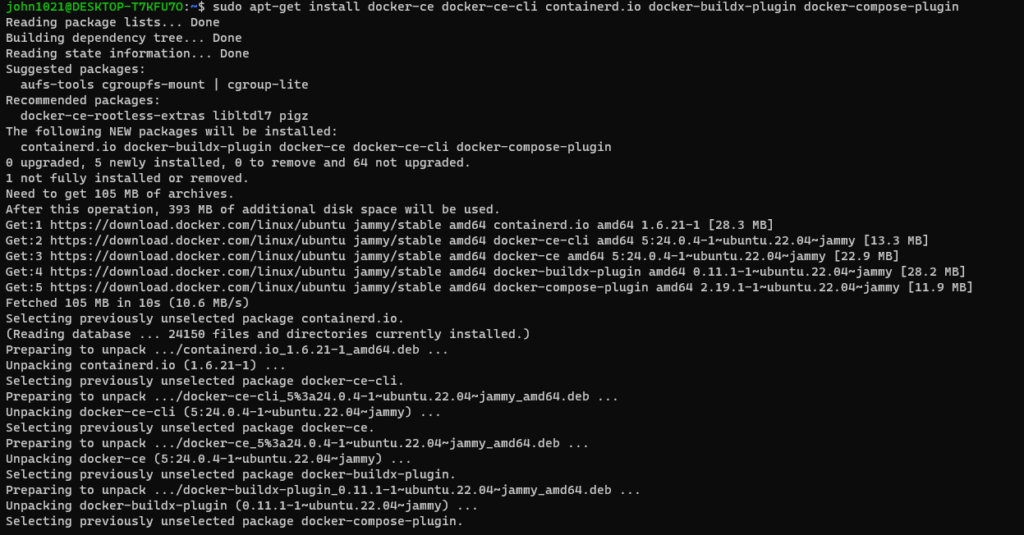
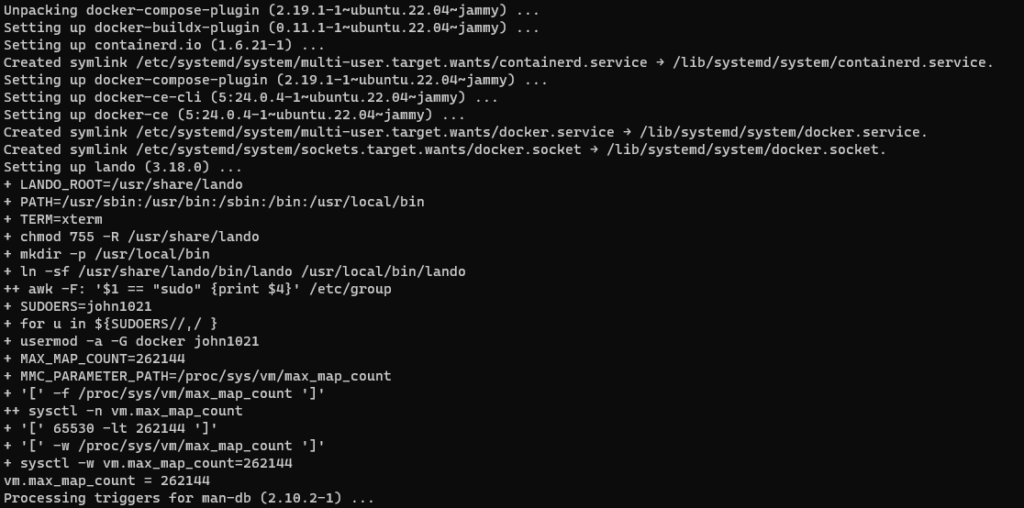
Step [6.7] – Install Docker Engine, containerd, and Docker Compose.

sudo apt-get install docker-ce docker-ce-cli containerd.io docker-buildx-plugin docker-compose-plugin

Step [6.8] – Verify that the Docker Engine installation is successful by running the hello-world image.

sudo docker run hello-world

Step [6.9] – Finally check docker version

Step [6.7] – Verify that the Docker Engine installation is successful by running the hello-world image.

sudo service docker start
sudo docker run hello-world

How Artificial Intelligence is transforming the E-Commerce Industry

Artificial Intelligence is development and implementation of computer systems that can perform tasks that typically require human intelligence. AI involves the creation of intelligent machines that can perceive their environment, reason, learn, and make decisions to achieve specific goals.

The following below steps define How AI is transforming the e-commerce industry tremendous way

Step [1] – Personalized shopping experiences: AI algorithms analyze vast amounts of customer data, including browsing history, purchase behavior, and preferences, to offer personalized product recommendations. This helps e-commerce platforms deliver tailored shopping experiences, leading to higher customer satisfaction and increased sales.

Step [2] – Chatbots and virtual assistants: AI-powered chatbots and virtual assistants provide real-time customer support, answering queries, and guiding customers through their purchase journey. These AI systems can understand natural language, assist with product recommendations, and even process transactions, enhancing customer service and reducing the need for human intervention.

Step [3] – Visual search: AI enables visual search capabilities, allowing customers to search for products using images rather than text-based queries. By analyzing visual features, AI algorithms can identify similar products and provide relevant search results, enhancing the overall search experience and making it easier for customers to find what they are looking for.

Step [4] – Supply chain optimization: AI algorithms help streamline and optimize the e-commerce supply chain by predicting demand, optimizing inventory management, and automating logistics and fulfillment processes. This leads to improved efficiency, reduced costs, and faster order delivery, benefiting both e-commerce businesses and customers.

Step [5] – Fraud detection and security: AI-powered systems can identify patterns and anomalies in real-time to detect fraudulent activities, such as payment fraud and identity theft. By leveraging machine learning algorithms, e-commerce platforms can enhance security measures and protect both the business and its customers from potential threats.

Step [6] – Price optimization: AI algorithms can analyze market trends, competitor pricing, and customer behavior to dynamically adjust prices in real-time. This enables e-commerce businesses to optimize pricing strategies, offer competitive prices, and maximize revenue while considering factors like demand elasticity and inventory levels.

Step [7] – Product content generation: AI can generate product descriptions, reviews, and other content based on customer reviews, specifications, and other relevant information. This helps e-commerce platforms automate the process of content creation, ensuring consistent and accurate product information across a large inventory.

Magento 2.x Undefined constant Magento\Framework\Encryption\Adapter\SODIUM_CRYPTO_AEAD_CHACHA20POLY1305_IETF_NPUBBYTES

Once Installing Magento 2.4.x and getting below errors

Undefined constant Magento\Framework\Encryption\Adapter\SODIUM_CRYPTO_AEAD_CHACHA20POLY1305_IETF_NPUBBYTES

Solution:: The following below steps need to follow

Step [1] – Open Apache config file (httpd-xampp.conf)

Path Location = D:\xampp\apache\conf\extra\httpd-xampp.conf

Step [2] – Go to Line Number 17 of file httpd-xampp.conf as below

LoadFile "D:/xampp/php/php8ts.dll"

LoadFile "D:/xampp/php/libpq.dll"

LoadFile "D:/xampp/php/libsqlite3.dll"

LoadModule php_module "D:/xampp/php/php8apache2_4.dll"

Step [3] – Load File Path “D:/xampp/php/libsodium.dll” at the end

LoadFile "D:/xampp/php/php8ts.dll"
LoadFile "D:/xampp/php/libpq.dll"
LoadFile "D:/xampp/php/libsqlite3.dll"
LoadModule php_module "D:/xampp/php/php8apache2_4.dll"
here need to file path as per step 4

Step [4] – After adding, finally added the line as below & restart Apache Server

LoadFile "D:/xampp/php/php8ts.dll"
LoadFile "D:/xampp/php/libpq.dll"
LoadFile "D:/xampp/php/libsqlite3.dll"
LoadModule php_module "D:/xampp/php/php8apache2_4.dll"
LoadFile "D:/xampp/php/libsodium.dll


How To Connect Adobe Commerce 2.x or (Magento 2.x) To Adobe Experience Manager (AEM)

The following below steps need to follow to connect Adobe Commerce 2.x or (Magento 2.x) to Adobe Experience Manager (AEM)

Step [1] – Install Adobe Commerce integration modules for Adobe Experience Manager:

Adobe provides integration modules that enable seamless connectivity between Adobe Commerce and Adobe Experience Manager. These modules include the “Commerce Integration Framework (CIF)” and “Commerce Integration Module (CIM).”
Follow the official documentation to download and install these modules into your Adobe Experience Manager environment.


Step [2] – Configure Adobe Commerce integration settings in Adobe Experience Manager:

In Adobe Experience Manager, access the configuration settings for the Commerce Integration Framework (CIF) and Commerce Integration Module (CIM). Configure the connection settings such as the URL of your Adobe Commerce instance, authentication credentials, and other required information.


Step [3] – Configure Adobe Experience Manager integration settings in Adobe Commerce:

In the Adobe Commerce Admin panel, navigate to Stores -> Configuration -> Adobe Experience Manager. Configure the connection settings for Adobe Experience Manager, including the URL, authentication credentials, and other necessary information.


Step [4] – Set up data synchronization between Adobe Commerce and Adobe Experience Manager:

Define the data synchronization settings to determine which data (such as products, categories, pricing, etc.) should be synchronized between the two systems. Configure the frequency and scope of data synchronization, as well as any mapping or transformation rules if required.


Step [5] – Test and validate the integration: Perform tests to ensure that data is synchronized correctly between Adobe Commerce and Adobe Experience Manager. Verify that product information, pricing, categories, and other relevant data is accurately shared between the two systems.


Step [6] – Implement customizations (optional):
If needed, develop customizations or enhancements to tailor the integration to your specific requirements. This may involve building custom components, templates, or workflows in Adobe Experience Manager or extending functionality in Adobe Commerce.