DeepminddotGoogle :: Toresearch and build safe artificial intelligence system to solve intelligence & advance science and humanityproblems
Solving Complicated Problems:: To Solve complex problems and pushing the boundaries of what is possible in artificial intelligence.
Open Collaboration:: To focus on teamwork, open communication & sharing knowledge skills to accomplish common goals.
Integrity Rules:: It is responsible AI development, with a strong emphasis on transparency, accountability, and respect for privacy.
Continues Learning Environment:: Providing Environment as Continuous learning and growth, providing opportunities for employees to develop their skills and pursue their interests in AI research and development.
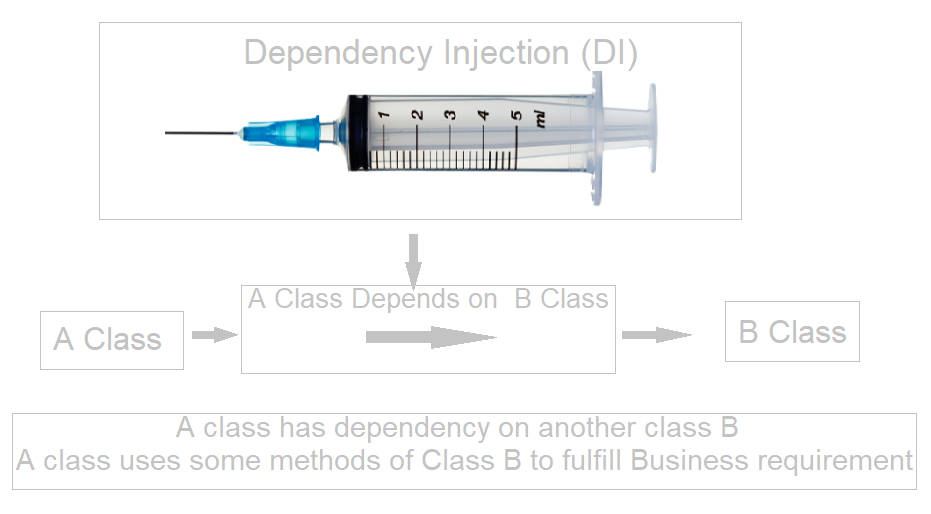
The Dependency injection (DI) means A class has dependency on another class B to provide some data or results, A class uses some methods of Class B to fulfill Business requirement.
Injection is process of Passing required dependency Parameter in constructor class or constructor method.
Magento 2.x or Adobe Commerce promotes dependency injection as a preferred approach for better code modularity, testability, reusability, and flexibility. Benefit of Dependency Injection
The following below two type Dependency Injection
1 – Magento 2 constructor injection Constructor Injection is the preferred way to inject dependencies in Magento 2, as it addresses the most simple scenario where a class requires one or more dependency parameter
Constructor Injection To Pass or add a parameter in the class constructor to inject the dependency
<?php
namespace John\Mage2db\Block\Data;

class Data extends \Magento\Framework\View\Element\Template
{
           protected $_customerSession;
           protected $_viewHelper;

	public function __construct(
                \Magento\Framework\View\Element\Template\Context $context,
                \Magento\Customer\Model\Session $customerSession,
                \Magento\Customer\Helper\View $viewHelper
            )
	{

        /* dependency injection of customerSession and viewHelper for Data class */

                       $this->_customerSession = $customerSession;
                       $this->_viewHelper = $viewHelper;
		parent::__construct($context);
	}

	public function getCustomer()
	{
	      return  $this->_customerSession->getData(); // retrive customer data

	}
                public function getName()
               {
   /* To Get customer name with the help of viewHelper object's dependency */

  /* injection using Customer data */

                   return $this->_viewHelper->getCustomerName($this->getCustomer());

                }
}
?>
Above code retrieve customer data by using customer session &
Step [1] –Advanced customization: Shopify Plus allows for greater flexibility in customizing your online store. You can access and modify the platform’s HTML, CSS, and JavaScript to create a unique storefront that aligns with your brand identity and customer experience goals.
Step [2] -Dedicated support: Shopify Plus customers receive priority support with access to a dedicated account manager who can provide assistance with technical issues, platform customization, and strategic guidance to help grow your business.
Step [3] -Scalability: Shopify Plus is built to handle high levels of traffic and sales volume, making it suitable for businesses experiencing rapid growth or expecting seasonal fluctuations in demand.
Step [4] -Robust Integrations: With Shopify Plus, you have access to more than 2,000 apps and integrations through the Shopify App Store. This allows you to extend the functionality of your store with features such as advanced analytics, marketing automation, inventory management, and more.
Step [5] -Multi-channel selling: Shopify Plus enables you to sell across multiple channels, including your online store, social media platforms, marketplaces like Amazon and eBay, and even in-person with Shopify’s POS system.
Step [6] -Customizable checkout: You can create a customized checkout experience to optimize conversions and reduce cart abandonment. This includes the ability to add custom fields, offer multiple payment options, and streamline the checkout process for your customers.
Step [7] -Enhanced security and compliance: Shopify Plus offers industry-leading security features, including Level 1 PCI compliance, SSL encryption, and automatic backups, to help protect your customers’ data and ensure secure transactions.
Step [8] -Automation and workflows: With Shopify Flow, you can automate repetitive tasks and create customized workflows to streamline your business operations. This includes automating order processing, inventory management, customer segmentation, and marketing campaigns.
Step [9] -Enterprise-level analytics: Shopify Plus provides access to advanced analytics and reporting tools to help you track key performance metrics, identify trends, and make data-driven decisions to optimize your business strategy.
Step [10] -Launchpad (Promotional): Shopify Plus includes Launchpad, a tool that allows you to schedule and automate product launches, flash sales, and promotional campaigns. This helps you efficiently manage large-scale events and maximize revenue opportunities.
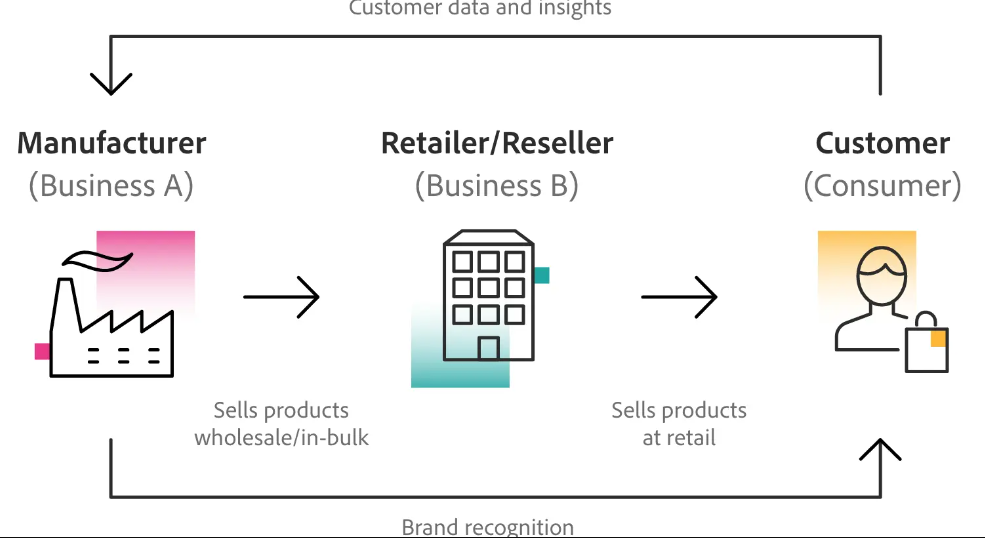
B2B2C describes business relationships in which two companies partner to offer services to consumers.
The First B in B2B2C
This is the first business to get into the whole chain of businesses, and they hope to acquire a bulk of customers. Instead of approaching a new customer every time,
The Middle B in B2B2C:
The intermediate business could have different reasons to connect the other business with the customer. The middle B usually make money by charging a commission or share the profits from the products or services provider.
The C in B2B2C:
The End Users or Consumers, those are purchasing products or services for their use
Examples relationships between Grocery Stores and Delivery Services to offer consumers online shopping and home delivery.
online retailer who sells smartphone accessories, but instead of approaching the customer by itself, the online retailer connects and approaches some franchised-mobile phone stores, the retailer ties up with the mobile phone stores to sell their products to the customer.
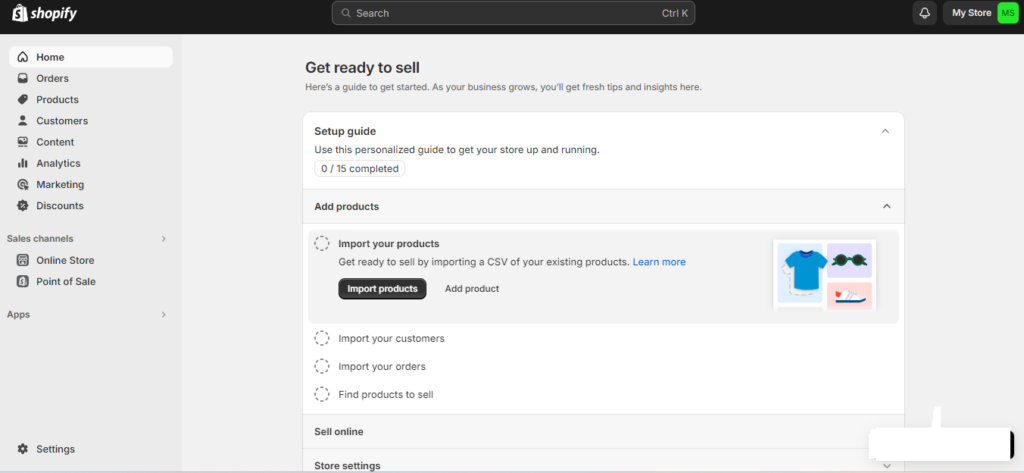
The following below steps explain Shopify Admin Panel Overview Step By Step
Step [1] – Once Login Shopify Admin Dashboard displaying as below.
Left Panel display all Menu Items
Home
Orders
Products
Customers
Content
Analytics
Marketing
Discounts
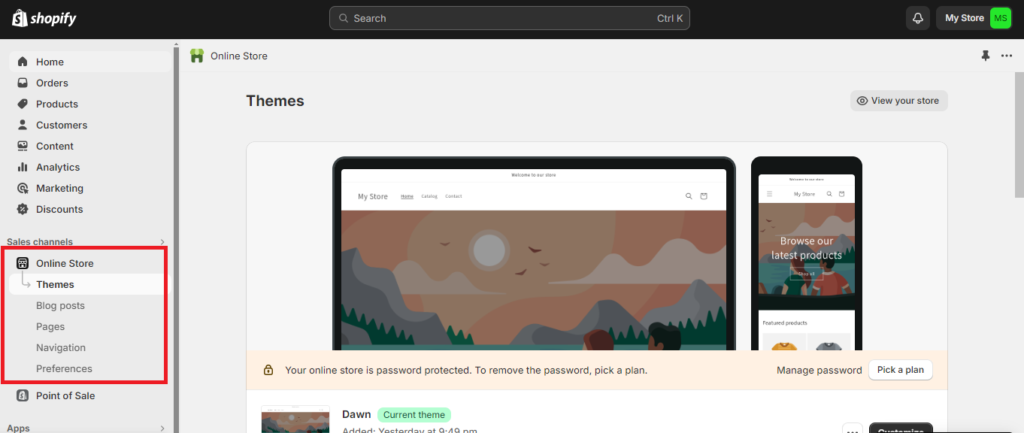
Sales Channel –> Online Store
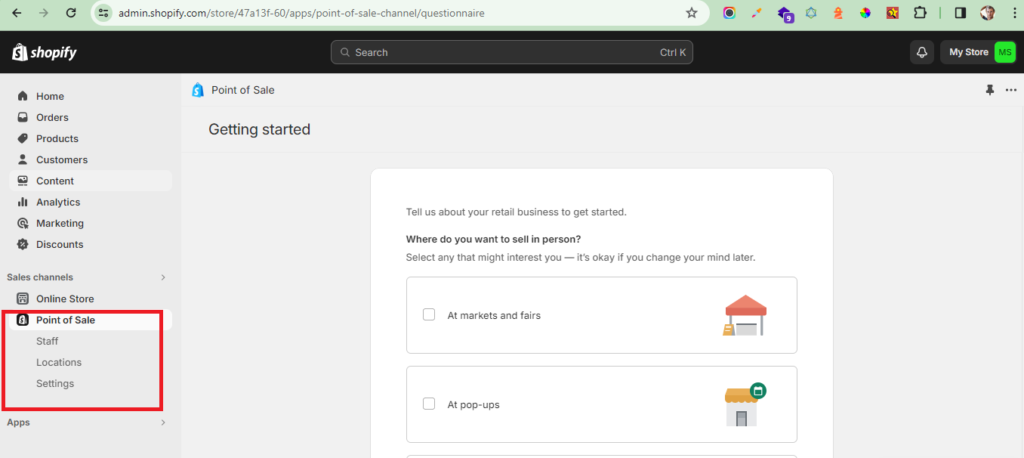
Sales Channel –> Point of Sale
Apps
Settings
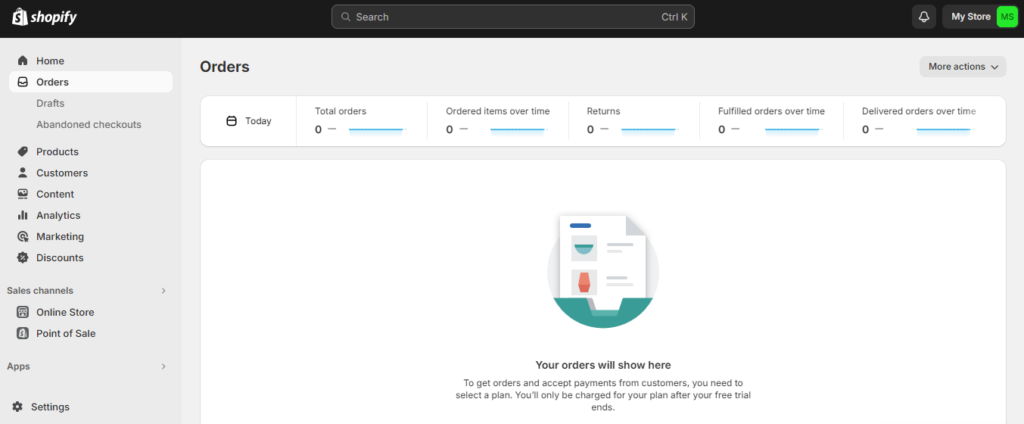
Step [2] – Click on Left Panel Orders
Orders:: Display listing of all Orders Listing
Drafts:: Display listing of all Draft Orders Listing
Abandoned Checkouts:: Display Those customers whom added products in Cart & trying to checkout but they did not succeed payment process for their added shopping cart products
Step [3] – Click on Left Panel Products
Collection:: Display list of all Products (Physical Products, Digital Products(MP3, Video etc.), Service Products(Movie Tickets, Online Coaching, Events Registration)
Inventory:: When you enable inventory tracking on your products, you can view and adjust their inventory counts here.
Purchase Orders::Track and receive inventory ordered from suppliers.
Transfers:: To create a transfer you’ll need more than one location, Move and track inventory between your business locations
Gift Cards:: Supports all Gift Cards type products (Physical, Virtual, [Virtual + Physical] )
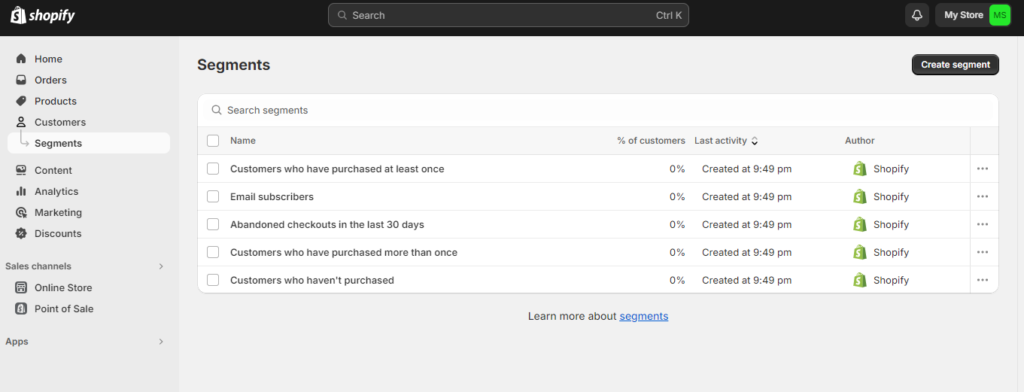
Step [4] – Click on Left Panel Customers
Manage customer details, see customer order history, and group customers into segments.
Segmentation applied on the bases of
Customer’s address
Customer’s Order History
Customer’s Shopping Cart Content
Customer’s Age
Customer’s Gender
Step [5] – Click on Left Panel Content
Metaobjects:: Metaobjects allow you to group fields and connect them to different parts of your store. Use them to create custom content or data structures.
Files:: Upload and manage your files & can be images, videos, documents, and more.
Step [6] – Click on Left Panel Customers
Display Sales Details as Total Sales, Sales by Channel, Average Orders etc.
Reports:: Display Sales, Customers, Cart, Gross Profits etc.
Live View:: Display live store view as graphics view.
Step [7] –Marketing:: Display Marketing related things
Campaigns:: Display Campaigns listing
Automations:: Marketing automations are set up once and run for as long as you want.
Step [8] –Discounts::
Create discount codes and automatic discounts that apply at checkout. You can also use discounts with compare at prices.
Step [9] – Sales channels :: having Two Parts
[a] Online Store
[b] Point of Sale
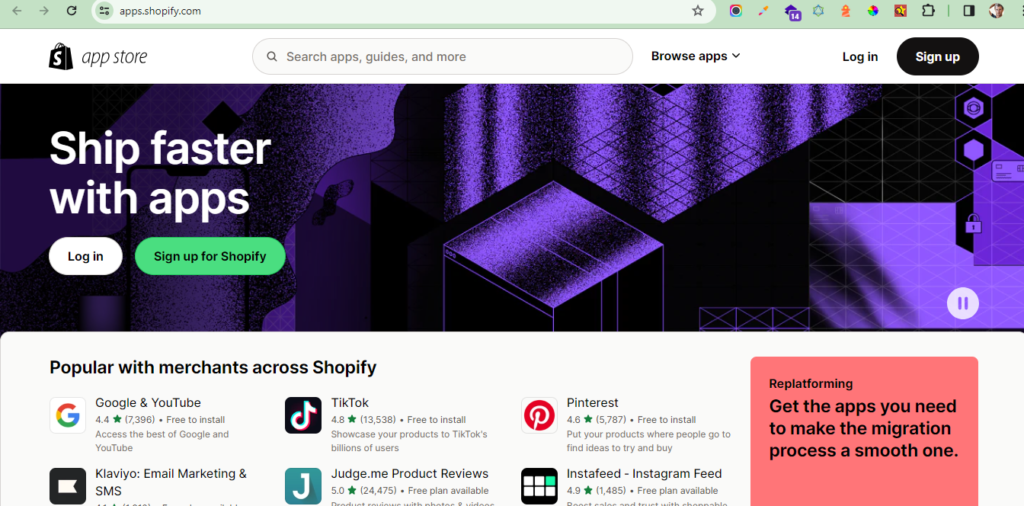
Step [10] – Apps::
Once you need to Install third party plugins click on Apps & search your desired plugins as per your Business Need.
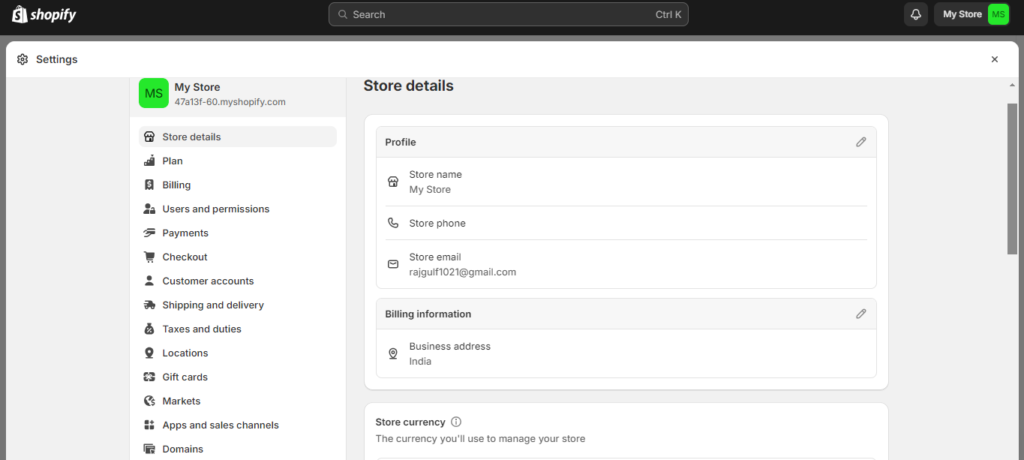
Step [11] – Settings::
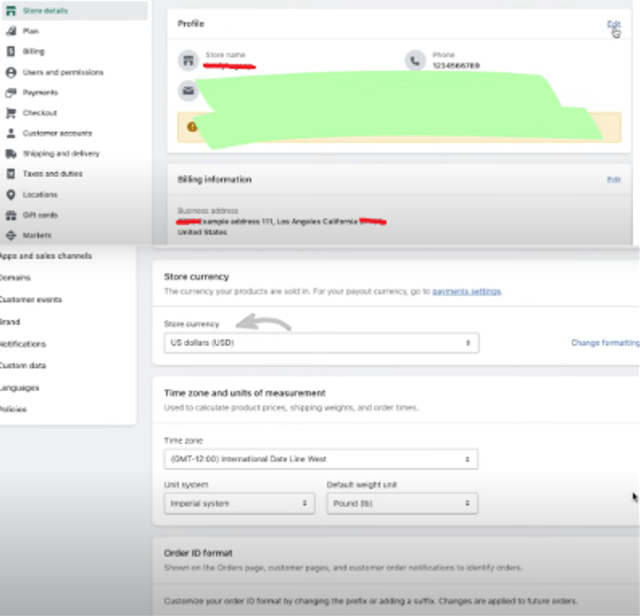
By Settings page, you can manage your Shopify subscription plan, store type, and store status.
On this page Update your plan Change your store address Change your store type Change your store owner account email Change your store’s customer-facing email address Change the store owner’s profile
The following below steps need to follow to setup Shopify Store
[1] – Sign up For Shopify:
Browse Shopify website and sign up for an account. You’ll need to provide basic information about yourself and your store business
[2] – Set up Your Store:
Once you’ve created an account, you’ll be directed to the Shopify admin dashboard. Here, you can begin setting up your store by adding details such as your store name, address, currency, and payment gateway preferences.
[3] – Choose a Theme:
Shopify offers a variety of themes that you can use to customize the look and feel of your store. Browse through the available themes and select one that fits your brand and aesthetic preferences. You can customize the theme further to match your branding.
[4] – Add Products:
After setting up your store, you can start adding products. In the Shopify admin dashboard, navigate to the “Products” section and click on “Add product” to add your products. You can add product details such as title, description, price, images, and variants.
[5] – Set up Payments:
Shopify supports various payment gateways, including Shopify Payments, PayPal, Stripe, and others. Set up your preferred payment gateway to accept payments from customers.
[6] – Configure Tax Settings
Set up your shipping settings, including shipping rates, shipping zones, and carrier integrations if applicable. You can specify shipping rates based on factors like weight, price, or location.
[7] – Configure Shipping Settings:
Create and customize your store policies, including terms of service, privacy policy, and refund policy. These policies help establish trust with your customers and outline expectations for transactions.
[8] – Create Important Static Pages / Blogs for Your Store:
Create Static page as Privacy / Policy, Terms & Conditions, Shipping Policy, Payment Policy & Blog as per your requirement
[9] – Install Shopify Third Party Plugins as Per Needed::
Install Shopify third Party Plugins as per your Business store requirement
Create and customize your store policies, including terms of service, privacy policy, and refund policy. These policies help establish trust with your customers and outline expectations for transactions.
[10] – Launch Your Store:
Once you’ve completed the setup process and customized your store to your liking, you’re ready to launch. Review your store settings, double-check everything is in place, and then click on the “Launch” button to make your store live.
[11] – Market Your Store:
After launching your store, focus on marketing and promoting your products to attract customers. Utilize various marketing channels such as social media, email marketing, content marketing, and search engine optimization (SEO) to drive traffic to your store.
[12] – Manage Your Store:
Regularly monitor your store’s performance, analyze sales data, and make adjustments as needed to optimize your store for success. Continuously engage with your customers, address their inquiries and feedback, and strive to provide a positive shopping experience.