The Total number of Database Tables in Magento 2.4 is 399
Magento 2.4 released on July 28, 2020
Continue reading “How Many Tables in Magento 2.4”Magento 2.4 = 399 Tables

AI, Ecommerce, Technology & Management – Learn. Build. Solve
The Total number of Database Tables in Magento 2.4 is 399
Magento 2.4 released on July 28, 2020
Continue reading “How Many Tables in Magento 2.4”Magento 2.4 = 399 Tables
The Total number of Database Tables in Magento 2.4.3 is 411
Magento 2.4.3 released on August 10, 2021
Continue reading “How Many Tables in Magento 2.4.3”Magento 2.4.3 = 411 Tables
The Total number of Database Tables in Magento 2.4.3-P1 is 411
Magento 2.4.3-P1 released on October 12, 2021
Continue reading “How Many Tables in Magento 2.4.3-P1”Magento 2.4.3-P1 = 411 Tables

The following below admin setting required to enable to merge JavaScript & CSS in Magento 2.x
Step [1] – Go To STORES > Configuration, redirects on configuration.
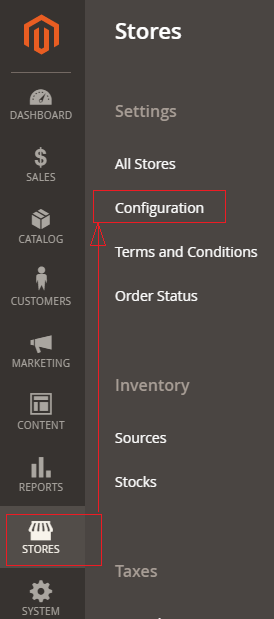
Step [2] – on the Configuration panel Click on Advance > Developer
Right Panel Tab display as below

Click on Right Panel tab Java Script Settings & CSS Settings
Step [2.1] – Java Script Settings Panel
Once expanded Java Script Settings Tab
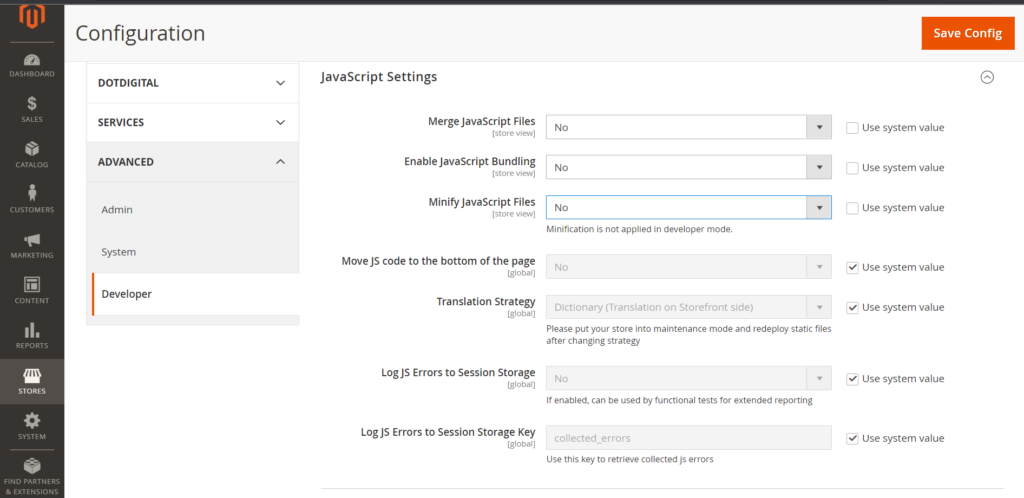
Step [2.1.1] – Once expanded Java Script Settings Panel
Merge JavaScript Files need to select Yes
Enable JavaScript Bundling need to select Yes
Minify JavaScript Files need to select Yes
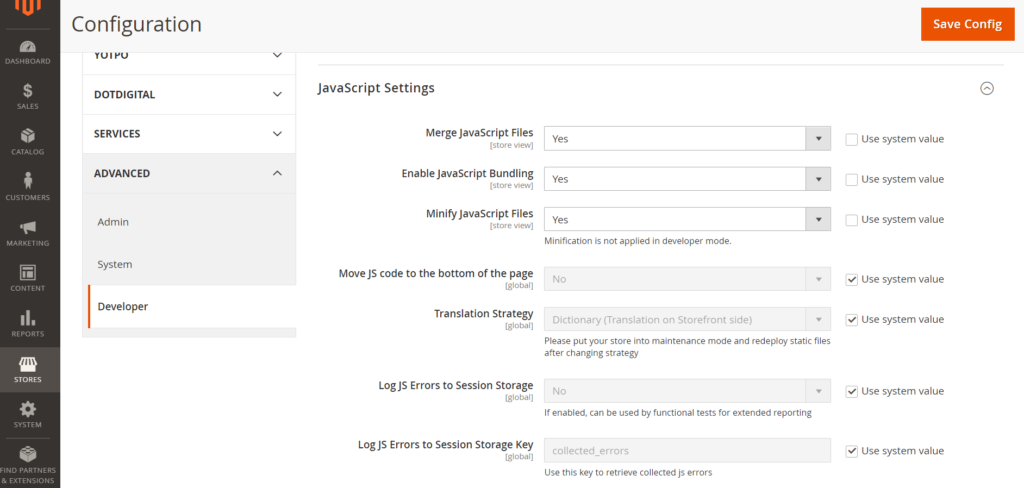
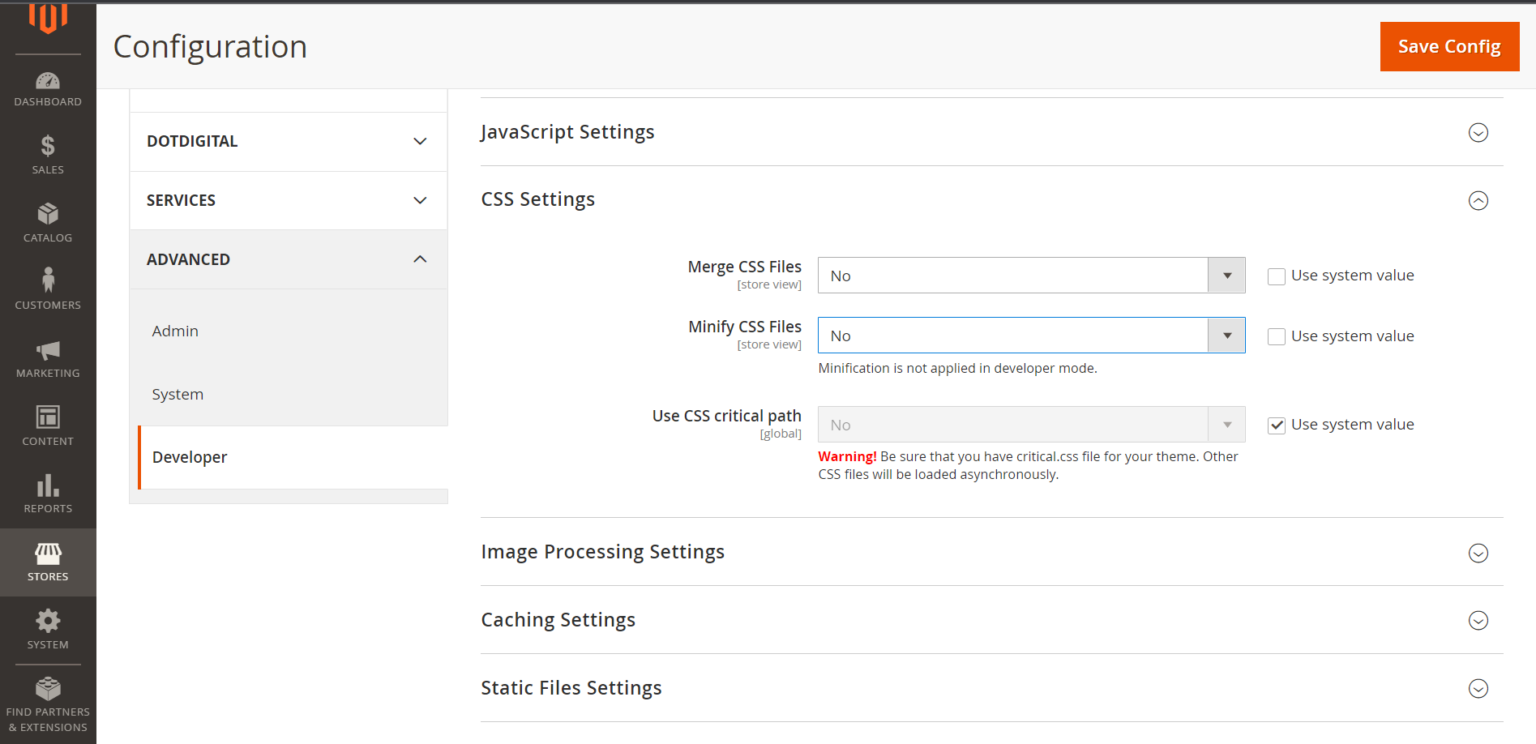
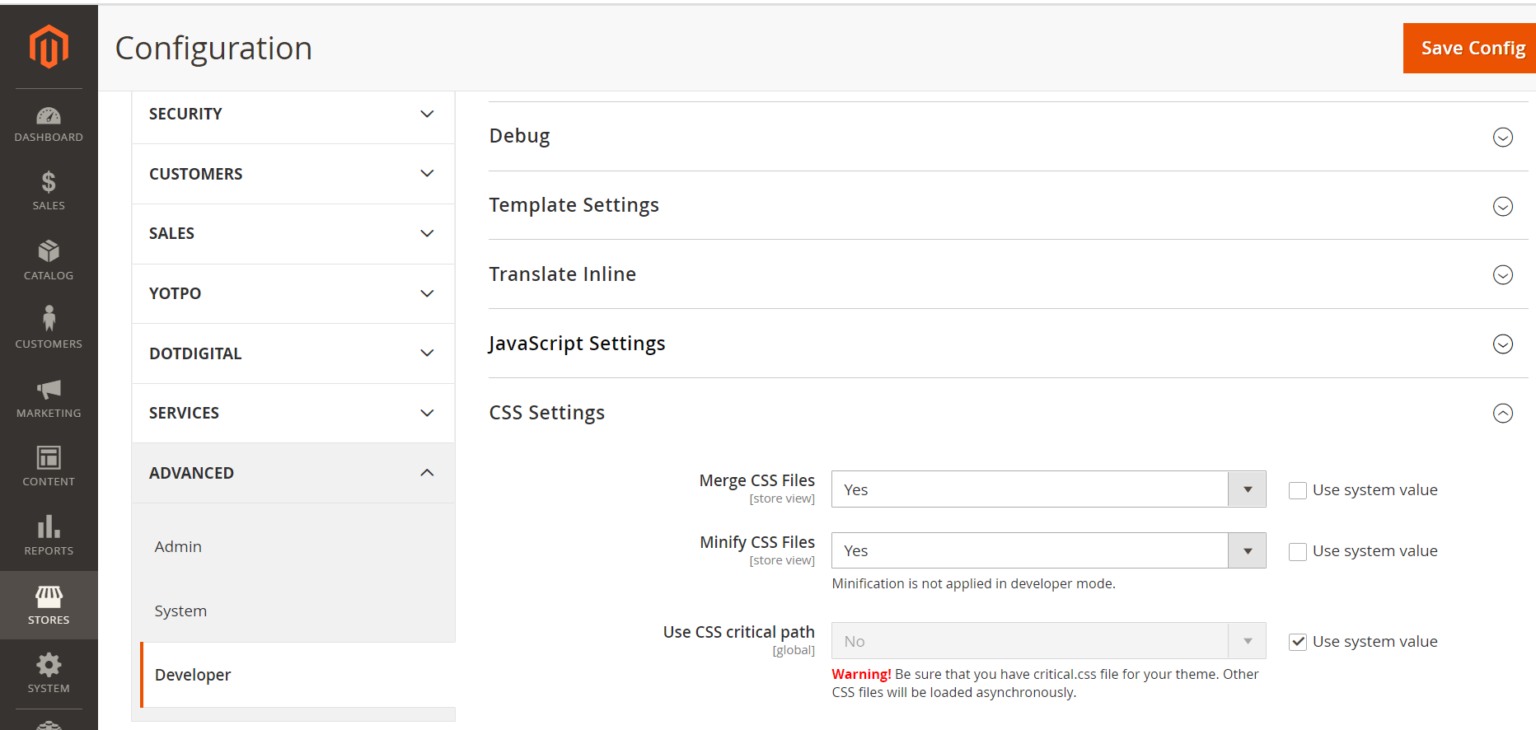
Step [2.2] – CSS Settings Panel
Once expanded CSS Script Settings Tab
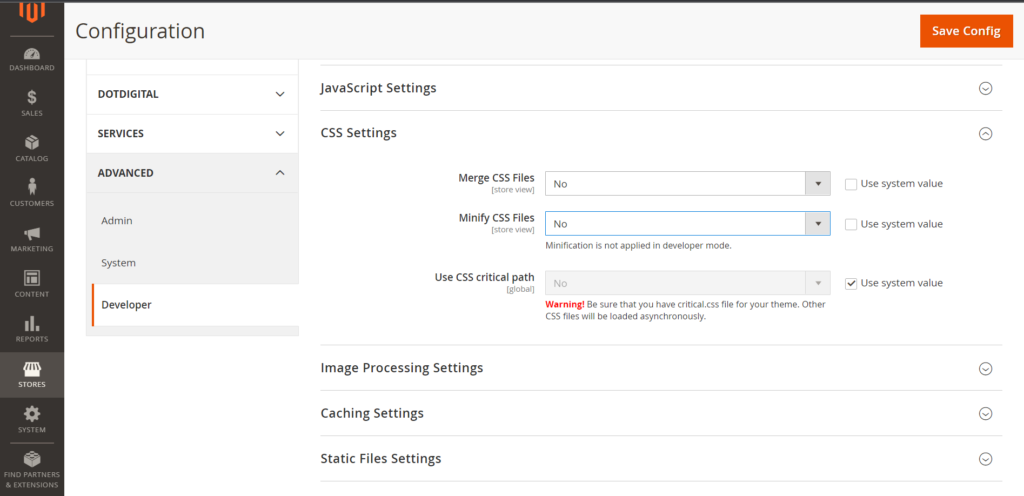
Step [2.2.1] – Once expanded CSS Script Settings Panel
Merge CSS Files need to select Yes
Minify CSS Files need to select Yes

Step [3] – Finally, Click on Save Config Button & run CLI command Flush & Index command
php bin/magento indexer:reindex
php bin/magento cache:clean
php bin/magento cache:flush
Step [4] – Finally, View Source Home any page, you can see JS & CSS has been done Merge & Minify

The following below admin setting required to enable to minify JavaScript & CSS in Magento 2.x
Step [1] – Go To STORES > Configuration, redirects on configuration.
Step [2] – on the Configuration panel Click on Advance > Developer
Right Panel Tab display as below

Click on Right Panel tab Java Script Settings & CSS Settings
Step [2.1] – Java Script Settings Panel
Once expanded Java Script Settings Tab

Step [2.1.1] – Once expanded Java Script Settings Panel
Merge JavaScript Files need to select Yes
Enable JavaScript Bundling need to select Yes
Minify JavaScript Files need to select Yes

Step [2.2] – CSS Settings Panel
Once expanded CSS Script Settings Tab
Step [2.2.1] – Once expanded CSS Script Settings Panel
Merge CSS Files need to select Yes
Minify CSS Files need to select Yes
Step [3] – Finally, Click on Save Config Button & run CLI command Flush & Index command
php bin/magento indexer:reindex
php bin/magento cache:clean
php bin/magento cache:flush
Step [4] – Finally, View Source Home any page, you can see JS & CSS has been done Merge & Minify

Magento 2 Debug Mode only works in Developer Mode, so Magento 2 Application must be developer mode to enable Debug Mode.
php bin/magento deploy:mode:set developerThe following below two method , we can enable Magento 2 Debug Mode.
Method [1] – Magento 2 Admin Settings To Enable Debug Mode
Method [2] – Magento 2 CLI Command To Enable Debug Mode
Let us explain one by one
Method [1] Magento 2 Admin Settings To Enable Debug Mode
The following below admin setting required to enable Debug Mode.
Step [1] – Go To STORES > Configuration, redirects on configuration.
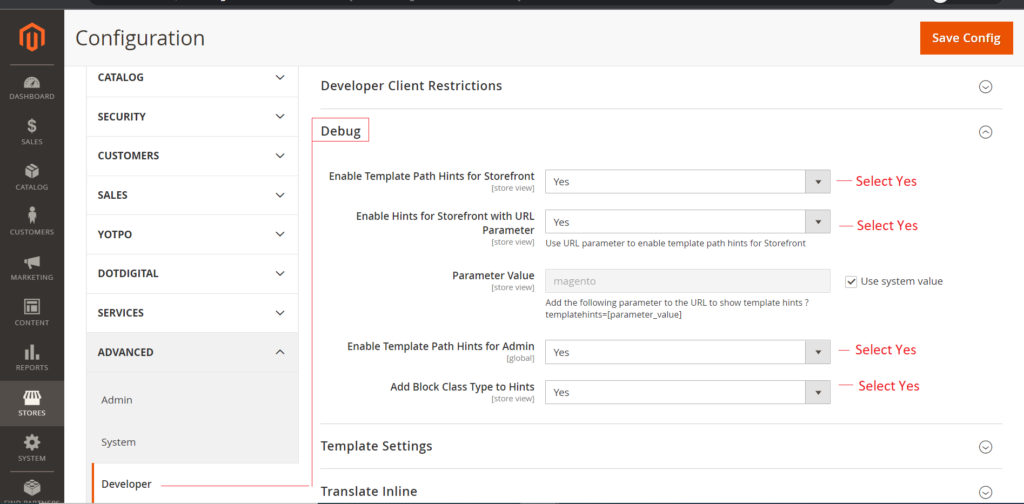
Step [2] – on the Configuration panel Click on Advance > Developer
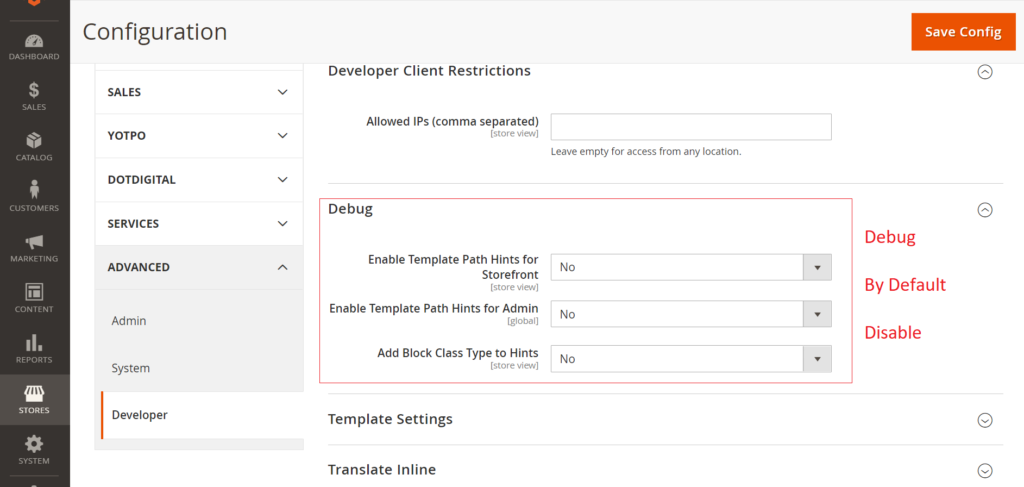
Click on Right Panel tab Debug
By default all Debug mode disable
Enable Template Path Hints for Storefront:: This is used to enable Template Path Hints for Storefront by default selected No
Enable Template Path Hints for Admin:: This is used to enable Template Path Hints for Admin by default selected No
Block Class Type to Hints:: This is used to enable Block Class Type Hints for Storefront by default selected No –
Step [3] – Once click drop down menu & select Yes for all Debug mode
Enable Template Path Hints for Storefront:: — Select Yes, once select Yes, Enable Hints for Storefront with URL auto displayed & selected Yes by default
Enable Template Path Hints for Admin:: — Select Yes
Block Class Type to Hints:: — Select Yes
Step [4] – Finally Debug mode has been enabled , run CLI command flush
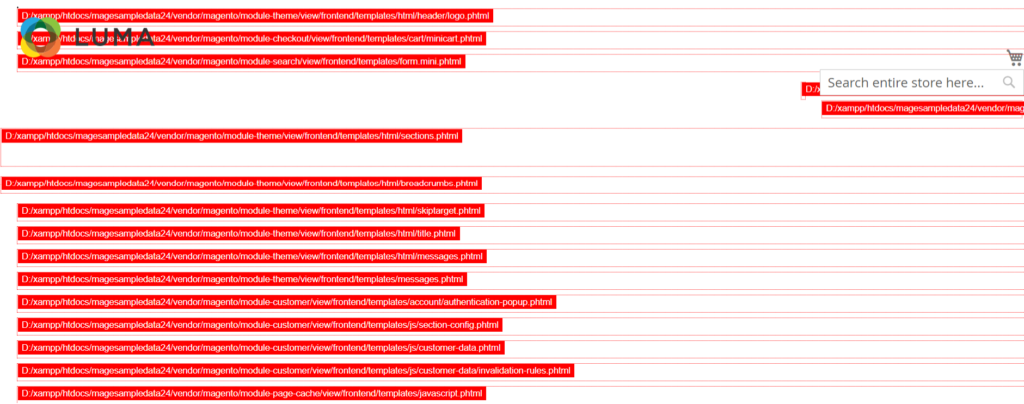
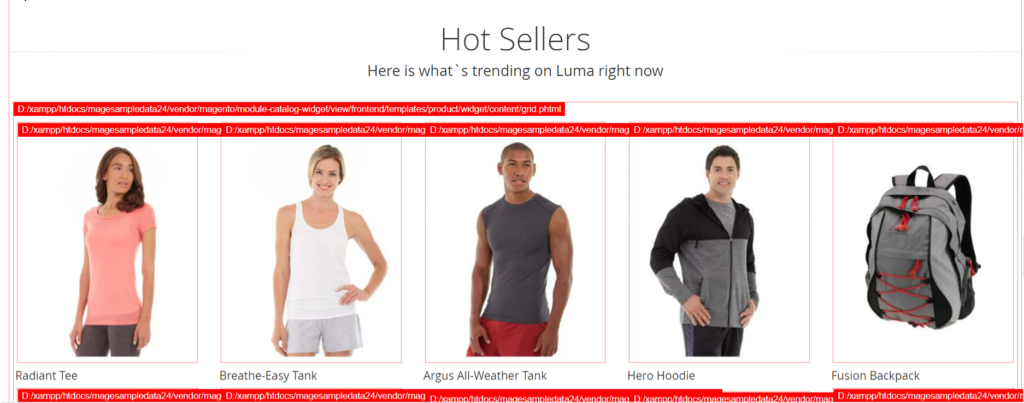
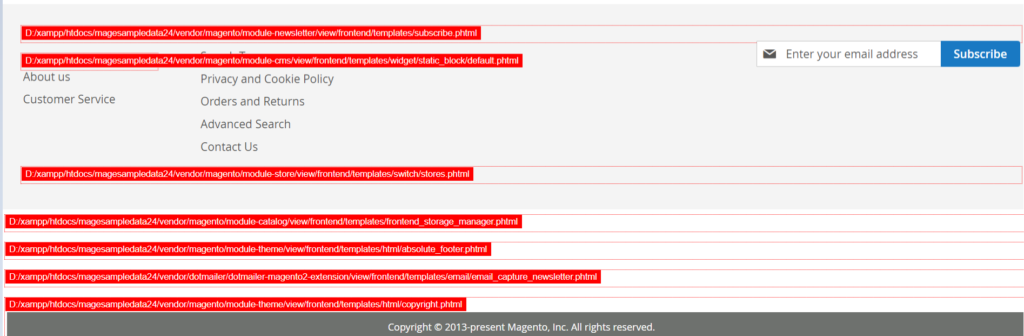
Step [5] – Go to storefront to view debug format
Method [2] – Magento 2 CLI Command To Enable Debug Mode
Run below CLI Command
To Enable Debug Mode
php bin/magento setup:config:set --enable-debug-logging=true
To Disable Debug Mode
php bin/magento setup:config:set --enable-debug-logging=false
Elasticsearch allows big store, search, and analyze huge volumes of data quickly and in near real-time and give results of search query in milliseconds. It’s able to achieve fast search responses.
Since release of Magento 2.4, Elasticsearch must be installed in Xampp to work with Magento 2.4 & Magento 2.4.x
The following below steps need to follow to install Elasticsearch in Xampp
Continue reading “How To Install Elasticsearch in Xampp”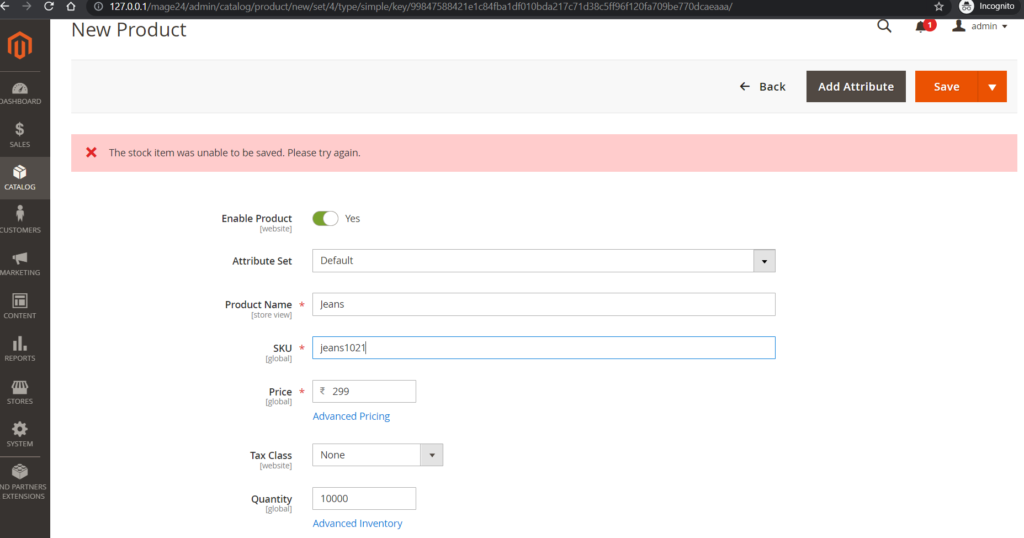
Magento 2.4.x essentially need Elasticsearch, before start Magento 2.4.x, your machine must be start Elasticsearch, once Elasticsearch start, your machine run perfectly with Magento 2.4.x
Continue reading “Magento 2.4.x Error “The stock item was unable to be saved. Please try again.””
There are following below Admin setting to do Enable or Disable Email sending in Magento 2.x
Step [1] – Go To STORES > Configuration, redirects on configuration.
Continue reading “How To Enable or Disable Email sending in Magento 2.x”