How To Install OpenSSL in Windows 10 or Above Windows Version

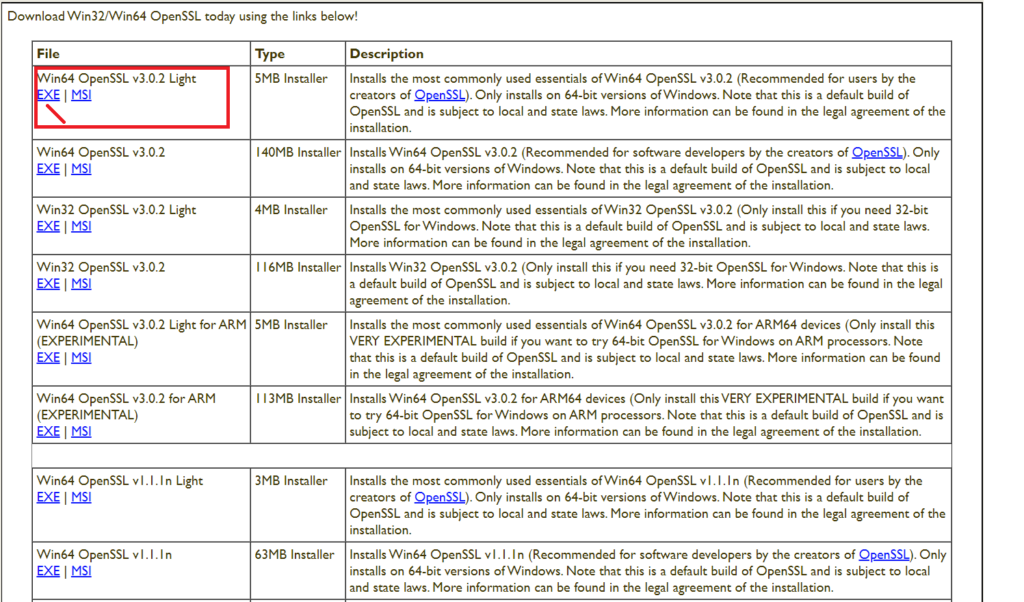
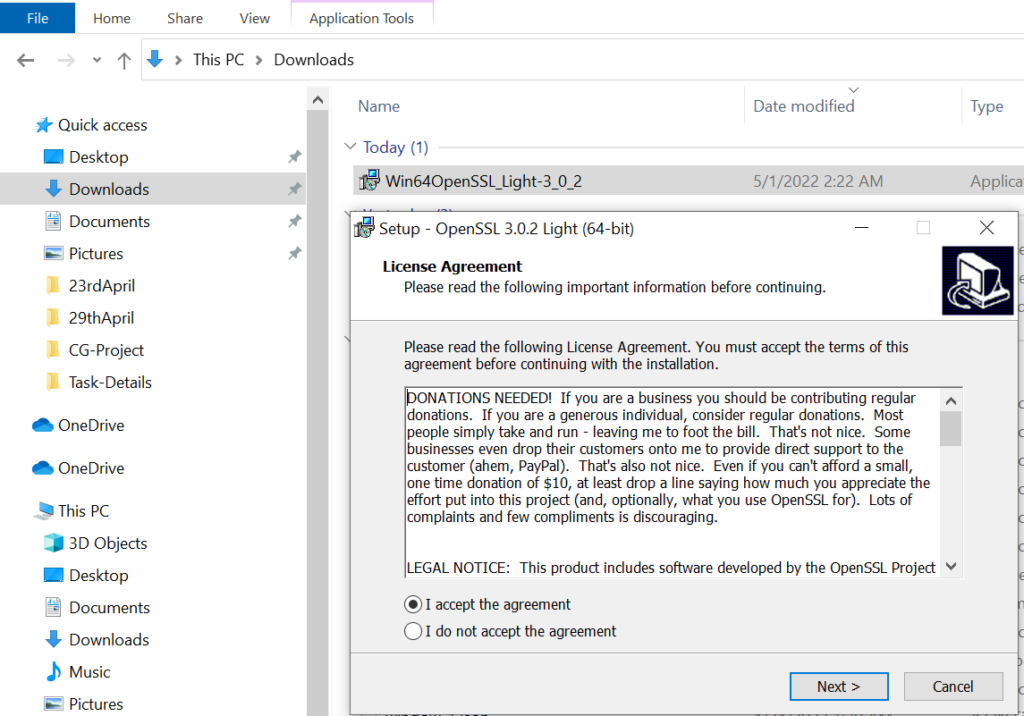
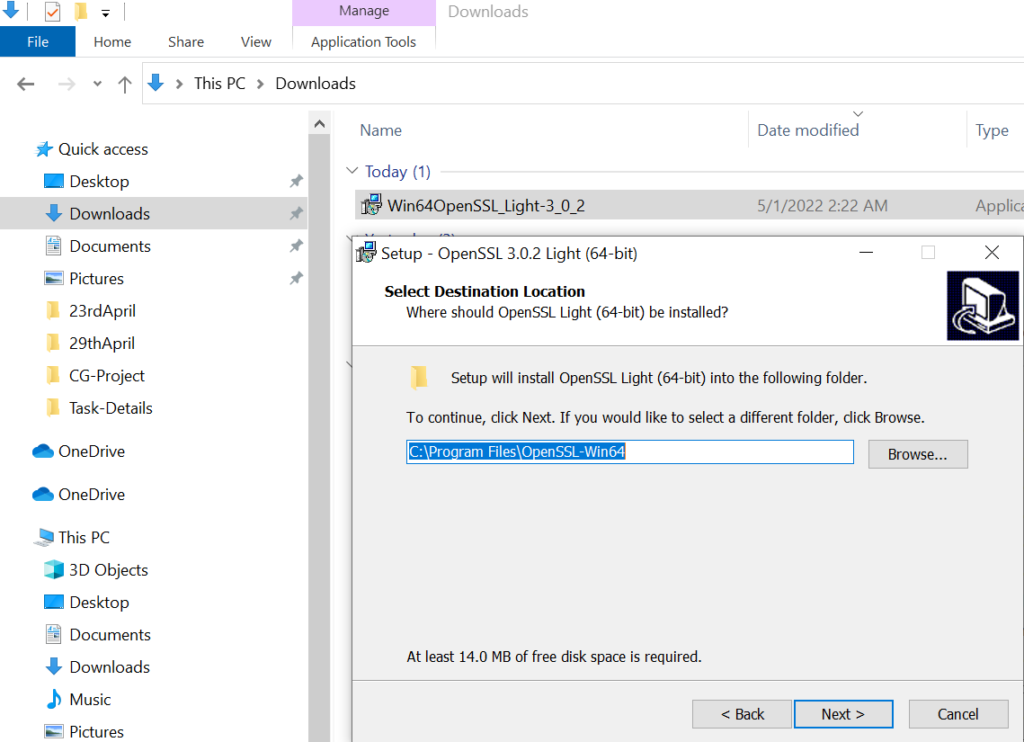
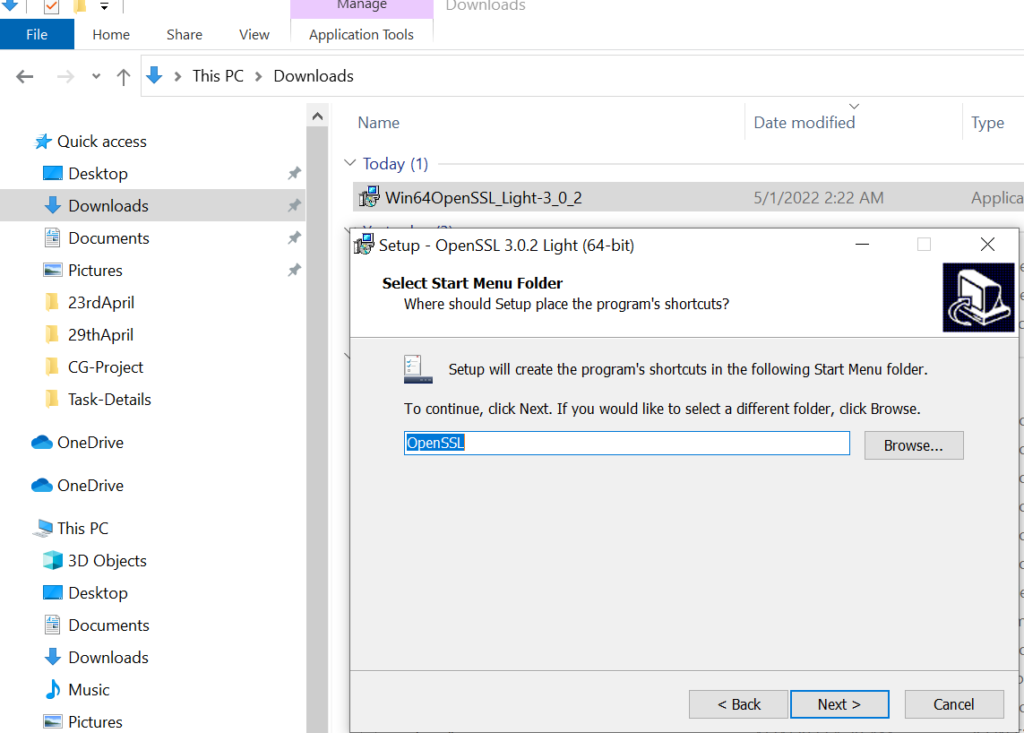
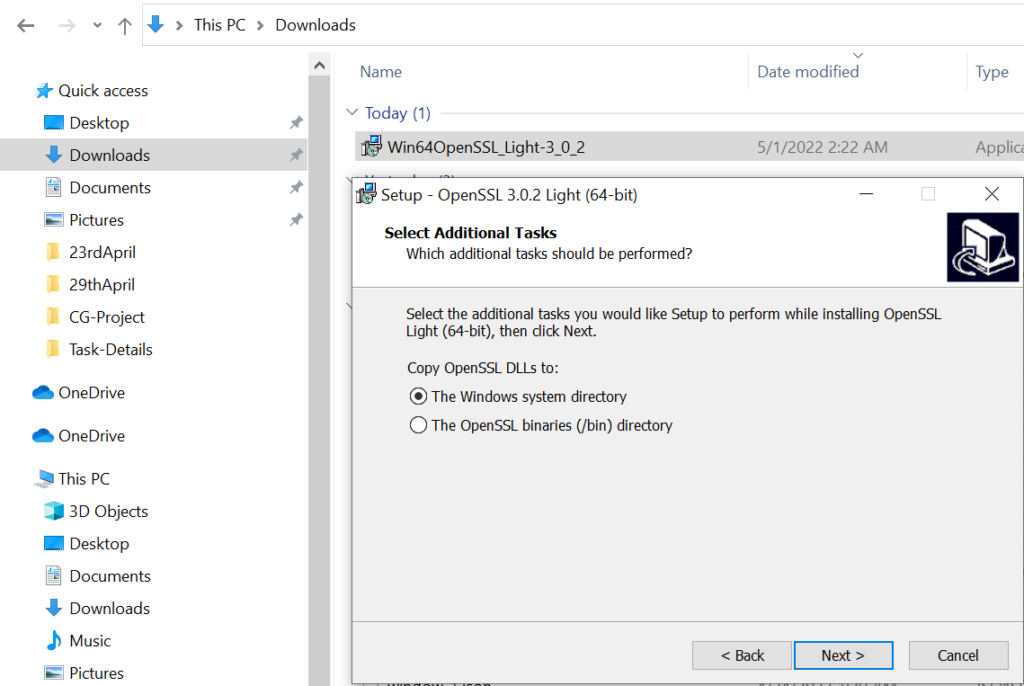
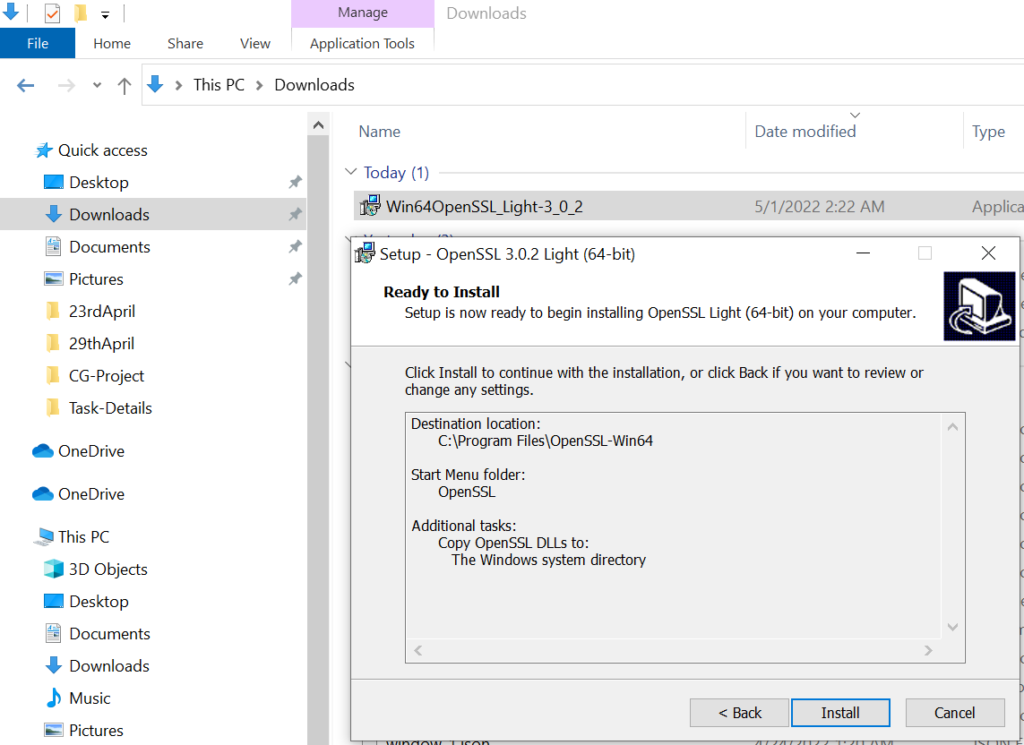
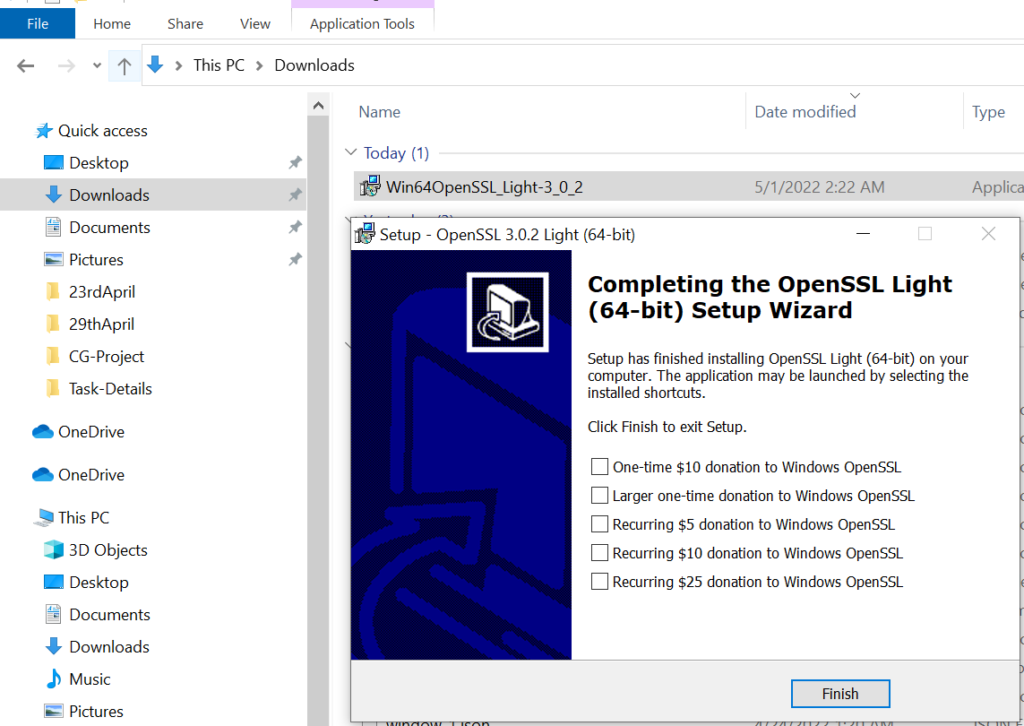
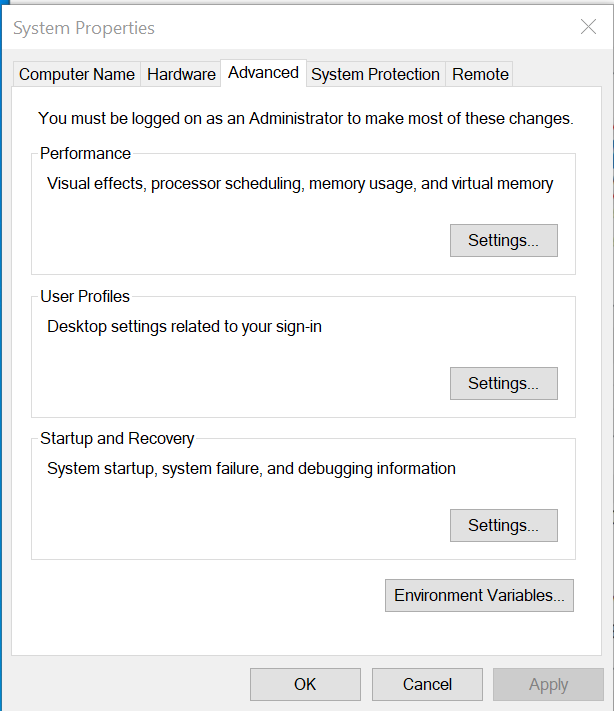
OpenSSL is an open-source command line tool which is used to generate Private Keys, create CSRs, implementation of the Secure Sockets Layer (SSL) and Transport Layer Security (TLS) protocols and identify certificate information.

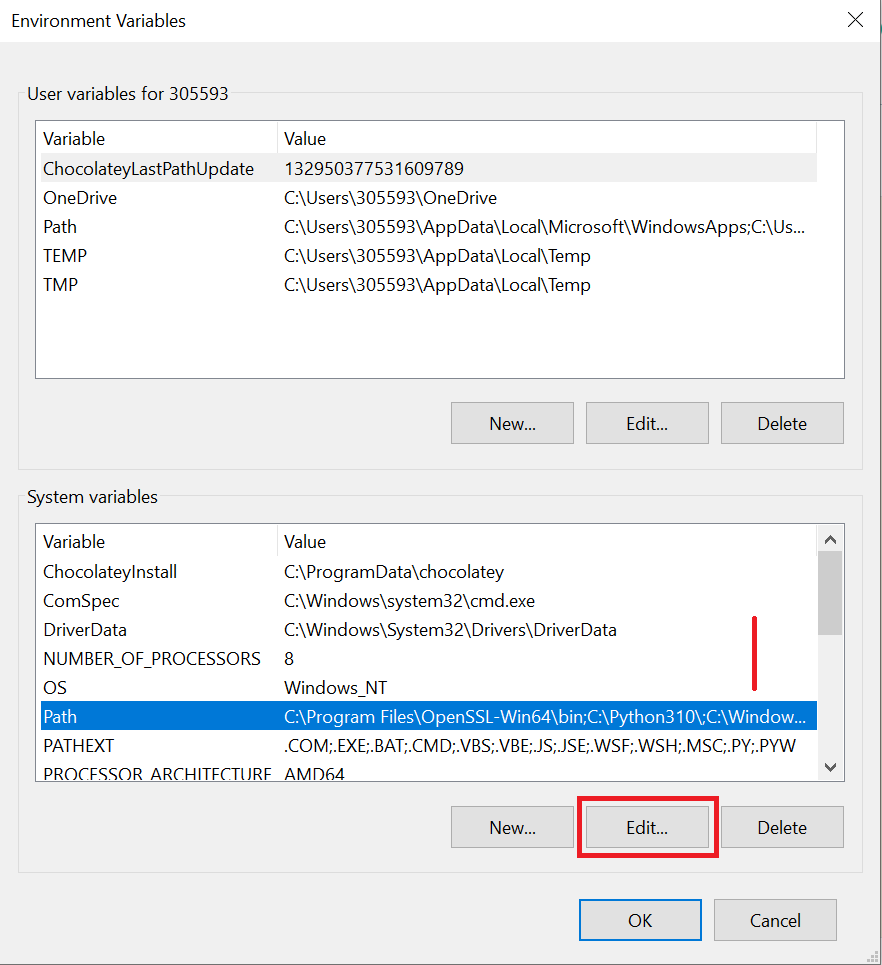
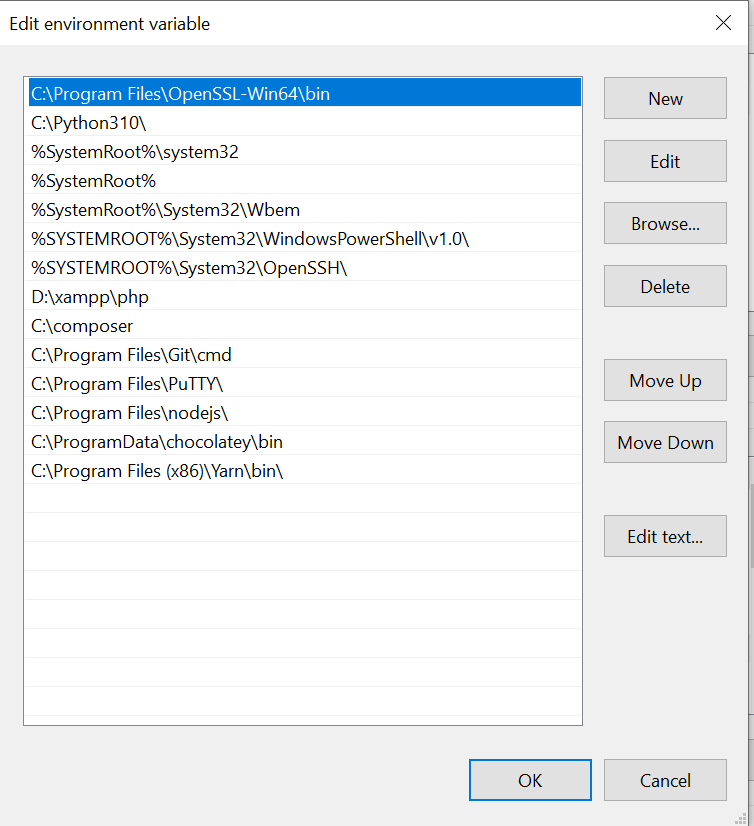
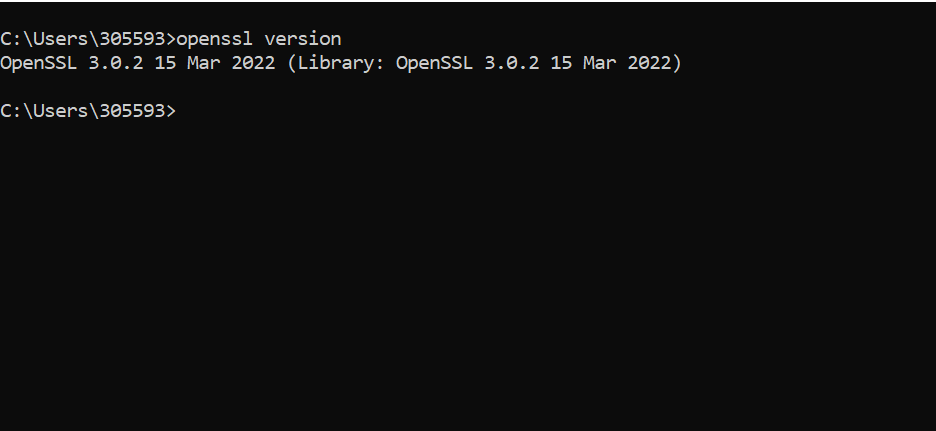
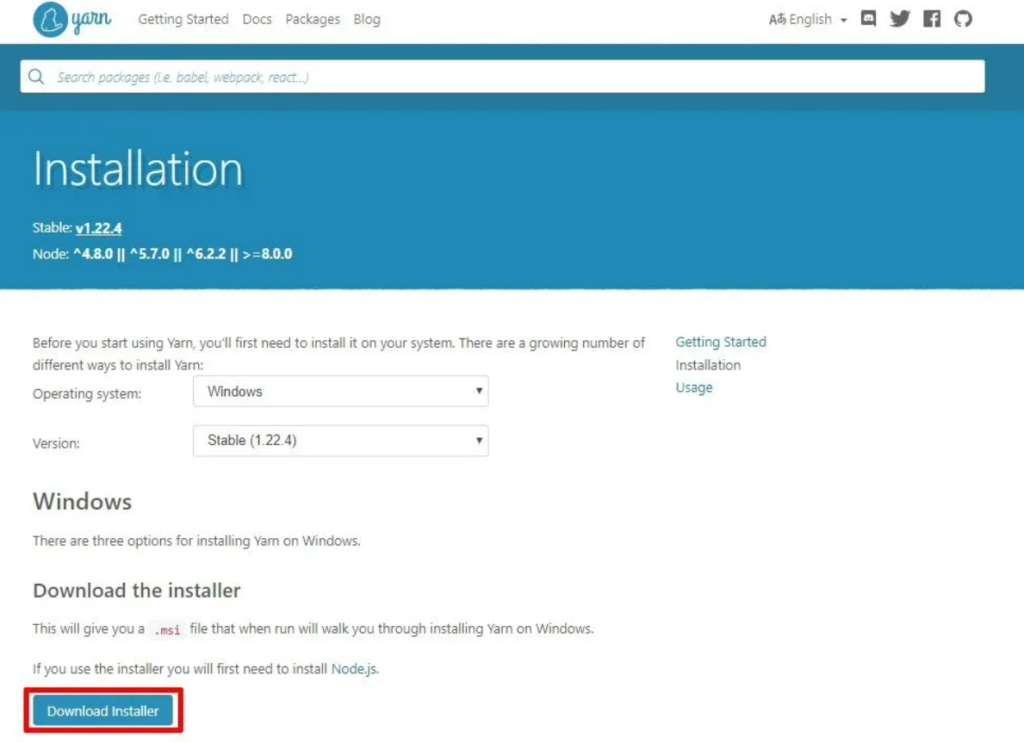
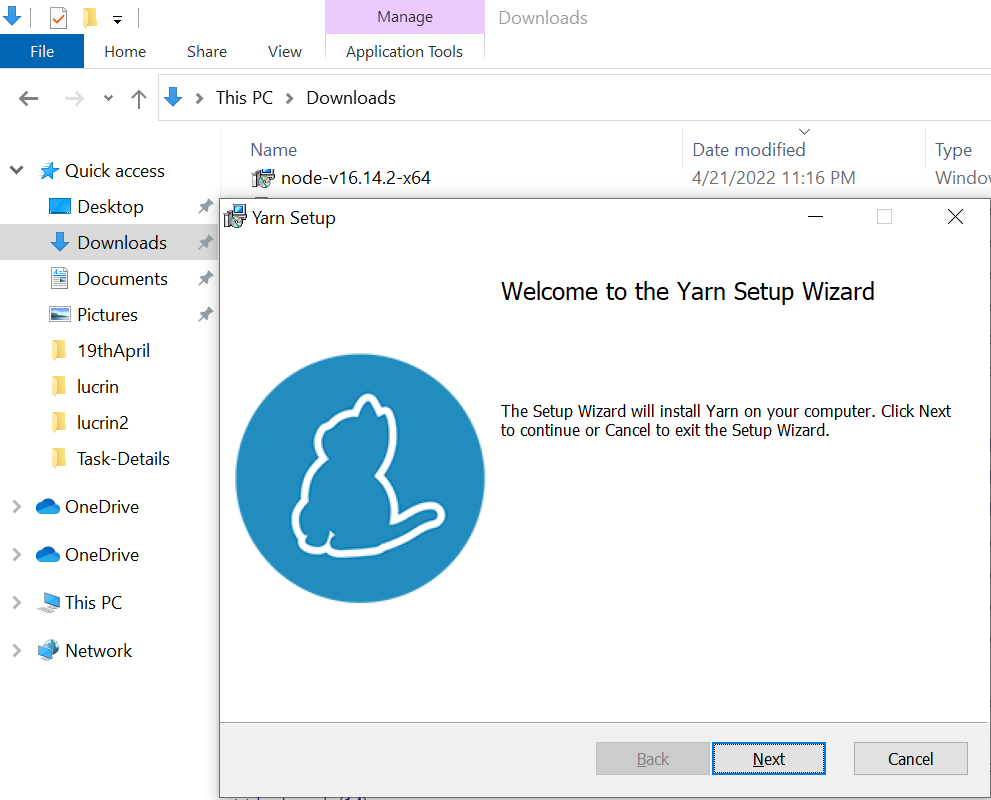
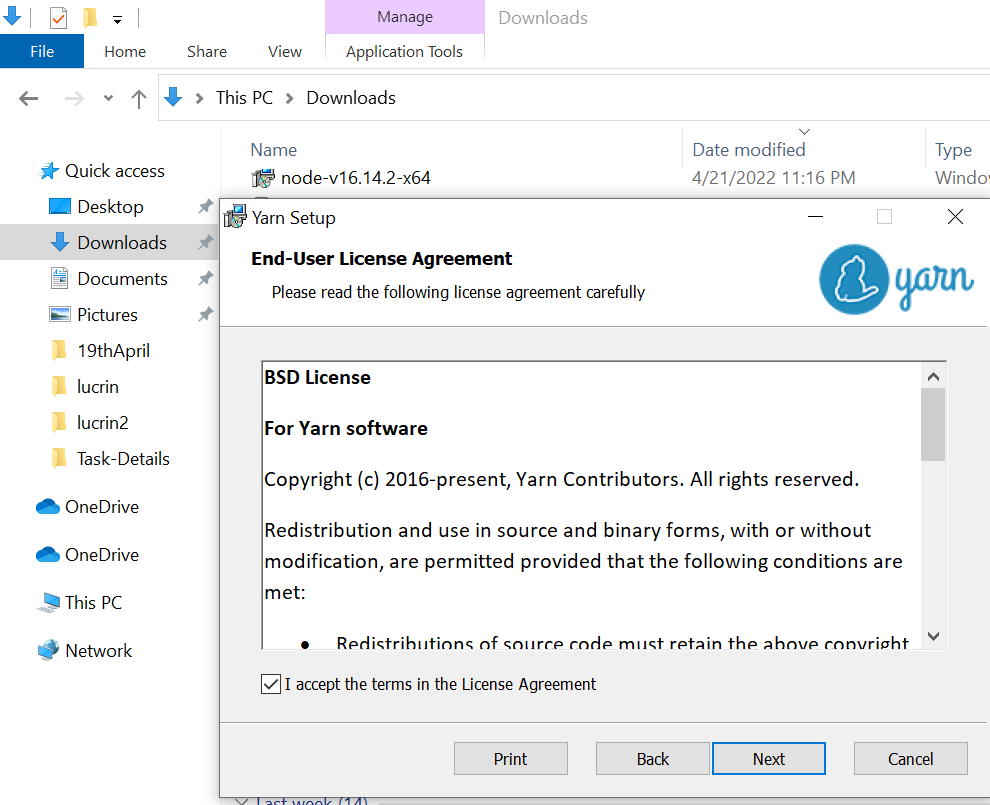
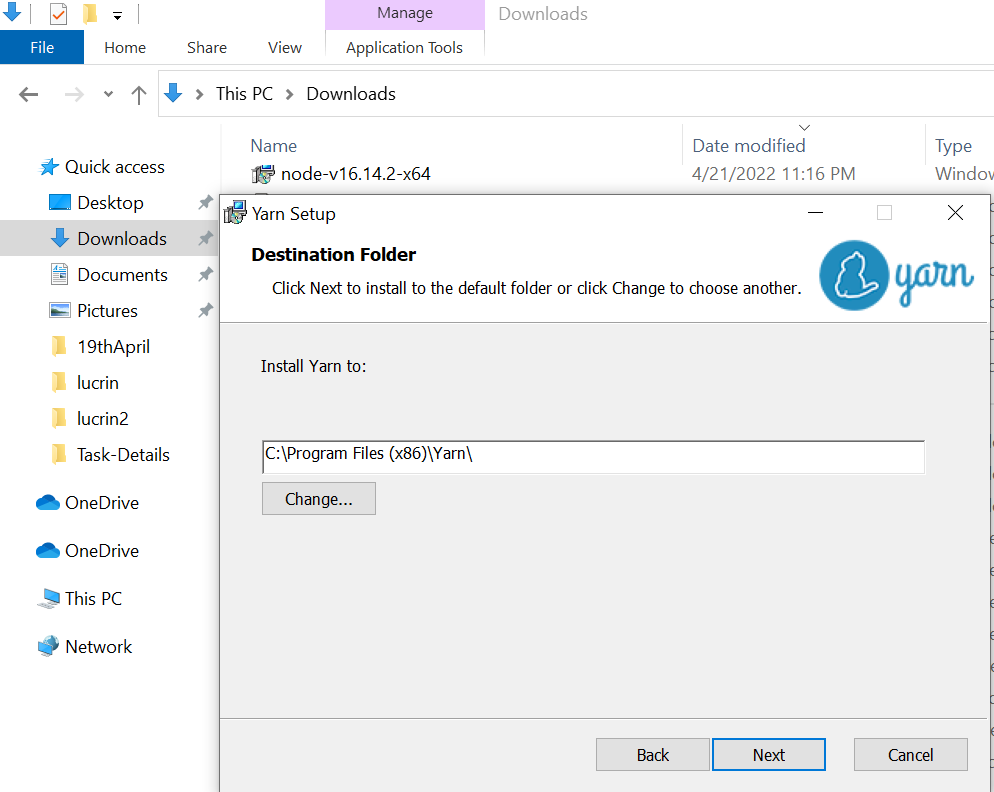
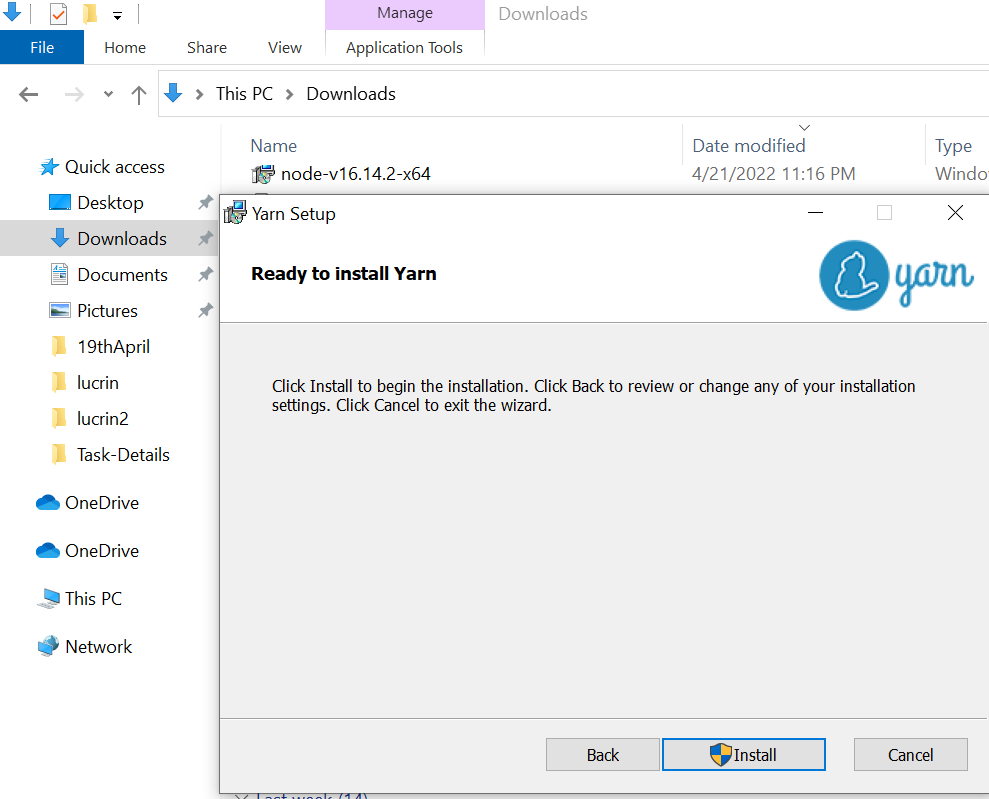
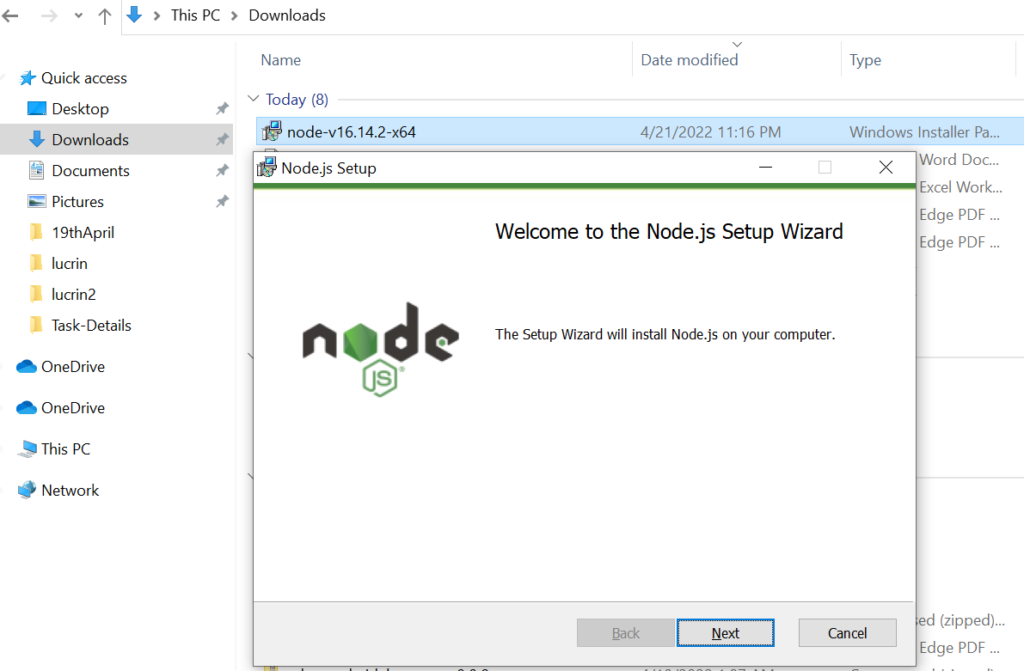
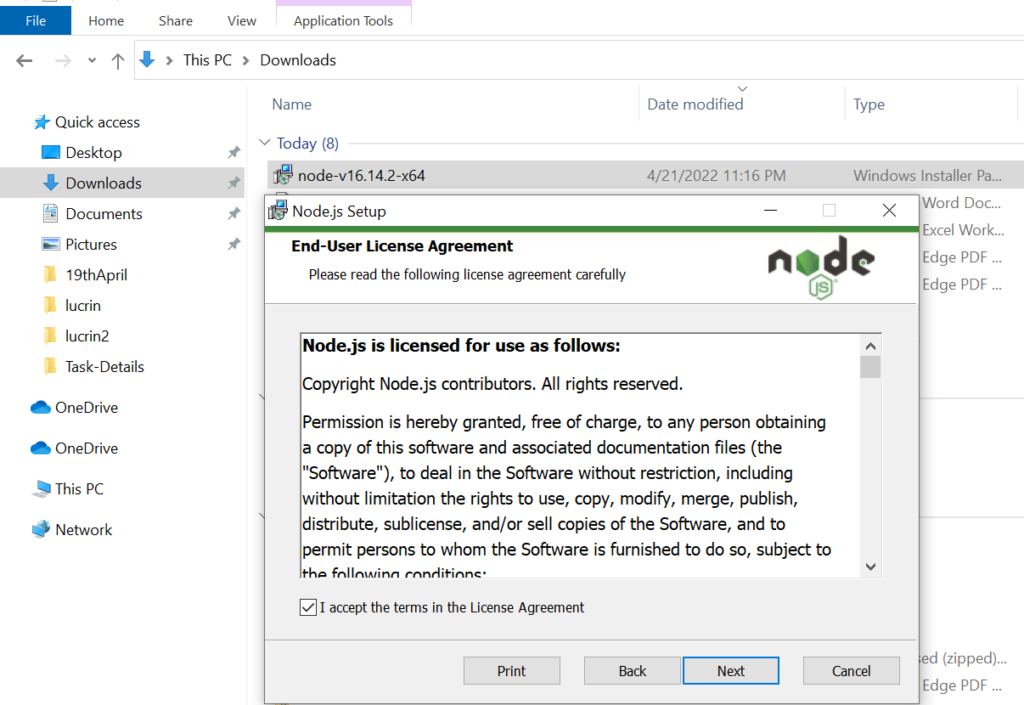
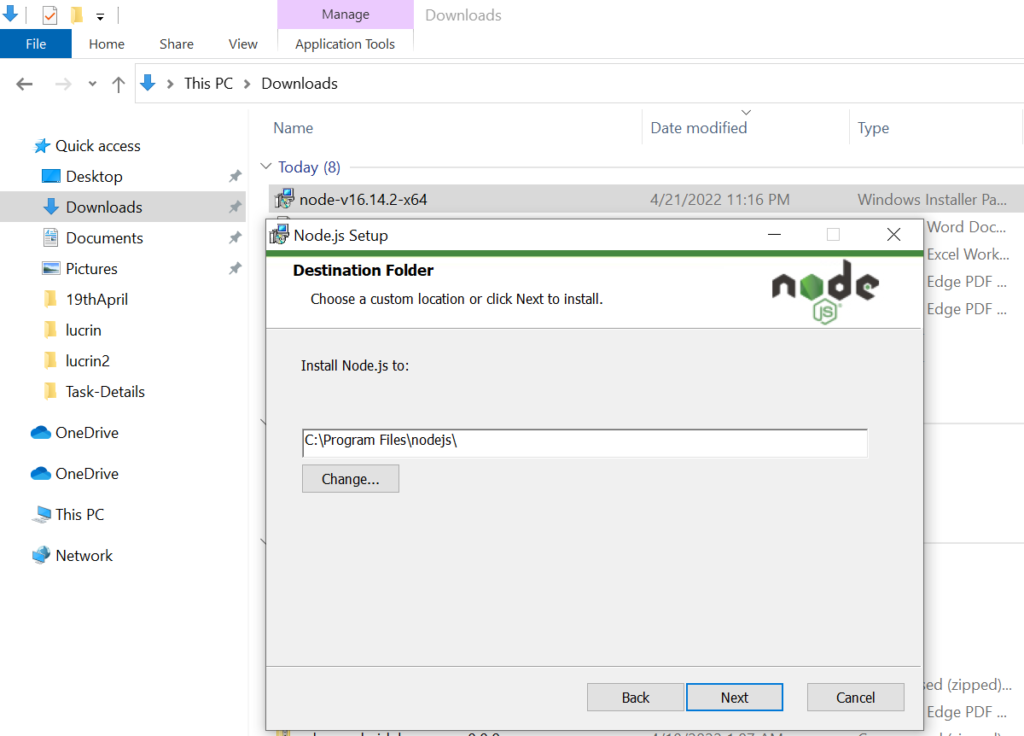
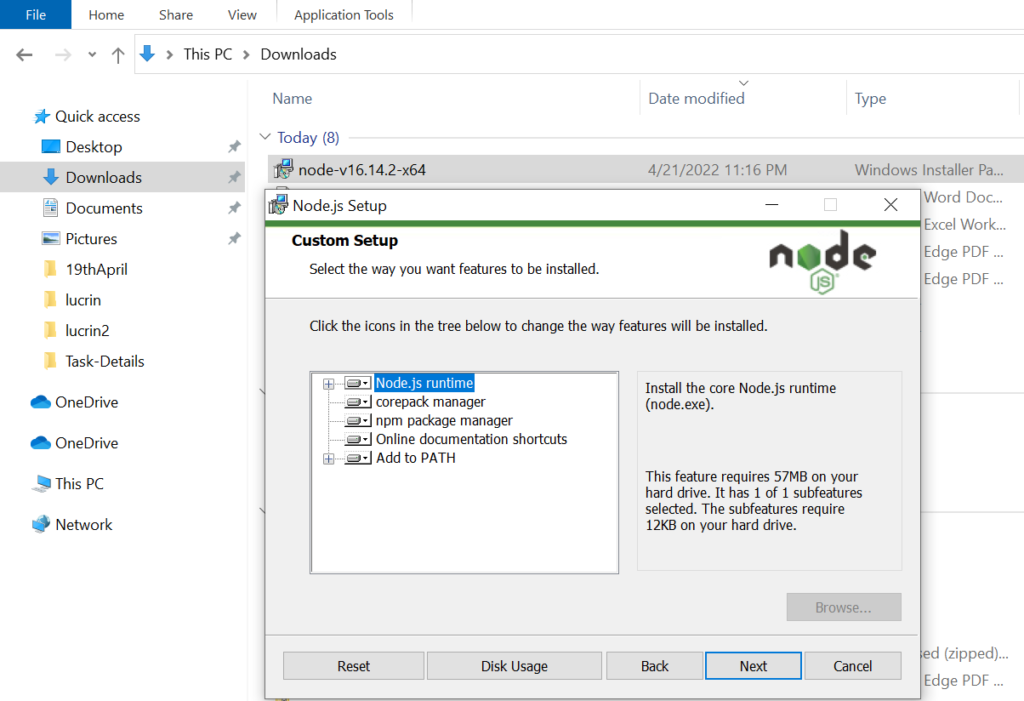
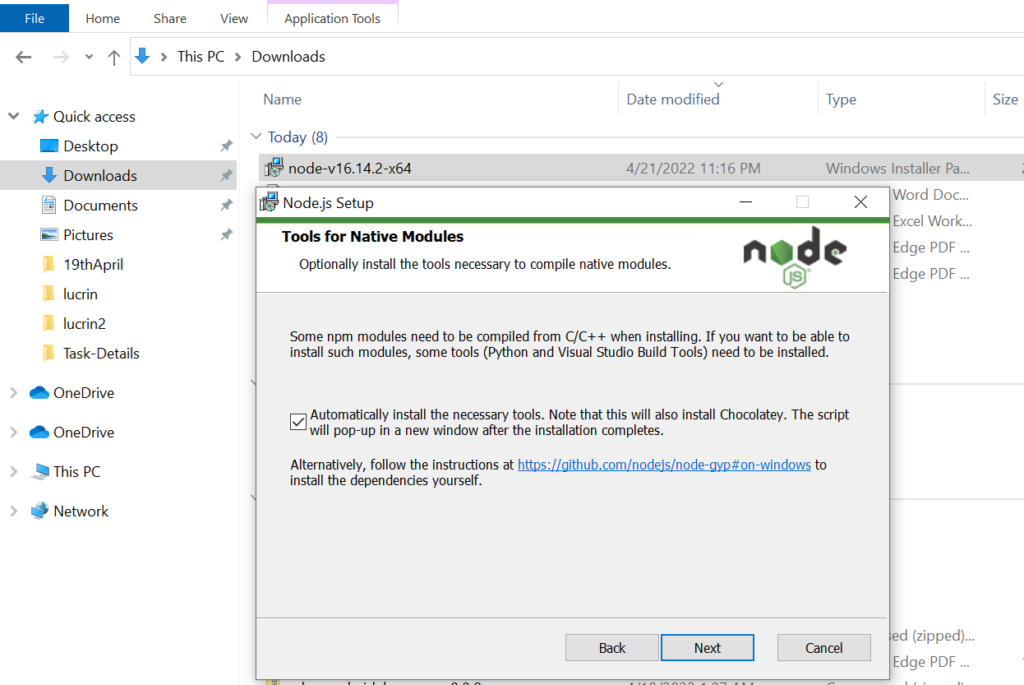
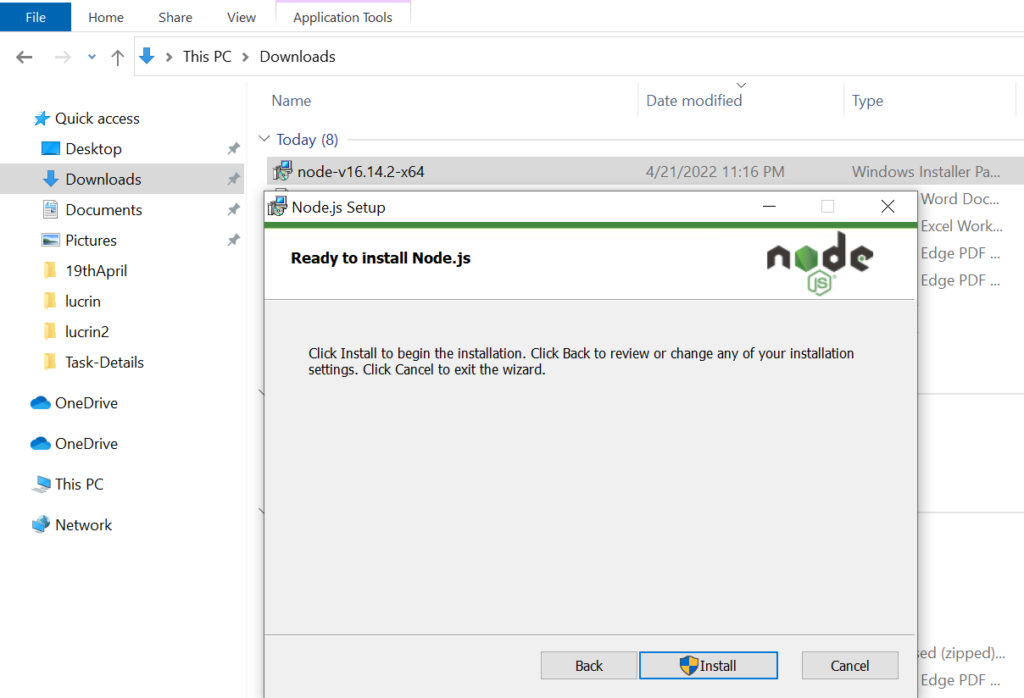
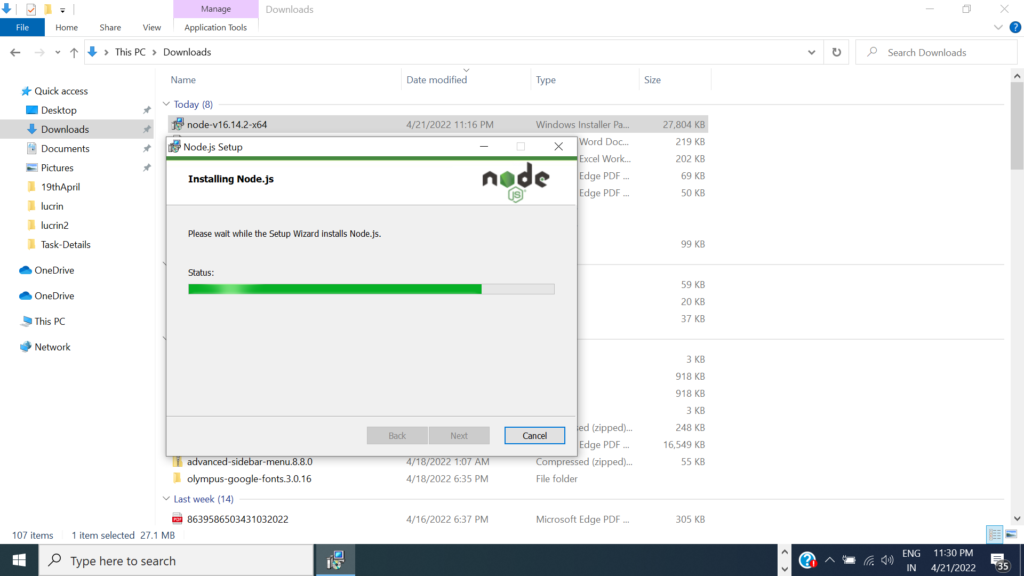
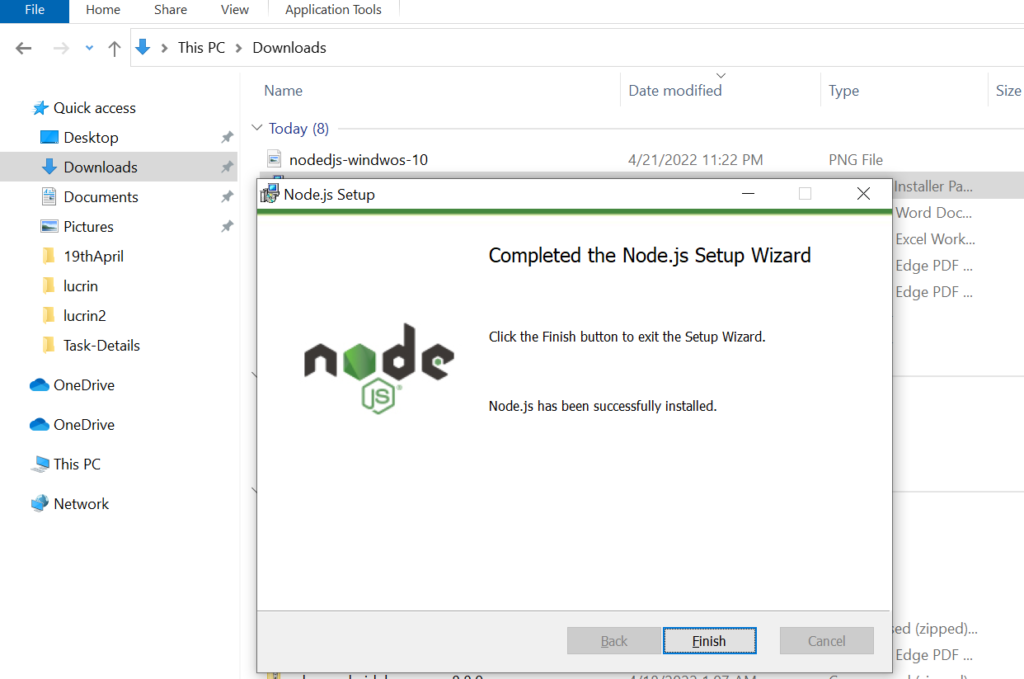
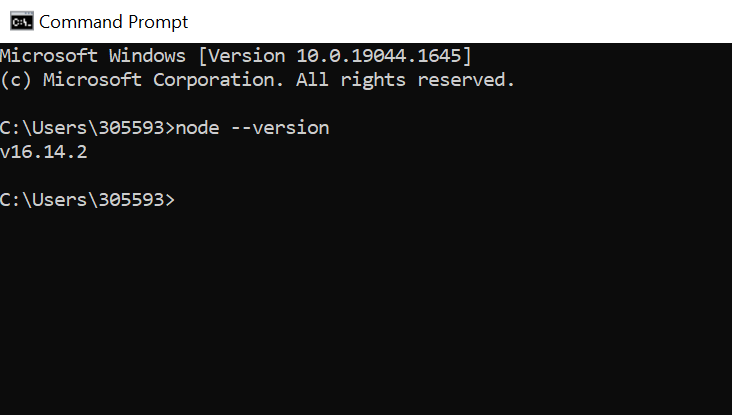
The following below steps need to follow to install OpenSSL in Windows 10

Download the OpenSSL installer from the official OpenSSL

Download Path: https://slproweb.com/products/Win32OpenSSL.html

I have done download exe file of Win64 OpenSSL v3.0.2 Light

Step [1] – Win64OpenSSL_Light-3_0_2.exe in Downloads folder, once click on exe file

Step [2] – Path for Installation

Step [3] – Selection of Installation folder

Step [4] – Select default selected The Windows system directory

Step [5] – Ready To Install

Step [6] – Finally OpenSSL has been successfully Installed

Step [7] – Set Environment variable For SSL

Step [8] – Using Shortcut Key ‘Windows’ + ‘r’ then type ‘sysdm.cpl’

Go to Advanced > Environment Variables or Directly Open Environment Variables

Step [9] – Under System Variables, Click on Path

Step [10] – Once Click Edit Button, below popup window display,

Need to click on New Button and add below path

C:\Program Files\OpenSSL-Win64\bin

Step [10] – Finally run

openssl version

How To Resolve Blank Page Error [Storefront & Backend] After Installation in Magento 2.x

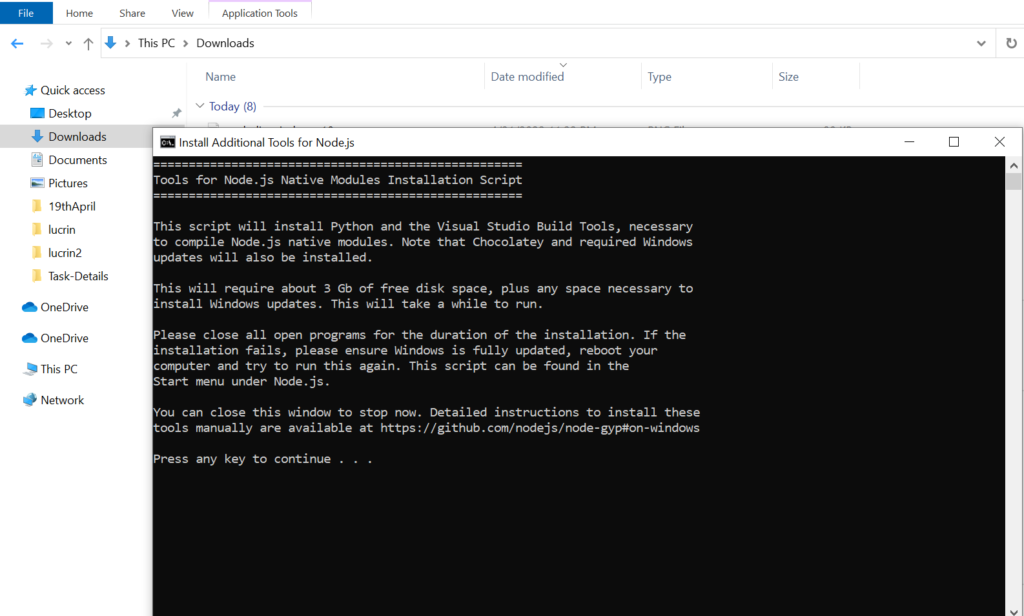
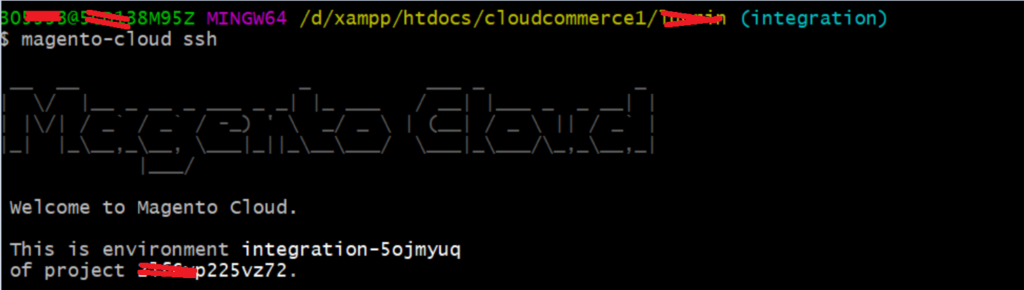
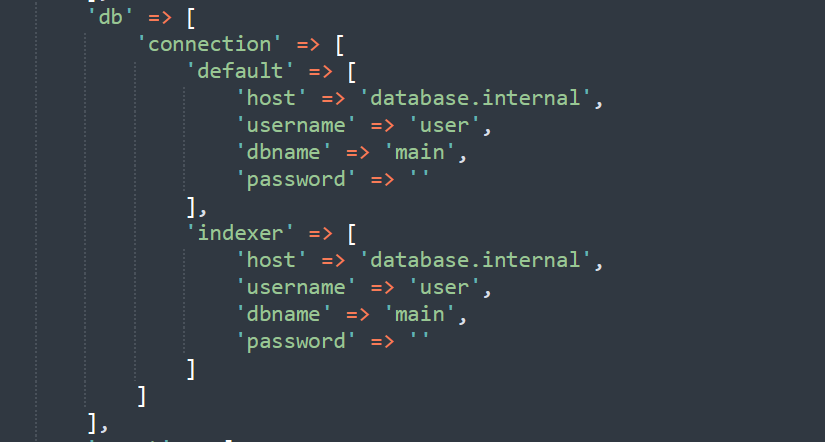
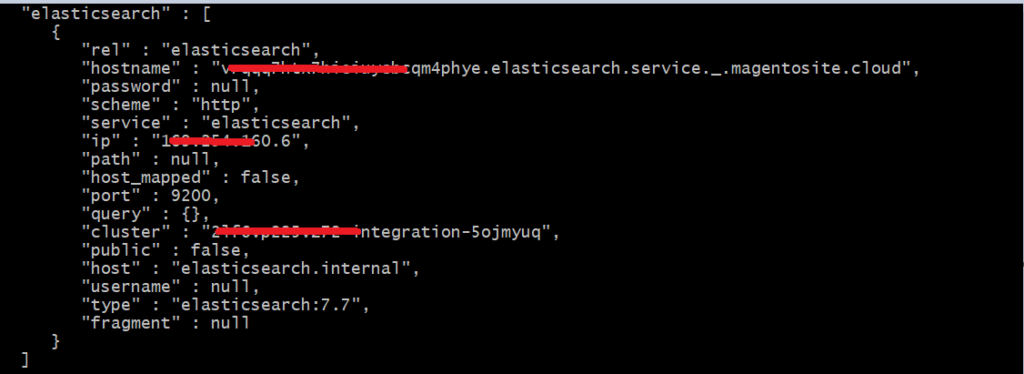
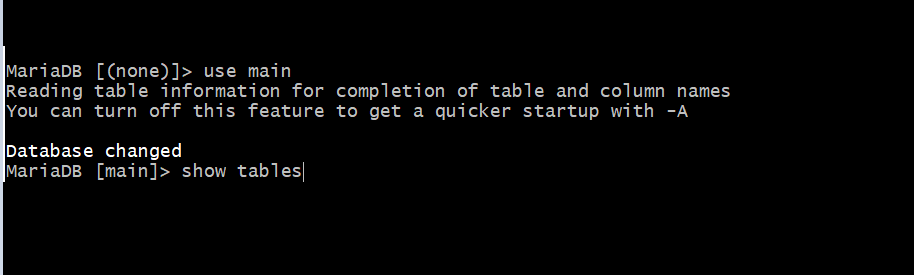
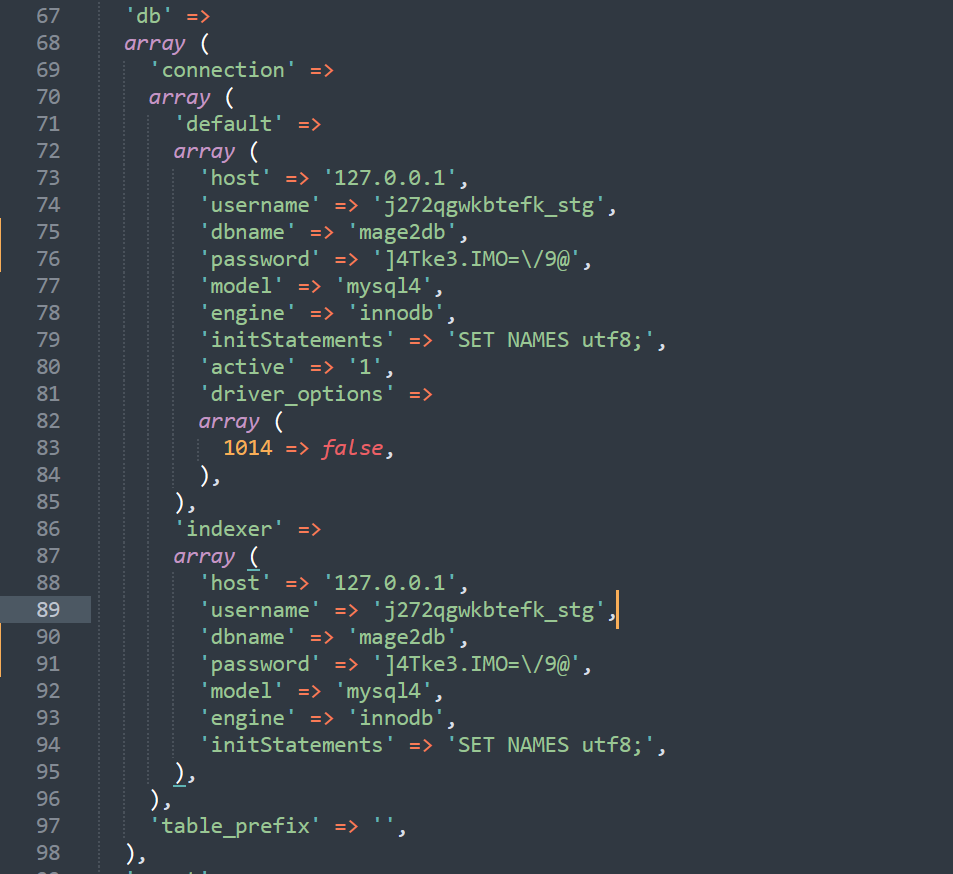
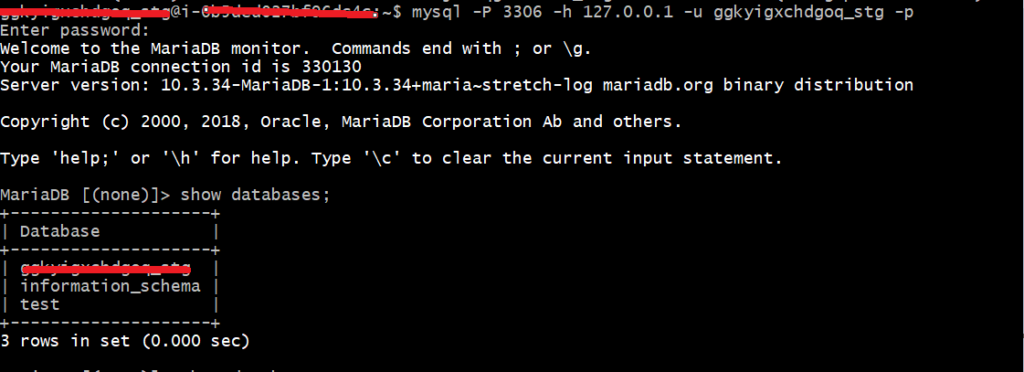
While Installing a Magento 2.x installation [Community Edition or Enterprise Edition or Commerce Cloud Edition ], you have seen that common blank page error [Storefront & Backend] that displays blank page.

Solution :: The following below steps need to follow

Step [1] – Go To ‘Validator.php’ file located at below path,

File Path = Magento 2 Root Directory
\vendor\magento\framework\View\Element\Template\File\Validator.php

Step [2] – Once open Validator.php

protected function isPathInDirectories($path, $directories)
{
    if (!is_array($directories)) {
        $directories = (array)$directories;
    }
    foreach ($directories as $directory) {
        if (0 === strpos($this->fileDriver->getRealPath($path), $directory)) {
            return true;
        }
    }
    return false;
}

[3] – Need to replace Validator.php code with following below code

protected function isPathInDirectories($path, $directories) {

$realPath = str_replace('\\', '/', $this->fileDriver->getRealPath($path));

if (!is_array($directories)) 

{ $directories = (array)$directories; } 

foreach ($directories as $directory) { 

if (0 === strpos($realPath, $directory)) 

{ return true; } 

} return false; 

}


Why Elon Musk bought Twitter @ $44 Billion Deal

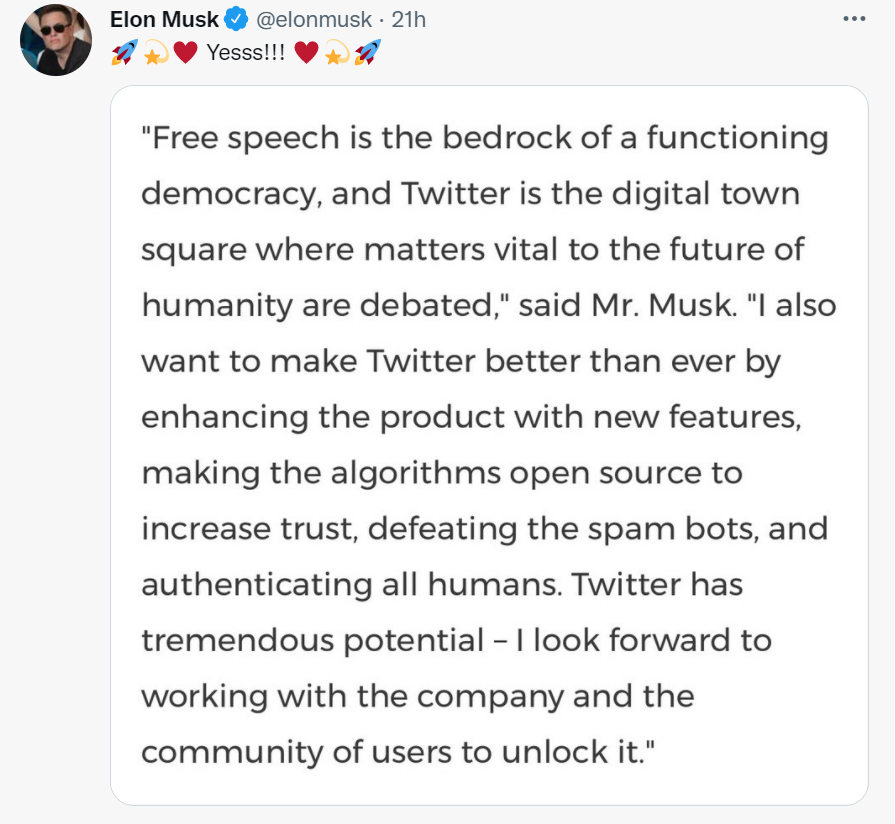
Business Tycoon Elon Musk & CEO of electric-car company Tesla and aerospace company SpaceX agreed to acquire Twitter for $44 billion on 26th April, 2022

The Following below reason, why acquired Twitter by Elon Musk

Reason [1] – Due To Free Speech, he wants to implement free speech on the platform so it can fulfil its potential as the world’s ‘Digital Town Square’.

Reason [2] – To make the company private is likely to have substantial ramifications for a service used by more than 300 million people, including many world leaders.

Reason [3] – To desire as safeguard Twitter as a free speech system rather than censorship, “Free speech is essential to a functioning democracy”

Reason [4] – To remove Fake Profile, & keeping genuine user & verified profiles

Reason [5] – To modify / moderate Twitter’s policies content, arguing that so be a genuine forum for free speech.

Reason [6] – To protect Twitter users from harmful content & keeping genuine content

Origins of Twitter::

The origins of Twitter date back to early 2006, when NYU student Jack Dorsey shared a new online communication idea with some of his coworkers at Odeo, a podcasting company. Dorsey’s idea was a platform that allowed users to share short messages with groups of people, similar to sending text messages.

First Tweet::

Jack Dorsey sent the first message on Twitter on 21st March 2006, 9:50 PM. It read, “just setting up my twttr.”

Twitter Trends Increased By 2007::

Twitter was introduced to the public on July 15th, 2006, . The website started watching around 20,000 tweets per day in the first months, but this number grew to 60,000 in 2007

Twitter Tweet Limit Increased from 140 characters to 140 characters::

Twitter was originally designed as an Mobile SMS-based platform in early days where limit was 140 characters, Twitter decided to increase Twitter limit from 140-character limit to 280 characters limit On 2017

How To Install Yarn in Windows 10 / 11

The following below steps need to follow.

Step [1] –Yarn need to download from below URL.

 Download the Yarn .msi installer

Step [2] – Once Installer Package done, click on that one.

Step [3] – The following Installer steps display as per screenshots as

Installer Screenshot-1

Installer Screenshot-2

Installer Screenshot-3

Installer Screenshot-4

Step [4] – Finally Yarn has been installed , Got to your Command Prompt & type

yarn --version

How To Install Node.js in Windows 10 / 11

The Following below steps need to follow.

Step [1] – Download Node.js from below URL for Windows.

https://nodejs.org/en/download/

Step [2] – Once Download done, click on Installer & further steps as per below screenshots.

Installer Screenshot-1

Installer Screenshot-2

Installer Screenshot-3

Installer Screenshot-4

Installer Screenshot-5

Installer Screenshot-6, this sept will take some time, Please Be Patience

Step [3] – Finally Node.js has been installed , Got to your Command Prompt & type

node --version

Magento 2.x Commerce Cloud Database Login / Access

The following below steps need to follow.

before applying below command you must be Magento Cloud Login in any environment like Integration, Staging, Production etc.

magento-cloud login

Step [1] – Run, The following below Command Magento Cloud SSH to log in to the remote environment.

 magento-cloud ssh

Step [2] – Run below vi command to open app/etc/env.php

vi app/etc/env.php

env.php file, need to check db connection part

Below is Magento 2.4.x Commerce Cloud default env.php format
<?php
return [
    'cache' => [
        'frontend' => [
            'default' => [
                'backend' => 'Cm_Cache_Backend_Redis',
                'backend_options' => [
                    'server' => 'redis.internal',
                    'port' => 6379,
                    'database' => 1
                ]
            ],
            'page_cache' => [
                'backend' => 'Cm_Cache_Backend_Redis',
                'backend_options' => [
                    'server' => 'redis.internal',
                    'port' => 6379,
                    'database' => 2
                ]
            ]
        ],
        'graphql' => [
            'id_salt' => 'AdS6J2N9YNbRAlhfzjci5swps1boeebc'
        ]
    ],
    'MAGE_MODE' => 'production',
    'cache_types' => [
        'compiled_config' => 1,
        'config' => 1,
        'layout' => 1,
        'block_html' => 1,
        'collections' => 1,
        'reflection' => 1,
        'db_ddl' => 1,
        'eav' => 1,
        'customer_notification' => 1,
        'config_integration' => 1,
        'config_integration_api' => 1,
        'full_page' => 1,
        'target_rule' => 1,
        'config_webservice' => 1,
        'translate' => 1,
        'vertex' => 1
    ],
    'cron' => [

    ],
    'backend' => [
        'frontName' => 'admin'
    ],
    'remote_storage' => [
        'driver' => 'file'
    ],
    'queue' => [
        'consumers_wait_for_messages' => 0
    ],
    'db' => [
        'connection' => [
            'default' => [
                'host' => 'database.internal',
                'username' => 'user',
                'dbname' => 'main',
                'password' => ''
            ],
            'indexer' => [
                'host' => 'database.internal',
                'username' => 'user',
                'dbname' => 'main',
                'password' => ''
            ]
        ]
    ],
    'crypt' => [
        'key' => 'f18dacf326865a257d00768151d46c03'
    ],
    'resource' => [
        'default_setup' => [
            'connection' => 'default'
        ]
    ],
    'x-frame-options' => 'SAMEORIGIN',
    'session' => [
        'save' => 'redis',
        'redis' => [
            'host' => 'redis.internal',
            'port' => 6379,
            'database' => 0,
            'disable_locking' => 1
        ]
    ],
    'lock' => [
        'provider' => 'db',
        'config' => [
            'prefix' => null
        ]
    ],
    'directories' => [
        'document_root_is_pub' => true
    ],
    'downloadable_domains' => [
        'master-7rqtwti-a4kqty5oswp5a.ap-3.magentosite.cloud'
    ],
    'install' => [
        'date' => 'Tue, 18 Jan 2022 04:02:32 +0000'
    ],
    'static_content_on_demand_in_production' => 0,
    'force_html_minification' => 1,
    'cron_consumers_runner' => [
        'cron_run' => false,
        'max_messages' => 10000,
        'consumers' => [

        ],
        'multiple_processes' => [

        ]
    ],
    'system' => [
        'default' => [
            'catalog' => [
                'search' => [
                    'engine' => 'elasticsearch7',
                    'elasticsearch7_server_hostname' => 'http://elasticsearch.internal',
                    'elasticsearch7_server_port' => 9200
                ]
            ]
        ]
    ]
];

If db connection part as below, need to run below three command to open Cloud Commerce / Enterprise Database

$MAGENTO_CLOUD_RELATIONSHIPS variable. Echo

echo $MAGENTO_CLOUD_RELATIONSHIPS | base64 -d | json_pp

mysql -h database.internal -u user

Each Command has been described properly in below

'db' => [
        'connection' => [
            'default' => [
                'host' => 'database.internal',
                'username' => 'user',
                'dbname' => 'main',
                'password' => ''
            ],
            'indexer' => [
                'host' => 'database.internal',
                'username' => 'user',
                'dbname' => 'main',
                'password' => ''
            ]
        ]
    ],

Step [2.1] – Run Command Magento Cloud RELATIONSHIPS

$MAGENTO_CLOUD_RELATIONSHIPS variable. Echo

Step [2.2] – Run Command Magento Cloud RELATIONSHIPS with additional variable

echo $MAGENTO_CLOUD_RELATIONSHIPS | base64 -d | json_pp

display Redis Cache, Database Elasticsearch details as below

Step [2.3] – Run MYSQL Database Access Command

mysql -h database.internal -u user

Displaying MYSQL / MariaDB Environment

show databases;

Displaying all Database [ MYSQL / MariaDB ] information, as here
MYSQL main database already created.

Step [2.4] – Run MYSQL Use Command

use databasename;

Step [3] – If db connection part [env.php] as below, need to run below three command to open Cloud Commerce / Enterprise Database

'db' => 
  array (
    'connection' => 
    array (
      'default' => 
      array (
        'host' => '127.0.0.1',
        'username' => 'j272qgwkbtefk_stg',
        'dbname' => 'mage2db',
        'password' => ']4Tke3.IMO=\/9@',
        'model' => 'mysql4',
        'engine' => 'innodb',
        'initStatements' => 'SET NAMES utf8;',
        'active' => '1',
        'driver_options' => 
        array (
          1014 => false,
        ),
      ),
      'indexer' => 
      array (
        'host' => '127.0.0.1',
        'username' => 'j272qgwkbtefk_stg',
        'dbname' => 'mage2db',
        'password' => ']4Tke3.IMO=\/9@',
        'model' => 'mysql4',
        'engine' => 'innodb',
        'initStatements' => 'SET NAMES utf8;',
      ),
    ),
    'table_prefix' => '',
  ),

Step [4] – Need to run below command with host

mysql -h 127.0.0.1 -u j272qgwkbtefk_stg -p

Some db connection part having Port, port=3306

mysql -P 3306 -h 127.0.0.1 -u john -p

Step [5] – By Using below direct command

magento-cloud db:sql

Step [6] – Need to run below command to check disk usage of the MySQL service 

magento-cloud db:size

Step [6] – Need to run below command to Database Dump

magento-cloud db:dump

Difference Between MAGE_RUN_CODE and MAGE_RUN_TYPE in Magento 2.x

Each website as well as each store view must have a unique identifier.

These unique identifier are required to use the MAGE_RUN_TYPE and MAGE_RUN_CODE variables as below following steps

MAGE_RUN_TYPE can be either store or website

The Website is used to load a website in your storefront.

The Store is used to to load any store view in your storefront.

MAGE_RUN_CODE is the unique website or store view code that corresponds to MAGE_RUN_TYPE

Which Magento 2.x Database Tables For Algolia Search, While Magento 2.x Connected To Algolia Search.

The following below set of Magento 2.x Database Tables created while , Magento 2.x Search configured with Algolia Search.

Algolia Search Tables in Magento 2.x Database

algoliasearch_landing_page

Store Meta Tags details [Title, Description, Keywords etc.] of landing_page

algoliasearch_query

Store Search Query Results with Store ID & Images

algoliasearch_queue

Store Search Query Results in the queue

algoliasearch_queue_archive

Store Search Query Results in archive

algoliasearch_queue_log

Store Search Query Results with Log details

algolia_additional_sections_cl

Store Catalog ID (entity_id)

algolia_categories_cl

Store Categories ID (entity_id)

algolia_delete_products_cl

Store Deleted Products ID (entity_id)

algolia_pages_cl

Store CMS Pages ID (entity_id)

algolia_products_cl

Store Products ID (entity_id)

algolia_queue_runner_cl

Store Currently running Search Query Results queue Catalog / CMS Pages ID (entity_id)

algolia_suggestions_cl

Store Search Query Results suggestions ID (entity_id)

How To Setup Algolia in Magento 2.x