The following below code need to put in your custom module controlller
Here We are creating
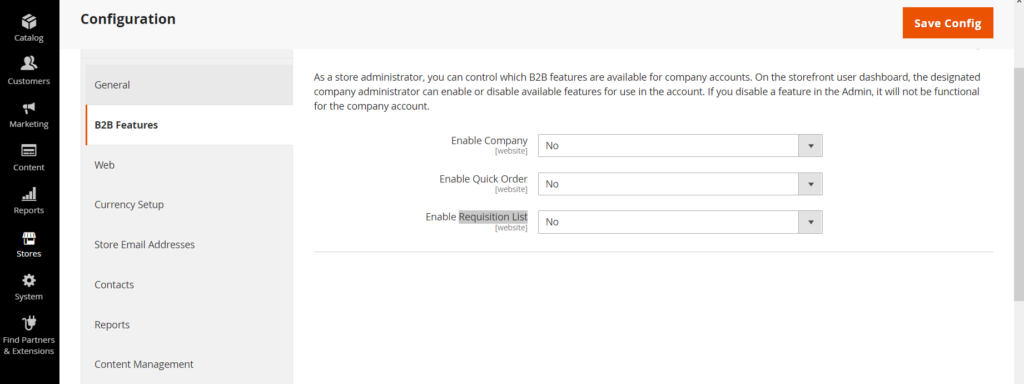
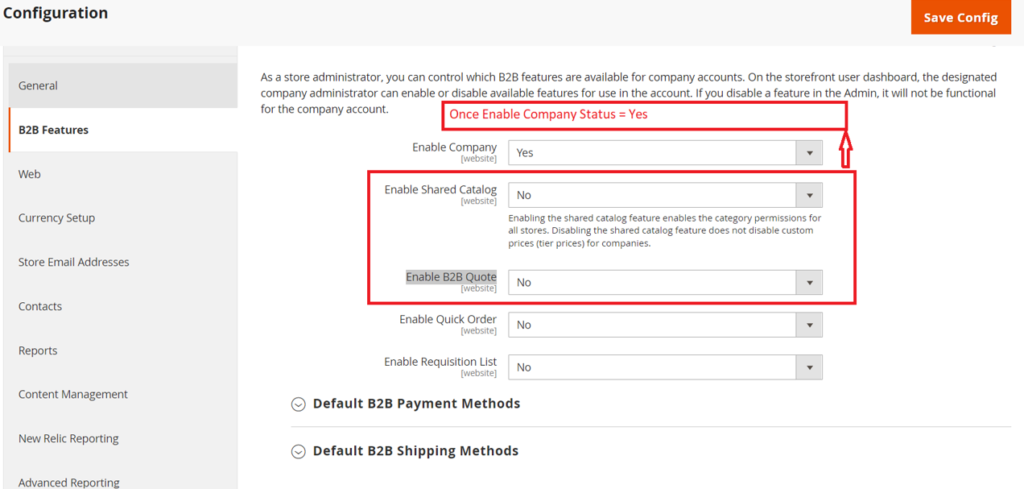
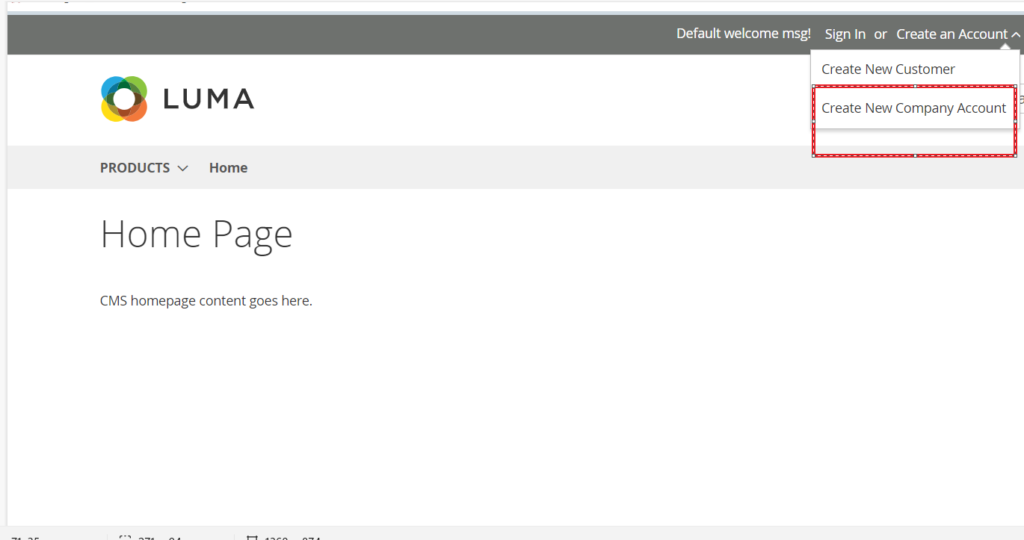
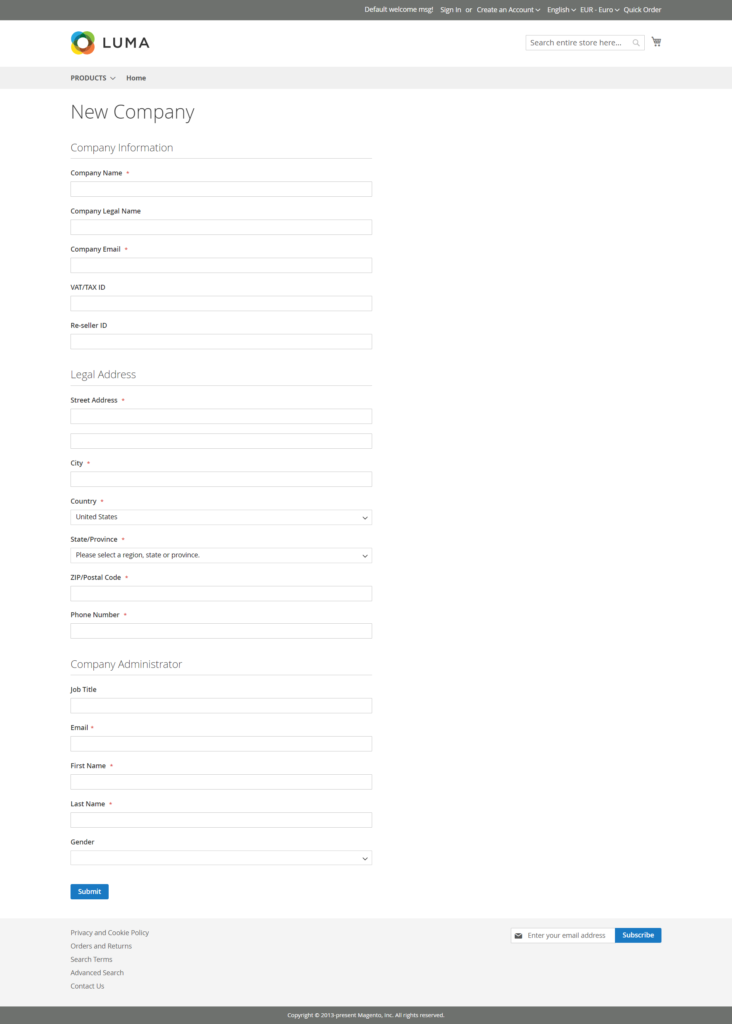
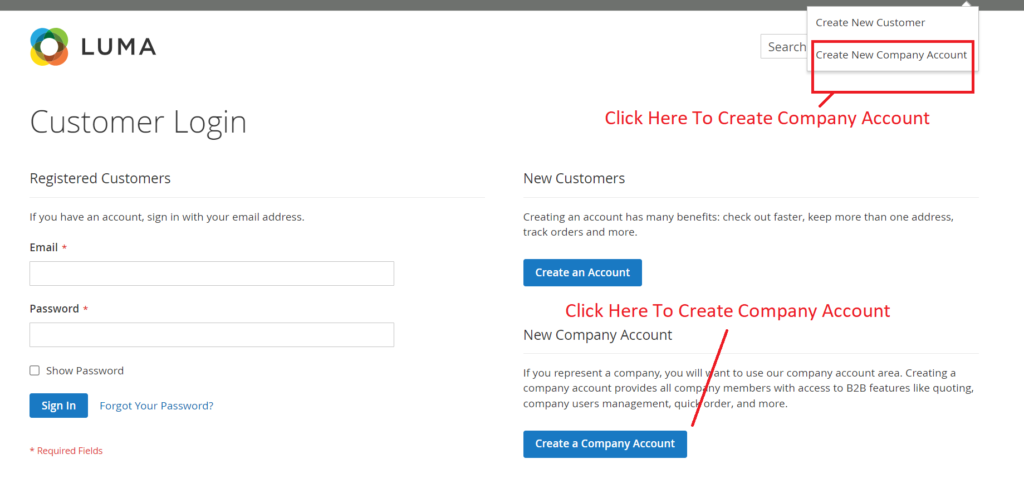
[1] – Adobe Commerce B2B Customer Account
[2] – Adobe Commerce B2B Company Account
<?php
/*
* John_Customercompanycreation
* @category Adobe Commerce B2B Customer Company Account Creation
* @package Customerregister Form
* @copyright Copyright (c) 2023 - Mage2DB.com
* @Email johndusa1021@gmail.com
* @version 1.0.0
*/
namespace John\Customercreation\Controller\Index;
use Magento\Backend\App\Action\Context;
use Magento\Framework\Controller\ResultFactory;
use Magento\Framework\App\Action\HttpPostActionInterface as HttpPostActionInterface;
use Magento\Framework\App\RequestInterface;
use Magento\Store\Model\StoreManagerInterface;
use Magento\Framework\Controller\Result\RedirectFactory;
use Magento\Framework\Message\ManagerInterface as MessageManagerInterface;
use Magento\Customer\Model\CustomerFactory;
use Magento\Company\Api\CompanyRepositoryInterface;
use Magento\Company\Api\Data\CompanyInterface;
use Magento\Framework\Api\DataObjectHelper;
use Magento\Customer\Api\CustomerRepositoryInterface;
class Index extends \Magento\Framework\App\Action\Action
{
/**
* @var \Magento\Framework\App\RequestInterface
*/
protected $request;
/**
* @var \Magento\Store\Model\StoreManagerInterface
*/
protected $storeManager;
/**
* @var John\Customerregister\Helper\Data
*/
protected $helper;
/**
* @var \Magento\Framework\Controller\Result\RedirectFactory
*/
protected $resultRedirectFactory;
/**
* @var \Magento\Framework\Message\ManagerInterface
*/
protected $messageManager;
/**
* @var \Magento\Customer\Model\CustomerFactory
*/
protected $customerFactory;
/**
* @var \Magento\Company\Api\CompanyRepositoryInterface
*/
protected $companyRepository;
/**
* @var \Magento\Company\Api\Data\CompanyInterface
*/
protected $companyInterface;
/**
* @var \Magento\Framework\Api\DataObjectHelper
*/
protected $objectHelper;
/**
* @var CustomerRepositoryInterface
*/
protected $customerRepository;
/**
* @param Action\Context $context
* @param \Magento\Framework\App\Cache\TypeListInterface $cacheTypeList
* @param \Magento\Framework\App\Cache\StateInterface $cacheState
* @param \Magento\Framework\App\Cache\Frontend\Pool $cacheFrontendPool
* @param \Magento\Framework\View\Result\PageFactory $resultPageFactory
* @param \Magento\Company\Api\CompanyRepositoryInterface $companyRepository
* @param \Magento\Company\Api\Data\CompanyInterface $companyInterface
* @param \Magento\Framework\Api\DataObjectHelper $objectHelper
*/
public function __construct(
\Magento\Framework\App\Action\Context $context,
\Magento\Framework\View\Result\PageFactory $resultPageFactory,
RequestInterface $request,
StoreManagerInterface $storeManager,
RedirectFactory $resultRedirectFactory,
MessageManagerInterface $messageManager,
CustomerFactory $customerFactory,
CompanyRepositoryInterface $companyRepository,
CompanyInterface $companyInterface,
DataObjectHelper $objectHelper,
CustomerRepositoryInterface $customerRepository
) {
parent::__construct($context);
$this->resultPageFactory = $resultPageFactory;
$this->request = $request;
$this->storeManager = $storeManager;
$this->resultRedirectFactory = $resultRedirectFactory;
$this->messageManager = $messageManager;
$this->customerFactory = $customerFactory;
$this->companyRepository = $companyRepository;
$this->companyInterface = $companyInterface;
$this->objectHelper = $objectHelper;
$this->customerRepository = $customerRepository;
}
/**
* Flush cache storage
*
*/
public function execute()
{
try {
/* start: To Save Data in Customer_Entity Database Table -- Customer Registration Process*/
$websiteId = $this->storeManager->getWebsite()->getWebsiteId();
$firstName = "John";
$lastName = "Doe";
$email = "smith@mage2db.com";
$password = "R@]*H7~>giXo16Cxv5+n%Mt";
// instantiate customer object
$customer = $this->customerFactory->create();
$customer->setWebsiteId($websiteId);
if ($customer->loadByEmail($email)->getId()) {
//echo 'Customer with the email ' . $email . ' is already registered.';
$message = __(
'There is already an account with this email address "%1".',
$email
);
// @codingStandardsIgnoreEnd
$this->messageManager->addError($message);
} else {
try {
// prepare customer data
$customer->setEmail($email);
$customer->setFirstname($firstName);
$customer->setLastname($lastName);
// set null to auto-generate password
$customer->setPassword($password);
// set the customer as confirmed
// this is optional
// comment out this line if you want to send confirmation email
// to customer before finalizing his/her account creation
$customer->setForceConfirmed(true);
// save data
$customer->save();
// send welcome email to the customer
$customer->sendNewAccountEmail();
/* Finish: To Save Data in Customer_Entity Database Table -- Customer Registration Process */
/*Start: To Get Customer ID By Email*/
$customerData = $this->customerRepository->get($email);
$customerId_latest = (int) $customerData->getId();
/*Finish: To Get Customer ID By Email*/
/* Starts To Save Customer Company Details -- Customer Registration Process -- Once Customer Account Created */
/* To Create Customer Company require Customer entity_id , that only done after customer account Creation */
/* Customer entity_id here using as super_user_id*/
if (isset($customerId_latest) && !empty($customerId_latest) ):
$companyRepo = $this->companyRepository;
$companyObj = $this->companyInterface;
$dataObj = $this->objectHelper;
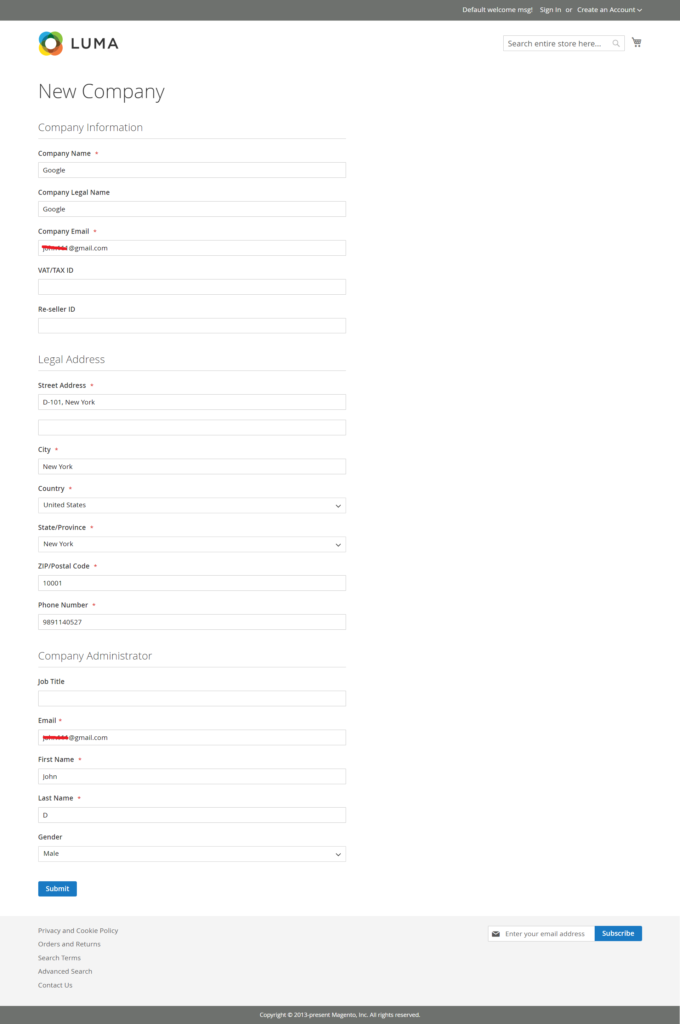
$company = [
"company_name" => "Google",
"company_email" => "info@mage2db.com",
"street" => ["D-101, New York"],
"city" => "New York",
"country_id" => "US",
"region" => "CA",
"region_id" => "12",
"postcode" => "10001",
"telephone" => "9999999999",
"super_user_id" => $customerId_latest,
"customer_group_id" => 1,
];
/*Super ID getting from customer_entity table*/
/*Once Customer Created, it ID as super_user_id for Company account*/
$this->objectHelper->populateWithArray(
$this->companyInterface,
$company,
\Magento\Company\Api\Data\CompanyInterface::class
);
$this->companyRepository->save($this->companyInterface);
endif;
/*Finish To Save Customer Company Details -- Customer Registration Process -- Once Customer Account Created*/
$this->messageManager->addSuccess(
__(
"Customer Company account with email %1 created successfully.",
$email
)
);
$url = $this->urlModel->getUrl("*/*/add", [
"_secure" => true,
]);
$resultRedirect->setUrl($this->_redirect->success($url));
//$resultRedirect->setPath('*/*/');
return $resultRedirect;
} catch (StateException $e) {
$url = $this->urlModel->getUrl(
"customer/account/forgotpassword"
);
// @codingStandardsIgnoreStart
$message = __(
'There is already an account with this email address. If you are sure that it is your email address, <a href="%1">click here</a> to get your password and access your account.',
$url
);
$this->messageManager->addError($message);
} catch (InputException $e) {
$this->messageManager->addError(
$this->escaper->escapeHtml($e->getMessage())
);
foreach ($e->getErrors() as $error) {
$this->messageManager->addError(
$this->escaper->escapeHtml($error->getMessage())
);
}
} catch (LocalizedException $e) {
$this->messageManager->addError(
$this->escaper->escapeHtml($e->getMessage())
);
} catch (\Exception $e) {
//$this->messageManager->addException($e, __('We can\'t save the customer.'));
}
}
// Finish: To Save Data in Customer_Entity Database Table
//Finish: To save Customer Company Details
} catch (LocalizedException $e) {
$this->messageManager->addErrorMessage($e->getMessage());
} catch (\Exception $e) {
$this->messageManager->addErrorMessage(
__("Something went wrong, please try again.")
);
}
$this->resultPage = $this->resultPageFactory->create();
return $this->resultPage;
}
} Once script run the following set of email by Customer
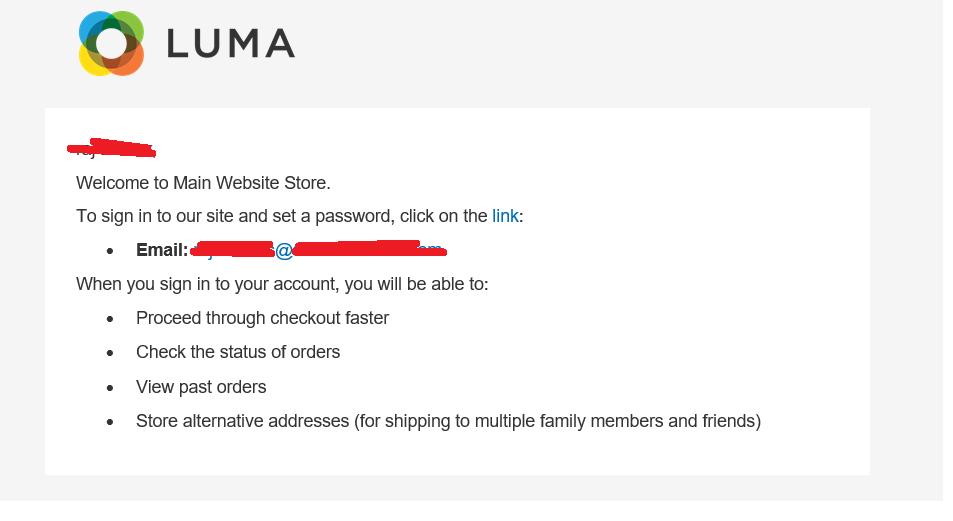
Step [1] – Customer Registration welcome email ::
Customer smith@mage2db.com getting email from Adobe Commerce B2B Store Owner Email Johndusa1021@gmail.com

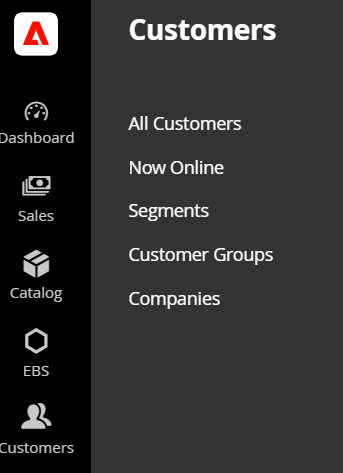
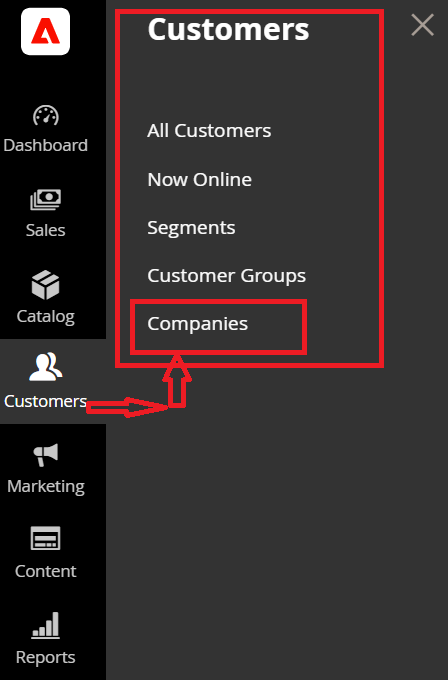
Step [2] – Go To Adobe Commerce B2B admin
Left Side Menu –> Customers –> Customers –> Companies
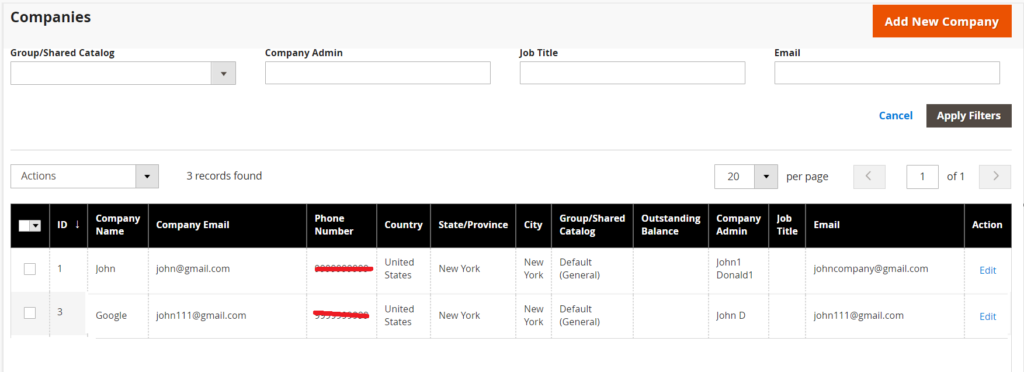
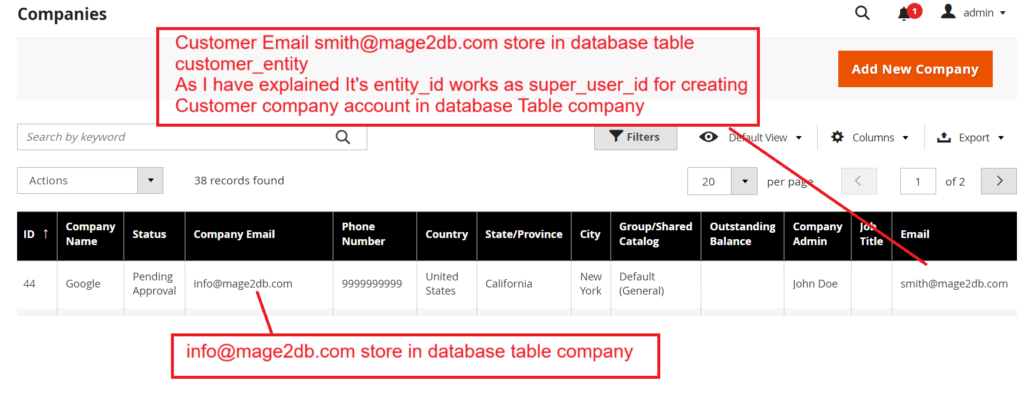
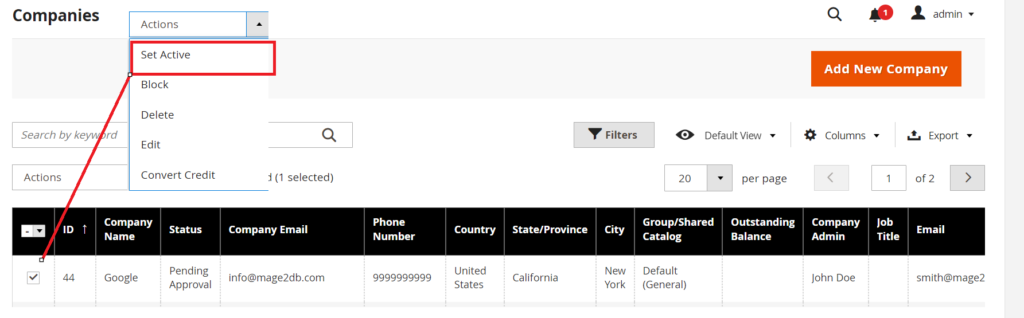
Step [3] – Once clicked on companies –> display listing of all customer companies listing
By Default newly created company disabled,
As below screenshot newly created company Google as Pending Approval Stage
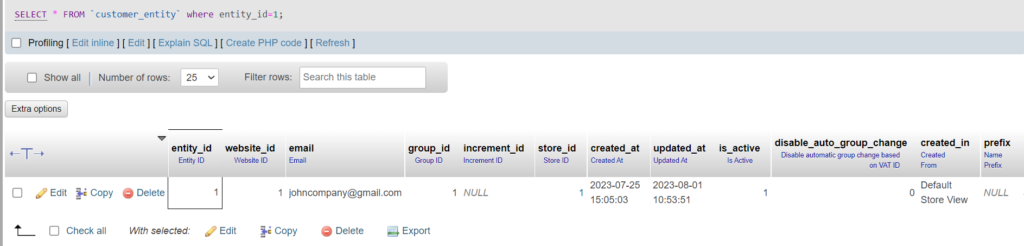
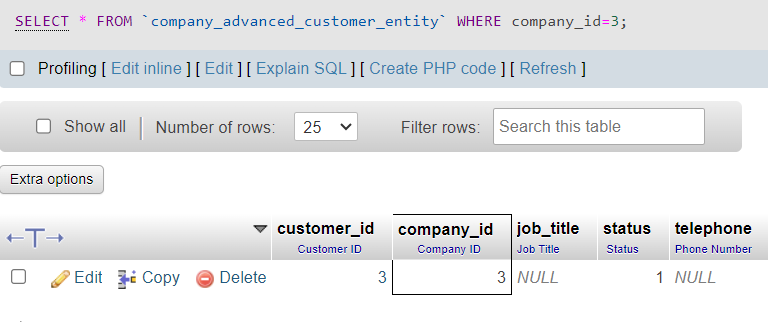
[3.1] – Customer Email smith@mage2db.com store in database table customer_entity
As I have explained It’s entity_id works as super_user_id for creating Customer company account in database Table company
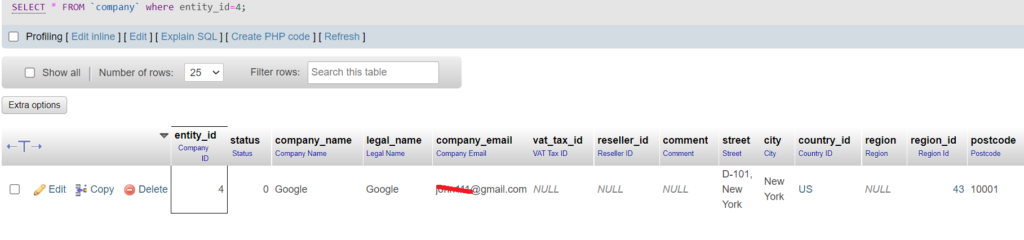
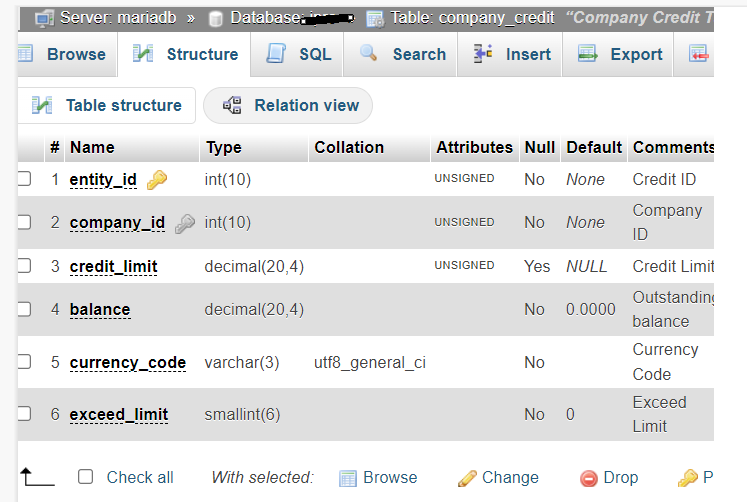
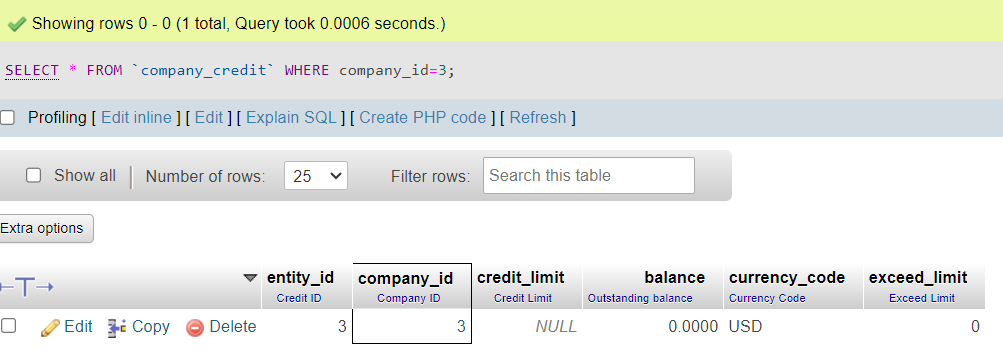
[3.2] – info@mage2db.com store in database table company
Here we have created Both Adobe Commerce B2B Customer Account & Customer Company account
First Created Adobe Commerce B2B Customer Account, once got customer created account entity_id from Database Table customer_entity
Once got entity_id from Database Table customer_entity , we are using that entity_id as super_user_id during Adobe Commerce B2B Customer Company account creating
Note:: if you want to create only Adobe Commerce B2B Customer Company account
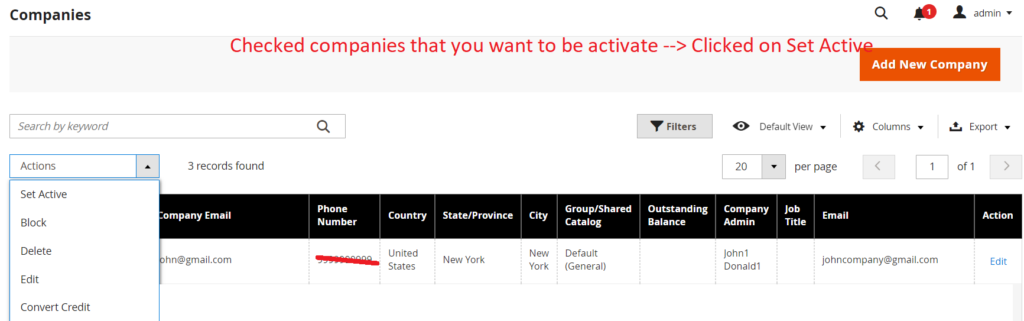
[3.3] – As Here Newly created company Google Pending Approval Condition ,
Admin must be activate –> Checked Company Google Row –-> Select Set Active From Actions Drop Down Menu
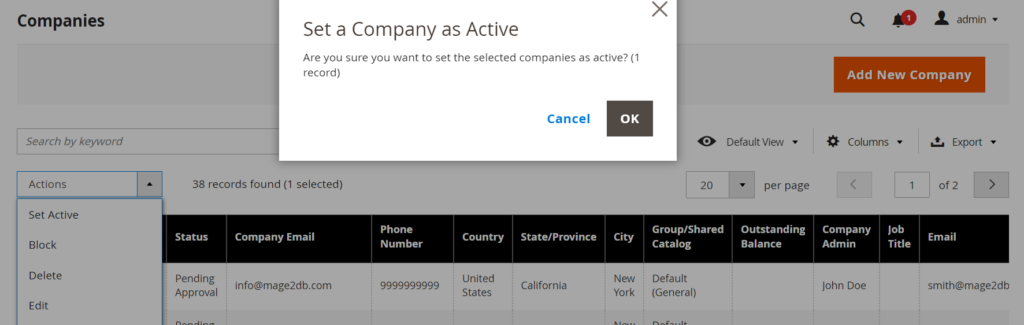
Clicked on OK to activate Company Google
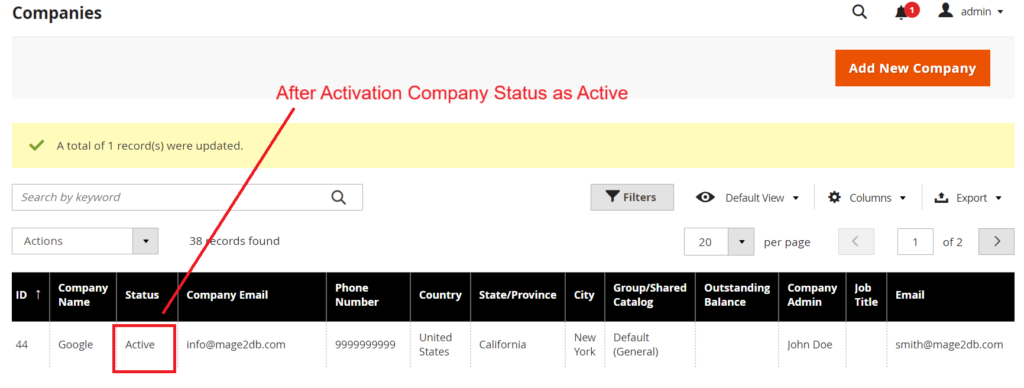
After Activation Company Status as Active
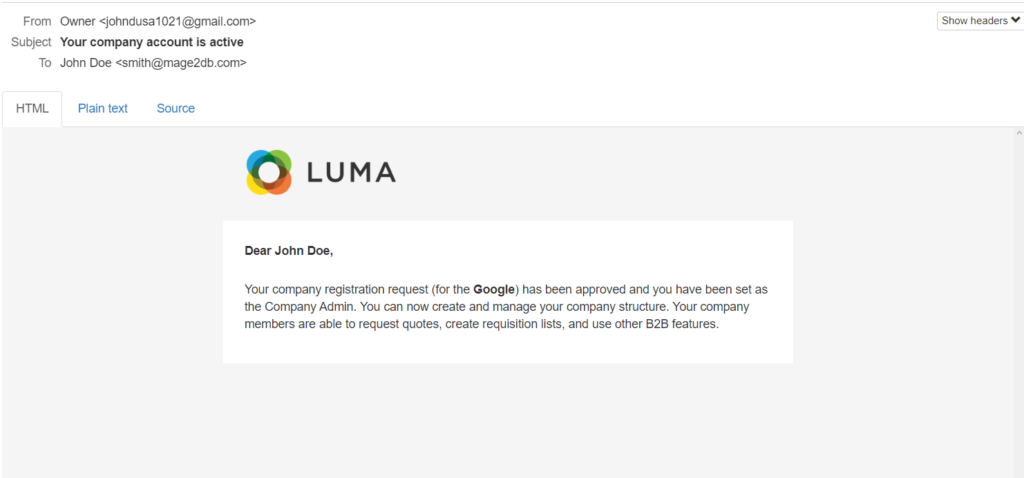
Step [4] – After activation Company
Customer will be getting email on his registered email
Here Customer smith@mage2db.com
got email from Adobe Commerce B2B Store Owner johndusa1021@gmail.com
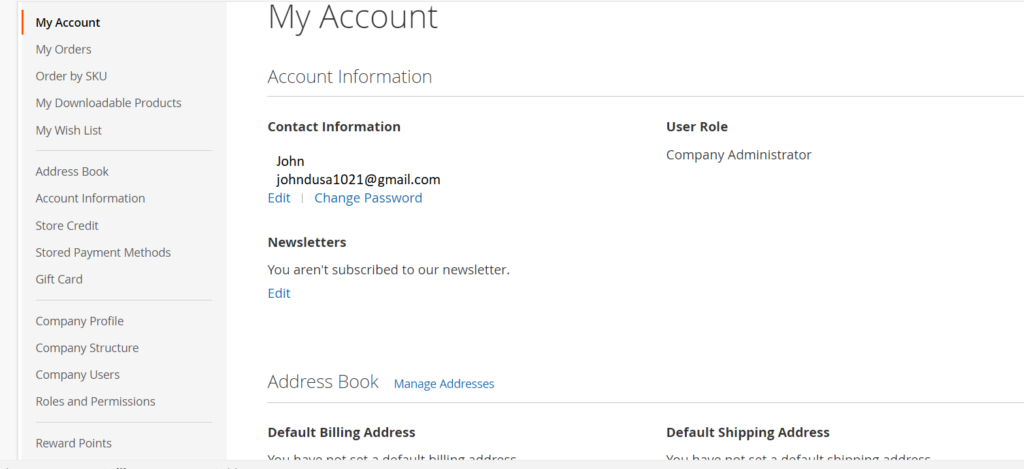
Step [4] – Finally Customer smith@mage2db.com can login
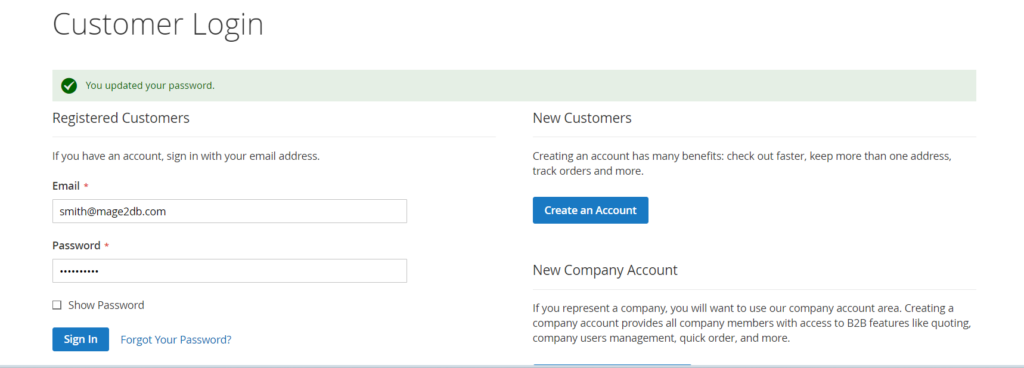
[4.1] – Once Logged In, Customer smith@mage2db.com can view his Dashboard

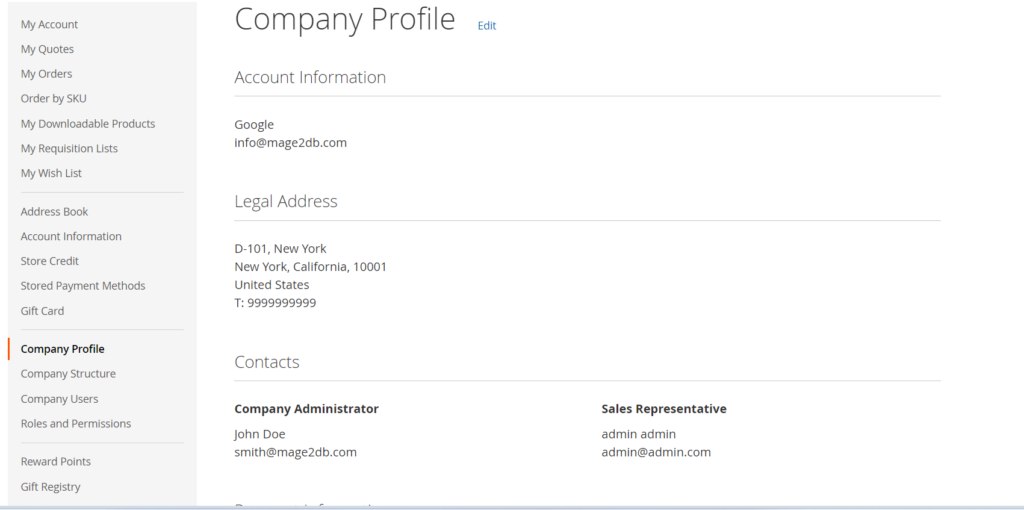
[4.2] – Once you clicked on Customer Profile , you can see Company Email with Legal Address
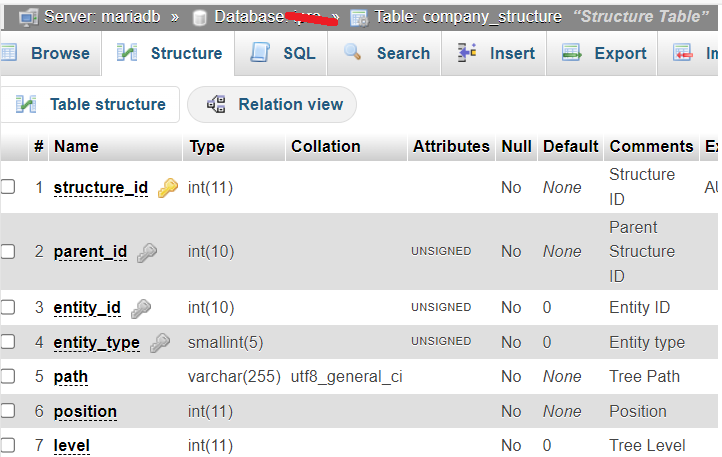
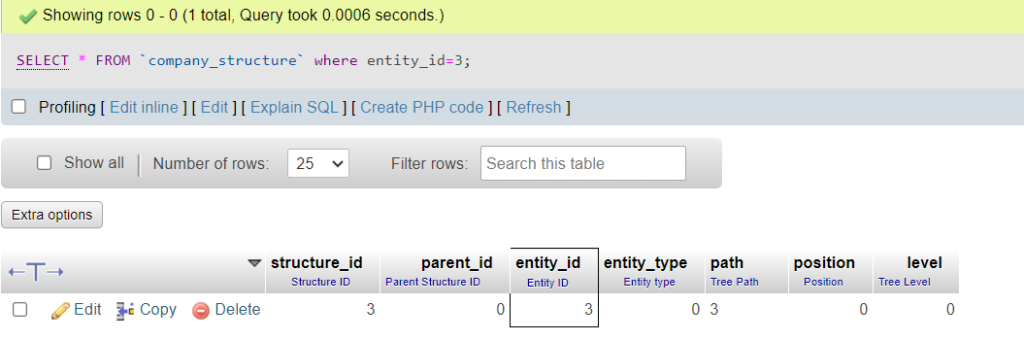
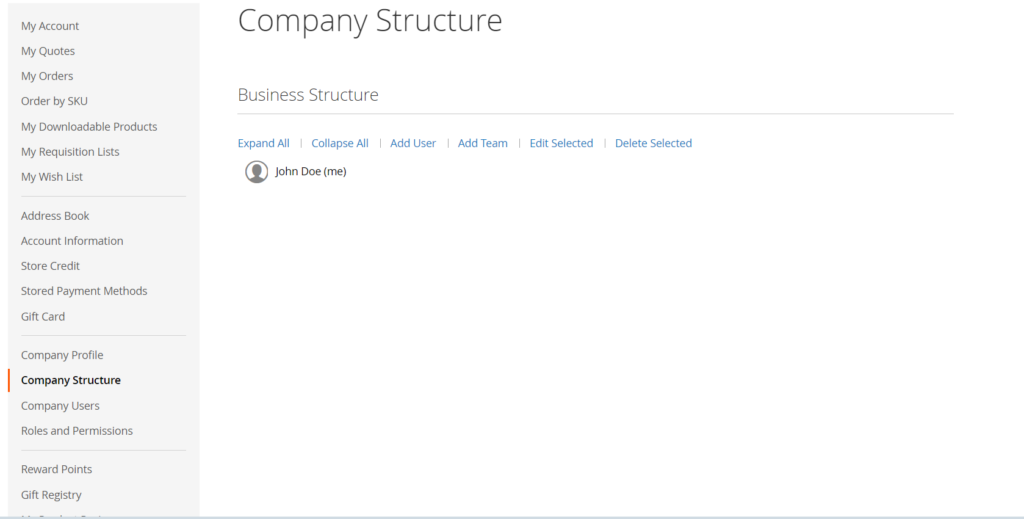
[4.3] – Once clicked on Company Structure , you can see Company Structure
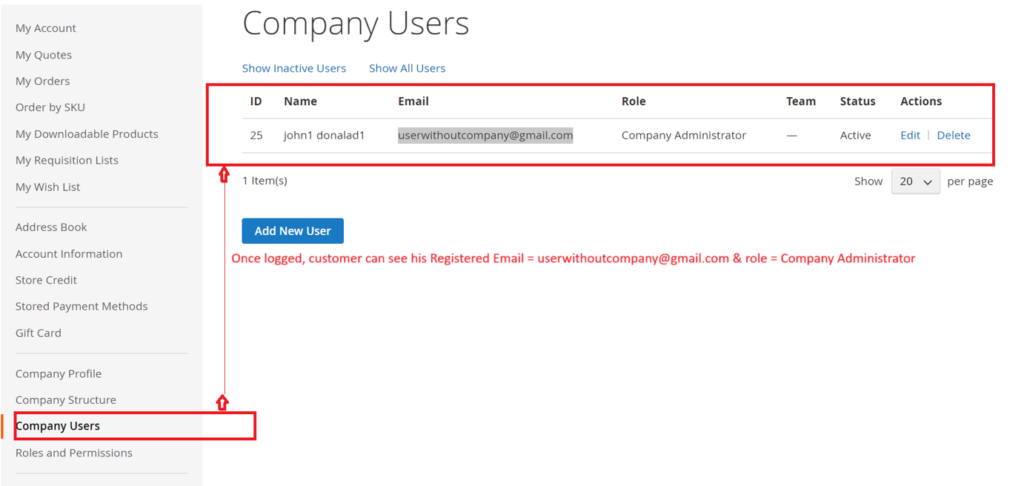
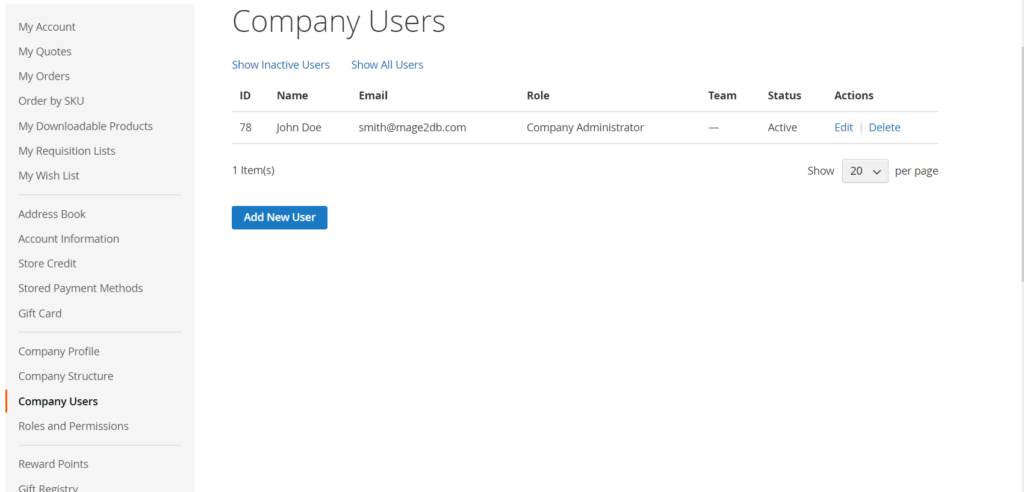
[4.4] – Once clicked on Company Users, you can see John Doe (smith@mage2db.com) as Company administrator
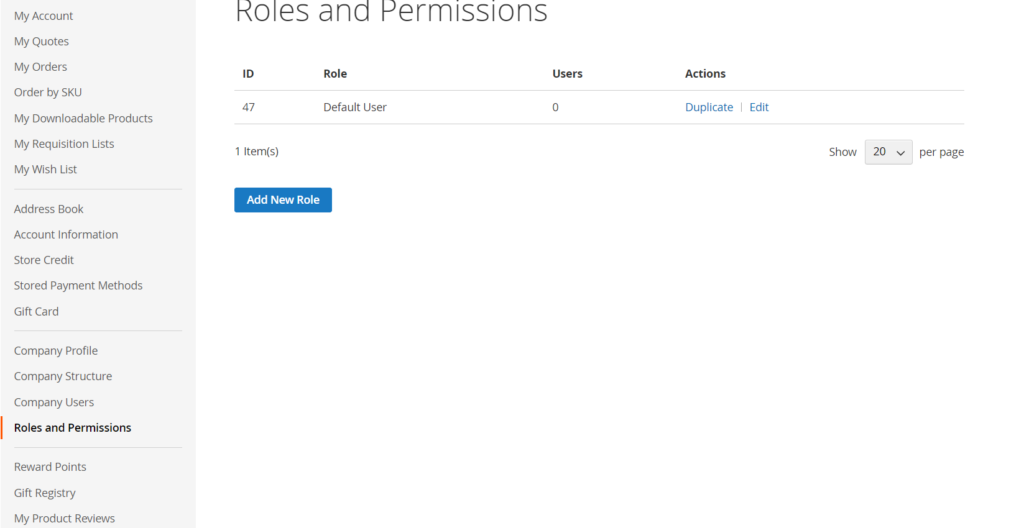
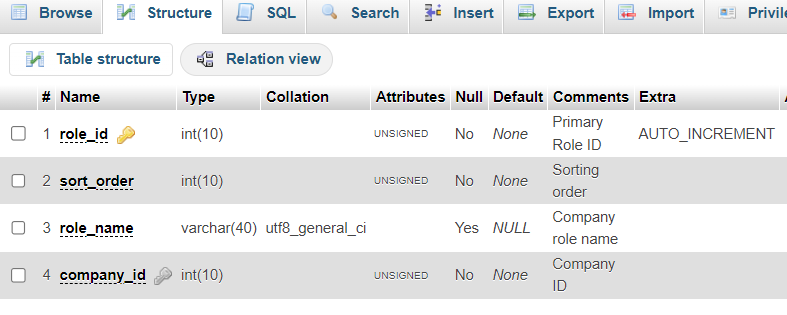
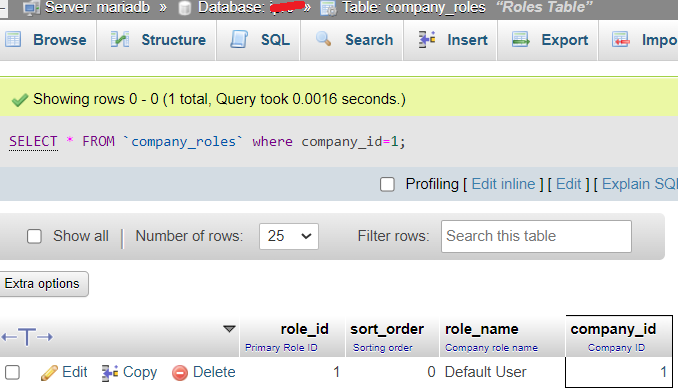
[4.5] – Once you clicked on Roles and Permissions –> Default Roles
You can create new Role as per your Business Need.