
| MongoDB | MySQL | |
| 1 | MongoDB represents data as of JSON documents. | MySQL represents data in tables and rows. |
| 2 | MongoDB does not support JOIN operations. | MySQL supports JOIN operations. |
| 3 | MongoDB uses JavaScript as query language. | MySQL uses the Structured Query Language (SQL). |
| 4 | MongoDB offers faster query processing. | MySQL offers slow query processing. |
| 5 | MongoDB does not support JOIN. | MySQL supports JOIN operations. |
| 6 | MongoDB is an ideal choice for unstructured data. | MySQL is an ideal choice for structured data. |
| 7 | MongoDB do not need to define the schema. | MySQL need to define the schema. |
| 8 | MongoDB supports built-in replication, sharding | MySQL supports master-slave replication and master replication. and auto-elections. |
| 9 | MongoDB Supports languages are C++, C | MySQL supports languages are C++, C and JavaScript |
| 10 | Cloud based application preferred MongoDB, build applications faster, handle highly diverse data types, and manage applications more efficiently at scale. | MySQL, If data security is your priority then MYSQL is the best option for you, is the best suited for you. |
Author: John
How To Get Base URL in Magento 2.x

There are following below two ways to get Base URLs
[1] By Using DI (Dependency Injection)
[2] By Using Object Manager
[1] By Using DI (Dependency Injection) : You can get Base URL, with / without Index, Store URL, Link URL, Media URL
[1.1] Write below code inside custom module Helper as

         [VendorName][ModuleName]\Helper\Data.php
<?php

namespace [VendorName]\[ModuleName]\\Helper;
use Magento\Store\Model\StoreManagerInterface;
use Magento\Framework\Controller\ResultFactory;
use Magento\Framework\App\Response\RedirectInterface;
class Data extends \Magento\Framework\App\Helper\AbstractHelper
{
  protected $storeManager;


  public function __construct( \Magento\Framework\App\Helper\Context $context,
                               StoreManagerInterface $storeManager
							 )
     {
      $this->storeManager = $storeManager;
      parent::__construct($context);
     }


  public function getStoreManagerData()
    {
  	    // To get Store Url with index.php
        return $storeUrl = $this->storeManager->getStore()->getBaseUrl();
        // To get Store Url without index.php
        return $storeUrl = $this->storeManager->getStore()->getBaseUrl(\Magento\Framework\UrlInterface::URL_TYPE_WEB);
        // To get Link Url of store
         $storeLinkUrl = $this->storeManager->getStore()->getBaseUrl(\Magento\Framework\UrlInterface::URL_TYPE_DIRECT_LINK);
        // To get media Base Url
         $storeMediaUrl = $this->storeManager->getStore()->getBaseUrl(\Magento\Framework\UrlInterface::URL_TYPE_MEDIA);
        //To get Static content Url
         $storeStaticUrl = $this->storeManager->getStore()->getBaseUrl(\Magento\Framework\UrlInterface::URL_TYPE_STATIC);
    }


}
[1.2] Write below code inside custom module Block as
[VendorName]\[ModuleName]\Block\Index\Index.php
<?php
namespace [VendorName]\[ModuleName]\Block\Index;
class Index extends \Magento\Framework\View\Element\Template
{
	protected $helper;

	public function __construct(
		\Magento\Framework\View\Element\Template\Context $context,
		[VendorName]\[ModuleName]\Helper\Data $helperData,

	)
	{
		$this->helper = $helperData;
		parent::__construct($context);
	}

	public function getbaseurldata()
    {
    return $this->helper->getStoreManagerData();
    }


}
[1.3] Write below code inside Custom Module Template Index phtml file
 [VendorName]\[ModuleName]\view\frontend\templates\index\index.phtml
$baseurl= $block->getbaseurldata();Finally you can Base URL as per store need.
[2] By Using Object Manager :
$objectManager = \Magento\Framework\App\ObjectManager::getInstance();
$storeManager = $objectManager->get('\Magento\Store\Model\StoreManagerInterface');

$storeManager->getStore()->getBaseUrl();  // to get Base Url
$storeManager->getStore()->getBaseUrl(\Magento\Framework\UrlInterface::URL_TYPE_WEB); // to get Base Url without index.php
$storeManager->getStore()->getBaseUrl(\Magento\Framework\UrlInterface::URL_TYPE_LINK); // to get store link url
$storeManager->getStore()->getBaseUrl(\Magento\Framework\UrlInterface::URL_TYPE_MEDIA); // to get Base Media urlHow To Disable / Enable Module in Magento 2.x
There are two ways to enable / disable module
[1] By Using CLI Command, here disabled Module Magento_TwoFactorAuth
php bin/magento module:status
php bin/magento module:disable Magento_TwoFactorAuth
php bin/magento setup:upgrade
php bin/magento cache:flush
[2] By Using Magento Root /app/etc/config.php
<?php
return [
    'modules' => [
        'Magento_AdminAnalytics' => 1,
        'Magento_Store' => 1,
        'Magento_AdobeIms' => 1,
        'Magento_AdobeImsApi' => 1,
        'Magento_AdobeStockAdminUi' => 1,
        'Magento_MediaGallery' => 1,
        'Magento_AdobeStockAssetApi' => 1,
        'Magento_AdobeStockClient' => 1,
        'Magento_AdobeStockClientApi' => 1,
        'Magento_AdobeStockImage' => 1,
        'Magento_Directory' => 1,
        'Magento_AdobeStockImageApi' => 1,
        'Magento_AdvancedPricingImportExport' => 1,
        'Magento_Theme' => 1,
        'Magento_Amqp' => 1,
        'Magento_AmqpStore' => 1,
        'Magento_Config' => 1,
        'Magento_Backend' => 1,
        'Magento_Authorization' => 1,
        'Magento_Eav' => 1,
    ]
];
To Disable any Module, convert 1 into 0 & run below command
php bin/magento setup:upgrade
php bin/magento cache:flush
How to Create System.xml Configuration in Magento 2.x
Magento 2 system. xml is a configuration file which is used to create configuration fields in Admin Section
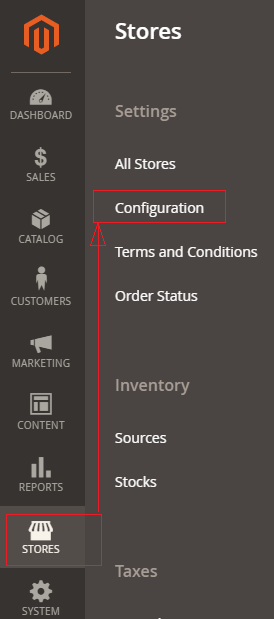
Stores > System > Configuration.
There are following below things nee to follow
while creating custom module, need to put system.xml file in custom module
Vendor Name= John
Module Name= Donald
Custom Module=John_Donald
John/Donald/etc/adminhtml/system.xml
Magento 2.x Persistent Shopping Cart
Magento 2 Persistent Shopping Cart decrease the abandonment cart & increase Sales
Please click below URL Link for more details
Magento 2 Persistent Shopping Cart enabled by Using Database Query
There are following below Database SQL Query need to run
INSERT INTO core_config_data (scope, scope_id, path, value) VALUES ('default', 0, 'persistent/options/enabled', '1');
How To Configure Persistent Shopping Cart in Magento 2.x
Magento 2 Persistent Shopping Cart decrease the abandonment cart & increase Sales
Persistent Shopping Cart allow retention of unpurchased items that are left in the cart and saves them for a time period that is configured in Persistence Lifetime (By Default 31536000 Seconds, 8760 Hours, 1 Year)
If customers want to take advantages of Persistent Shopping Cart below things must done.
For Registered customers must be logged in, if Guest customers want to advantage of Persistent Shopping Cart, must be create account & logged in
For Persistent Shopping Cart, Customer’s Browser’s Cookies must be enabled
By default, Magento 2 Persistent Shopping Cart disabled
Magento 2 Enabled Persistent Shopping Cart
There are following below steps need to follow to enable Persistent Shopping Cart in Magento 2 Admin
[1]- Go To STORES > Configuration, redirects on configuration.

[2]- Left Panel Clicked on Customers > Persistent Shopping Cart redirects on [Right Panel]
[3]- Once redirection on General Options [Right Panel]
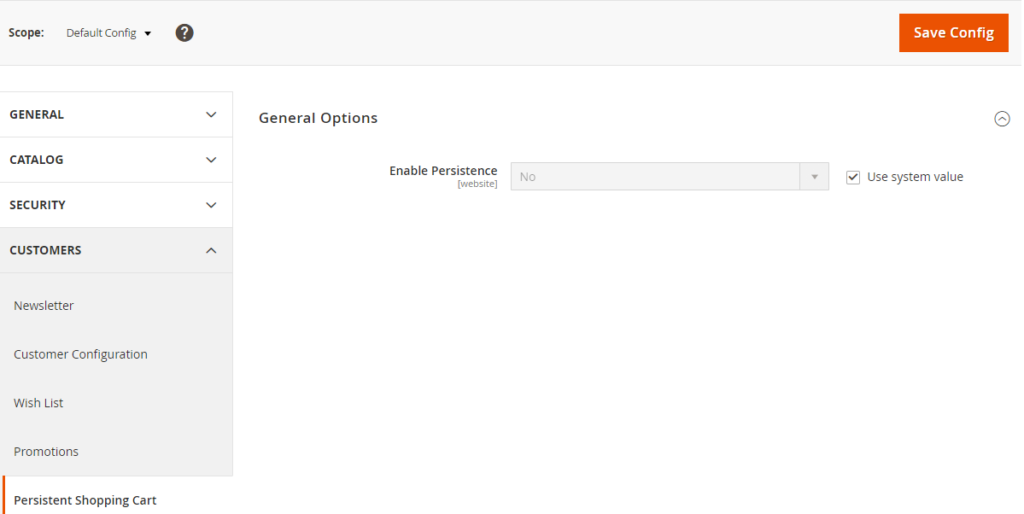
[4] – General Options [Right Panel] having Enable Persistence Panel
By Default Enable Persistence Panel & No Option By Default selected
If Store Owner(Admin) want to enable Persistent Shopping Cart
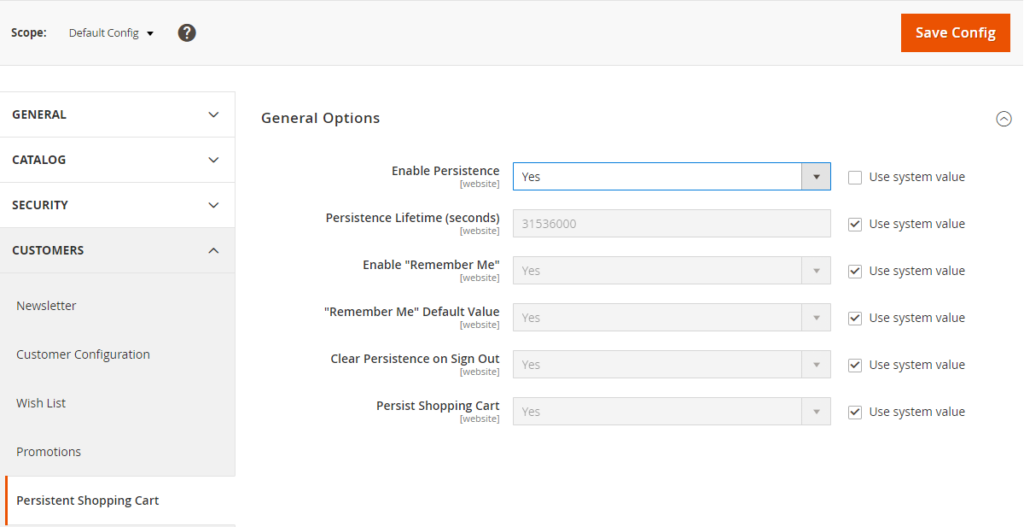
Need to select Yes , There are following below options displayed.
Only Adobe Commerce 2.x B2B
Each option defined as
[4.1]- Persistence Lifetime (seconds) : By default 31536000 Seconds (1 Year Timer Period) , as per store’s requirement, store owner(Admin) can fill time period in seconds.
[4.2]- Enable “Remember Me” : Enable Remember Me to display a checkbox on Customer’s Login page that allows saving the shopping cart information.
[4.3]- “Remember Me” Default Value : It is optional field, if Store Owner(Admin) want to set default option “Remember Me” once customer’s login to store.
[4.4]- Clear Persistence on Sign Out : By Default Yes selected. Store Owner(Admin) want to set “No” option for Clear Persistence on Sign Out to ensure that all shopping cart Items has been saved.
[4.5]- Persist Shopping Cart : By Default Yes selected , if Store Owner(Admin) want to keep the persistent cookie when the session cookie expires, do not need to select No
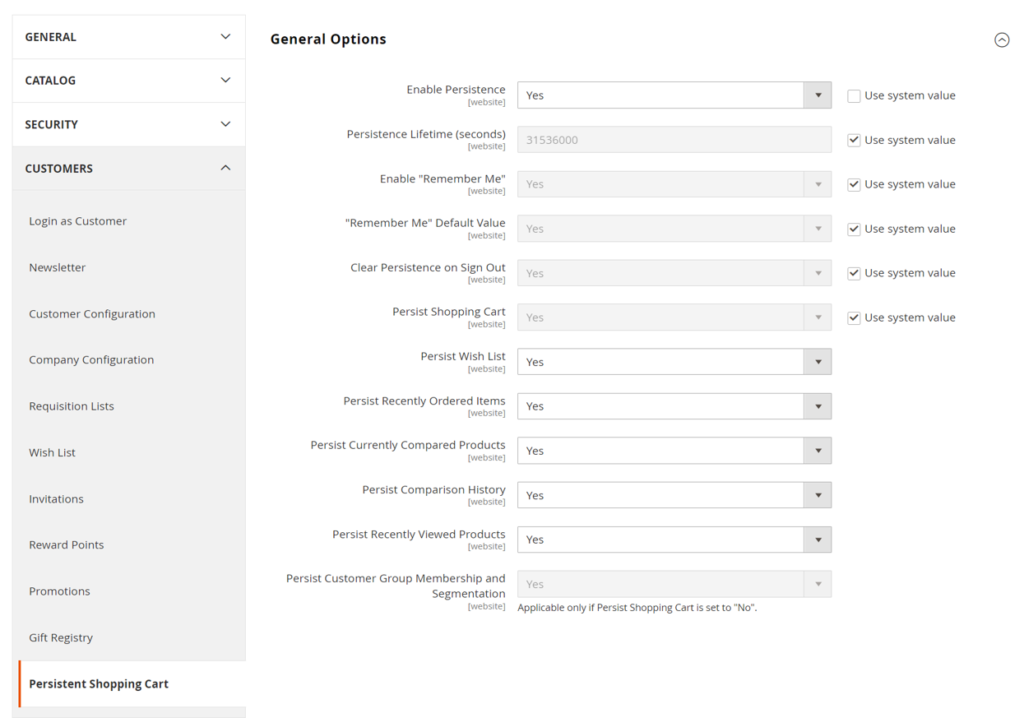
[4.6] – (Adobe Commerce only)
Persist Wish List:: Set Persist Wish List to determine if the state of customer wish lists is retained when the session ends
Yes – The wish list contents are saved when the session ends.
No – The wish list is not saved when the session ends.
[4.7] – Adobe Commerce (Adobe Commerce only) ::
Persist Recently Ordered Items:: Set Persist Recently Ordered Items to determine if the state of recently ordered items is retained when the session ends:
Yes – The state of Recently Ordered Items is saved when the session ends.
No – The state of Recently Ordered Items is not saved when the session ends.
[4.8] – Adobe Commerce (Adobe Commerce only) ::
Persist Currently Compared Products:: Set Persist Currently Compared Products to Yes or No.
[4.9] – Adobe Commerce (Adobe Commerce only) ::
Persist Comparison History:: Set Persist Comparison History to Yes or No.
[4.10] – Adobe Commerce (Adobe Commerce only) ::
Persist Recently Viewed Products:: Set Persist Recently Viewed Products to Yes or No.
[4.11] – Adobe Commerce (Adobe Commerce only) ::
Persist Customer Group Membership and Segmentation:: Adobe Commerce (Adobe Commerce only) Set Persist Customer Group Membership and Segmentation to determine if the state of the customer’s group membership and segmentation criteria are retained when the session ends:
Yes – The state of the customer’s group membership and segmentation data is saved when the session ends.
No – The state of the customer’s group membership and segmentation data are not saved when the session ends.
[5]- Click on Save Config button & run CLI command Flush
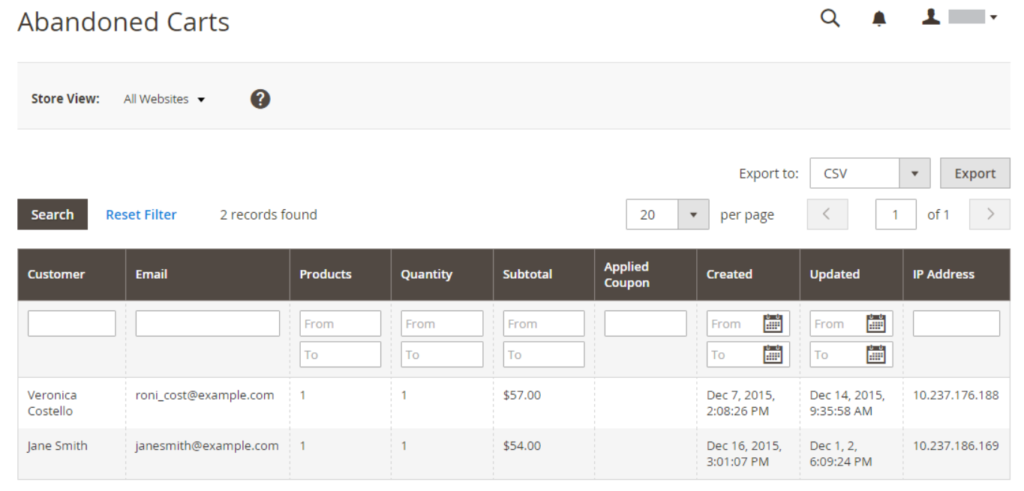
How can get Abandoned Carts
[1] – Go To STORES > Reports > Abandoned Carts
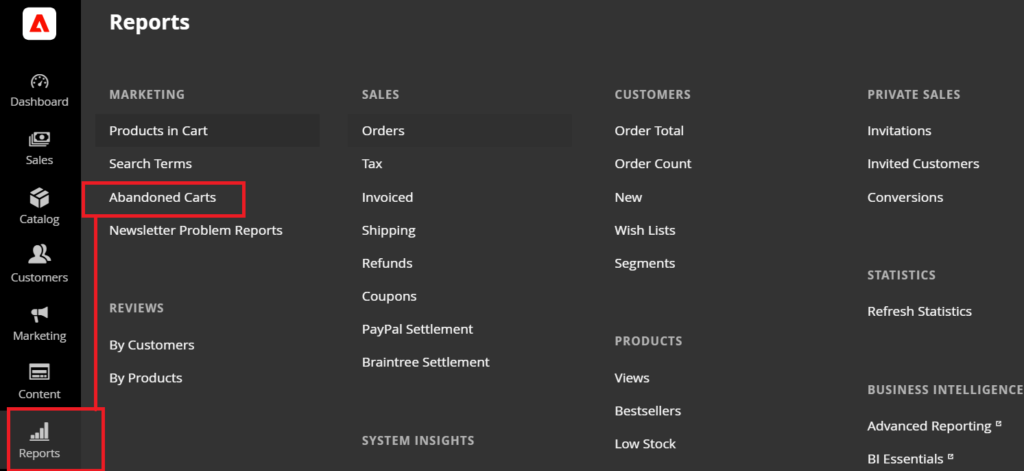
Once clicked displayed listing as below
Magento 2 All Database Tables [500 & more Tables]
How To Set Multi Shipping Settings In Magento 2
How To Set Origin Shipping in Magento 2
Difference Between Offline Shipping Method and Online Shipping Method
Magento 2 Online Customers Options
How To Apply Customer Group Price of Products in Magento 2
How To Add Customer Groups Dropdown in Magento 2 Admin Form and Grid By UI Component
How To Get all Customers Data in Magento 2
How To Create Customer Order in Magento 2 Admin Panel
Magento 2 Login As Customer Not Enabled
How To Configure Customer Account Sharing Options in Magento 2
Magento 2 Redirect To Customer Dashboard After Login
Which Magento 2 database table store customer shipping and billing address
How To Remove Sales Order Data & Customer Data in Magento 2
Which Magento 2 database table store customer’s Email Data
Which Magento 2 Database Table Store Customer Newsletter Data
Which Magento 2 database table store customer’s shipping and billing address
How To Remove Sales Order Data & Customer Data in Magento 2
Which Magento 2 Database Tables Store Customer Rating
Which Magento 2 Database Tables Store Customer Wishlist Products
Magento 2 Increase Customer Session Time
Which Magento 2 Database Table Store Patches
How To Configure Currency in Magento 2.x
There are following below steps need to follow, Magento 2 Admin
[1]- Go To STORES > Configuration, redirects on configuration.

[2]- Left Panel Clicked on General > Currency Setup, redirects on [Right Panel]
[3]- Once redirection on [Right Panel]
[4]- Once clicked / expanded, Currency Options [Right Panel]
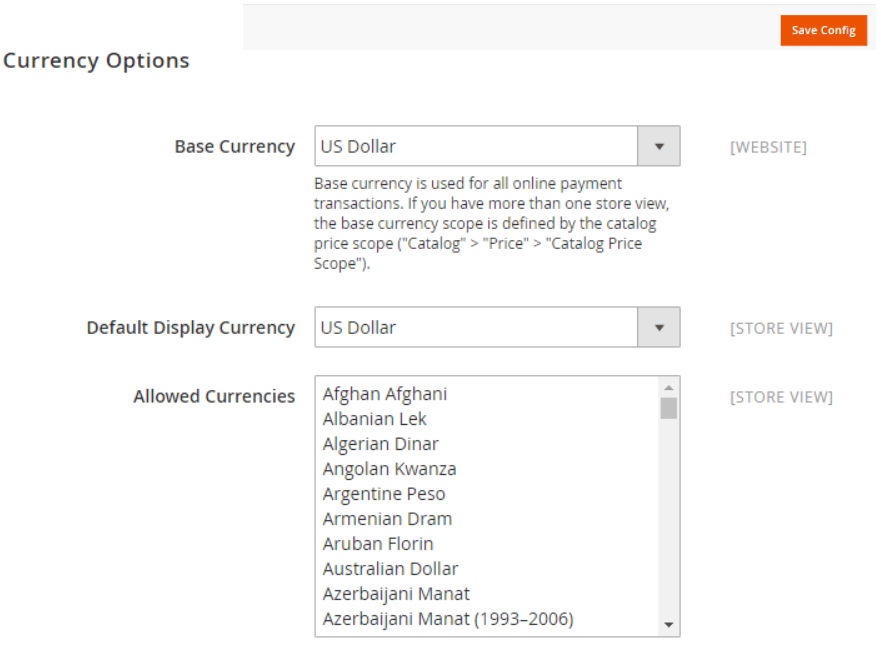
Each Input field (Select Box Values), defined as
[4.1]- Base Currency : Select Base Currency (Main Currency) for online payment transaction, By Default US Dollar Selected
[4.2]- Default Display Currency :Select Default Display Currency that Store Owner(Admin) want to display pricing in store.
By Default US Dollar Selected.
[4.3]- Allowed Currencies : Select list of currencies that Store Owner(Admin) want to allow, in case of Multiple Currency( By Using to hold the ctrl key and then selecting the currency options).
During above operation, if message as cache refreshment display, then close it and refresh it.
[5] Set scope of the base currency:
[5.1]- Once clicked on Left Panel (Catalog > Catalog)
[5.2]- Display Right Panel (Price)
Select Catalog Price Scope as either “Global” or “Website”

[6]- Finally click on Save Config Button
Magento 2.x Browser Capabilities Detection
How To Configure Browser Capabilities Detection in Magento 2.x
Magento 2 performs fully operations, if most of browser enabled both Cookies and JavaScript, As per Browser’s Capabilities Detection, require both Cookies and JavaScript must be enabled stage for Fully Functional Magento 2 Store.
sometimes, Users already set the browser to the highest privacy setting that cookies and JavaScript are not allowed. Magento 2 Admin can configure website store to check the capabilities of each visitor’s browser (either cookies and JavaScript enabled or not), if cookies and JavaScript not enabled send a notification to user’s browser to enable for Fully Functional Magento 2 Store.
There are following below steps need to follow for Browser Capabilities Detection.
[1]- Go To STORES > Configuration, redirects on configuration.
[2]- Left Panel Clicked on General > Web, redirects on [Right Panel]

[3]- Once redirection on [Right Panel]
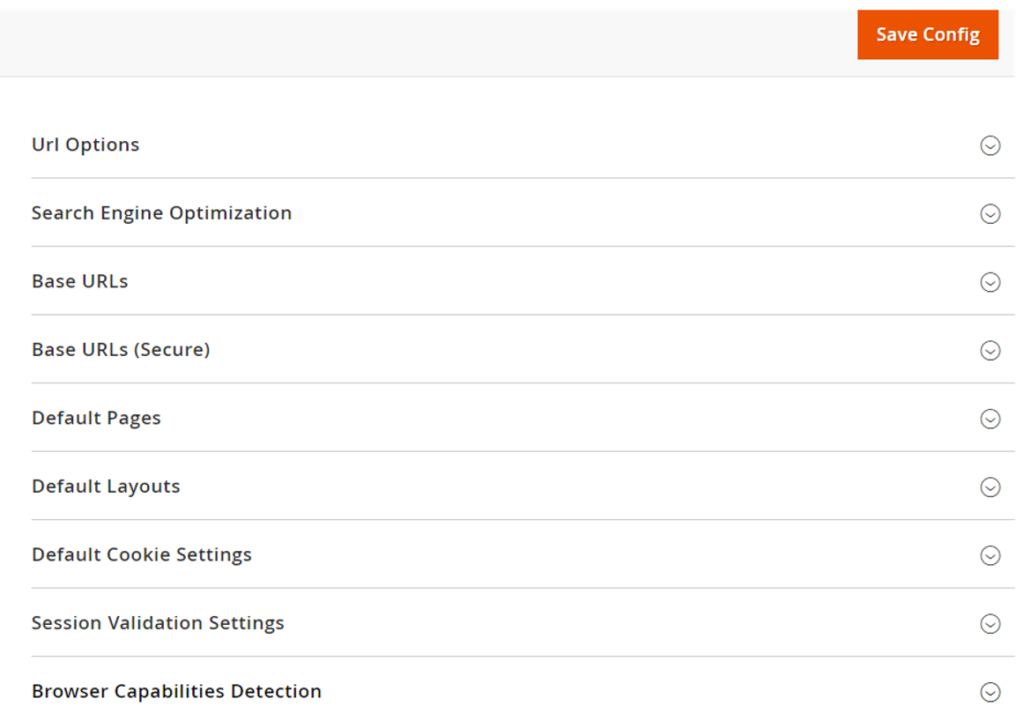
[4]- Once clicked / expanded, Browser Capabilities Detection [Right Panel]
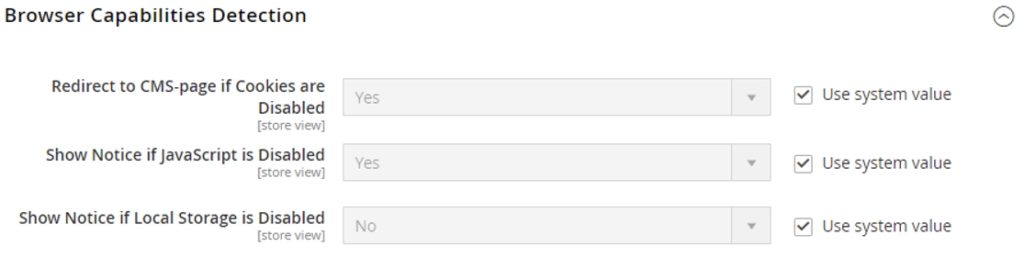
Each Input Field (Drop Down Value) of Browser Capabilities Detection [Right Panel] defined as.
[4.1] Redirect to CMS-page if Cookies are Disabled : By Default selected Yes, It is allowed to display instructions & guidelines that describe how to configure the browser to allow Cookies , browser’s Cookies disabled.
[4.2] Show Notice if JavaScript is Disabled : By Default selected Yes, It is allowed to display instructions & guidelines as Alert notification banner above header that describe how to configure the browser to allow JavaScript, browser’s JavaScript disabled.
[4.3] Show Notice if Local Storage Disabled : By Default selected No
It is allowed to display instructions & guidelines as Alert notification , if Local Storage Disabled
[5]- Finally click on Save Config Button
How To Configure Session Validation Settings in Magento 2.x
There are following below steps need to follow for Session Validation Settings.
[1]- Go To STORES > Configuration, redirects on configuration.

[2]- Left Panel Clicked on General > Web, redirects on [Right Panel]
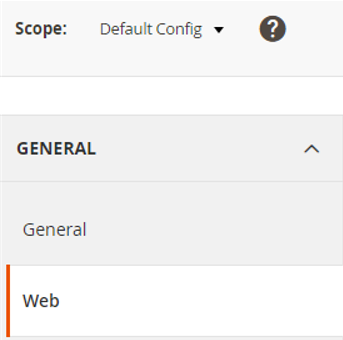
[3]- Once redirection on [Right Panel]

[4]- Once clicked / expanded, Session Validation Settings [Right Panel]
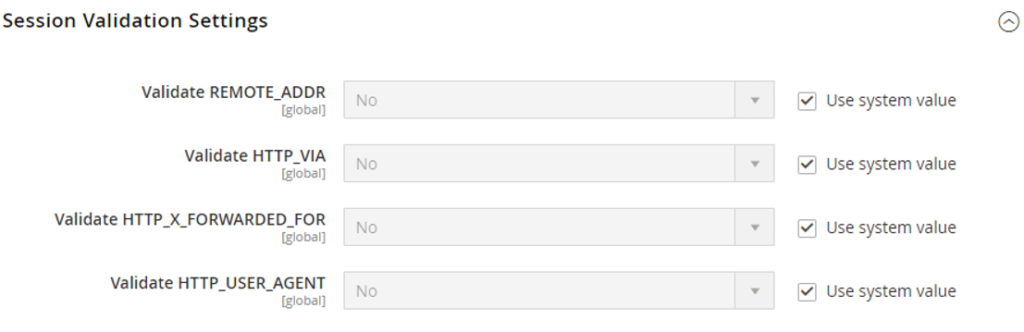
Each Input (Drop Down)Field of Session Validation Settings defined as
[4.1]- Validate REMOTE_ADDR : By Default No selected
Set Validate REMOTE_ADDR to “Yes”
To verify that the IP address of a request matches what is stored in the $_SESSION variable.
[4.2]- Validate HTTP_VIA : By Default No selected
Set Validate Validate HTTP_VIA to “Yes”
To verify that the proxy address of an incoming request matches what is stored in the $_SESSION variable.
[4.3]- Validate HTTP_X_FORWARDED_FOR : By Default No selected
Set Validate Validate HTTP_X_FORWARDED_FOR to “Yes”
To verify that the forwarded-for address of a request matches what is stored in the $_SESSION variable.
[4.4]- Validate HTTP_USER_AGENT : By Default No selected
Set Validate Validate HTTP_USER_AGENT to “Yes”
To verify that the browser or device that is used to access the store during a session matches what is stored in the $_SESSION variable.
[5]- Click on Save Config button & run CLI command Flush