Magento 2 Configure Content Management allow setting, how to configure / use WYSIWYG Editor settings.
There are following below steps need to follow
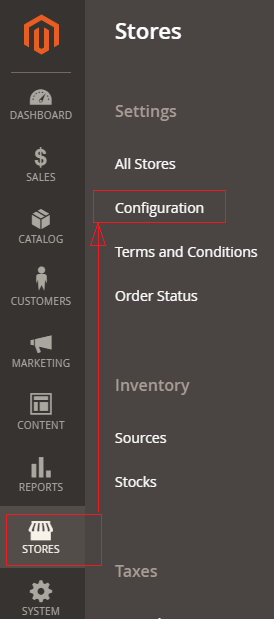
[1]- Go To STORES > Configuration, redirects on configuration
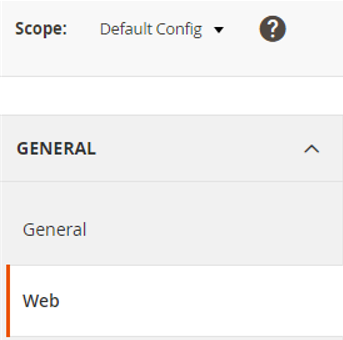
[2]-Left Panel Clicked on General > Content Management, redirects on WYSISYG Options [Right Panel]
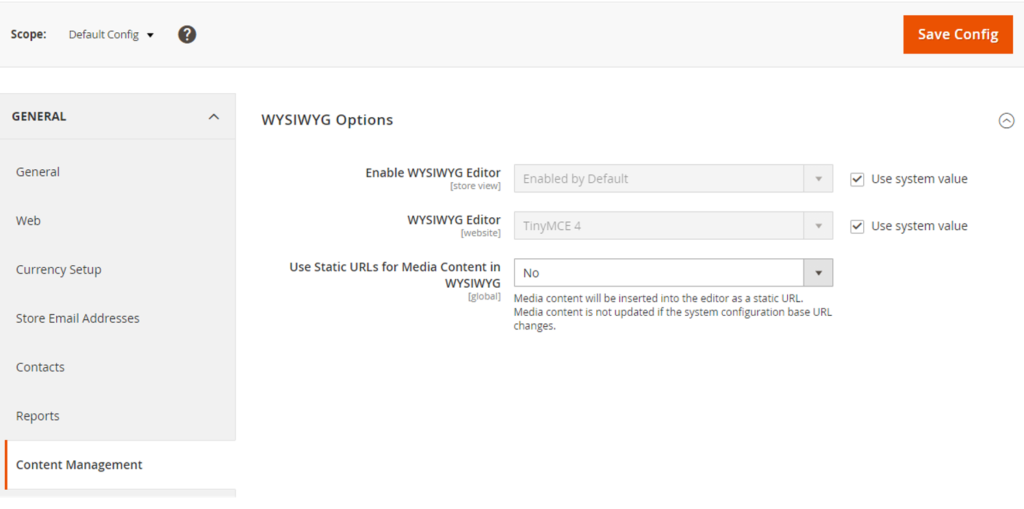
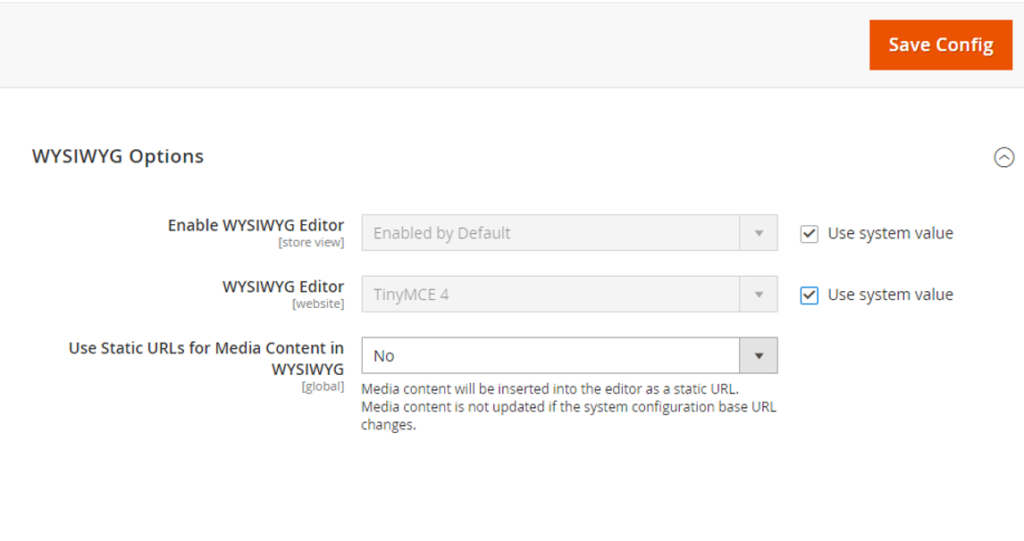
[3]-Once WYSISYG Options [Right Panel] expanded , there are following below options displayed.
Enabled WYSISYG Editor :
Once clicked on Drop Down there are three options as
First Option “Enabled by Default” -By Default Selected Second Option “Disabled by Default” -Select, If do not want to use WYSISYG Third Option “Disabled Completely” -Select, If want to disable WYSISYG
WYSIWYG Editor :
Once clicked on Drop Down there are two options as
First Option “TinyMCE 4.” By Default Selected Second Option “TinyMCE 3”, already deprecated before Version Magento 2.3.2
Use Static URLs for Media Content in WYSIWYG :
This option must be selected as No. Because when Admin insert the media in WYSIWYG editor, it automatically takes base URL If option selected as Yes, It will allow to insert full static URL of Media, once Store Base URL, When Store move from local to live, Admin will have to change all the Media URLs manually, So It is hectic task, keep it as No as it is.
[4] Click on Save Config button & run CLI command Flush
Magento 2 Configuration General Settings is important terms.
There are following below section included as:
Country Options
State Options
Locale Options
Store Information
Single-Store Mode
How to configure Magento 2 General Settings
Magento 2 Admin
[1]- Go To STORES > Configuration, redirects on configuration page
[2]- Left Panel click on General > General , expanded Right Panel with combination of following things as
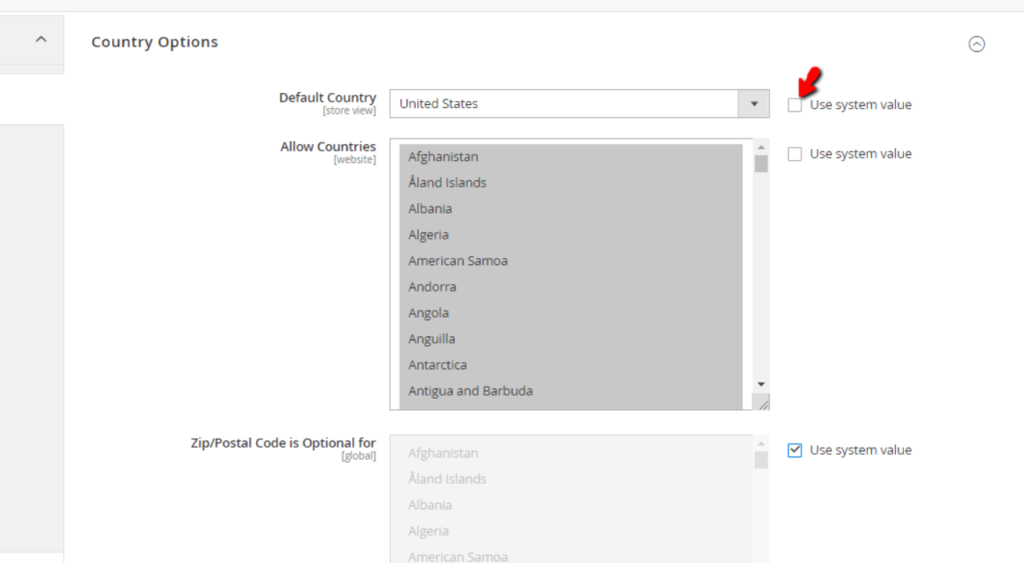
[2.1]- Country Options
There are following below subsections of Country Options are described as
Default Country : This represents, which country admin want to operate store, By Default United States selected.
Allow Countries : This represents, Admin, how many countries are allowed to view store, By Default, all countries are selected.
Zip/Postal Code is Optional for : This represents, Admin, how many countries [Zip/Postal Code] are allowed to view store, By Default, all Zip/Postal Code are selected, this is optional field
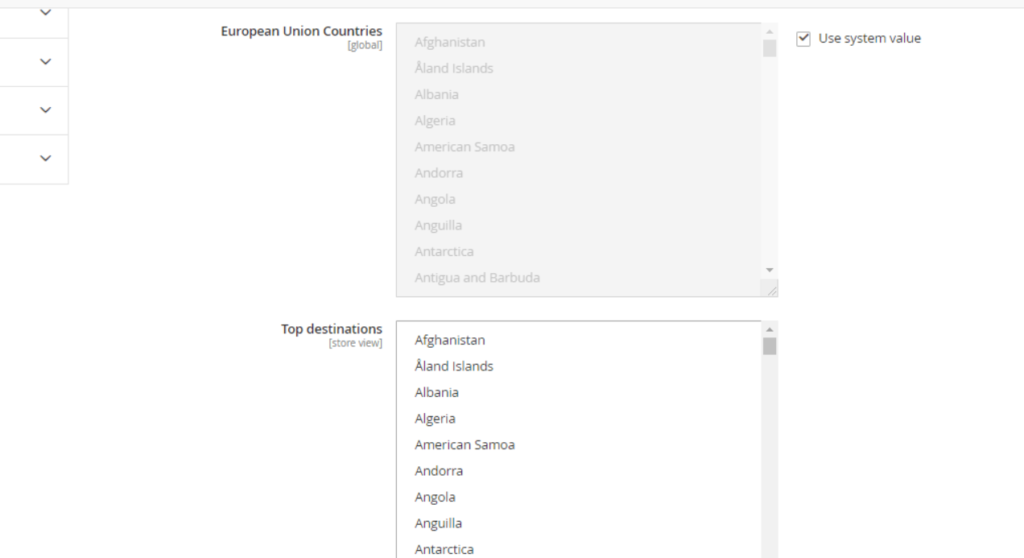
European Union Countries : Admin can exclude countries that will not be considered as members of the EU for the purposes of store
Top destination : Admin can select counties that will be positioned at the top of any county list displayed for customers before it gets to alphabetic order.
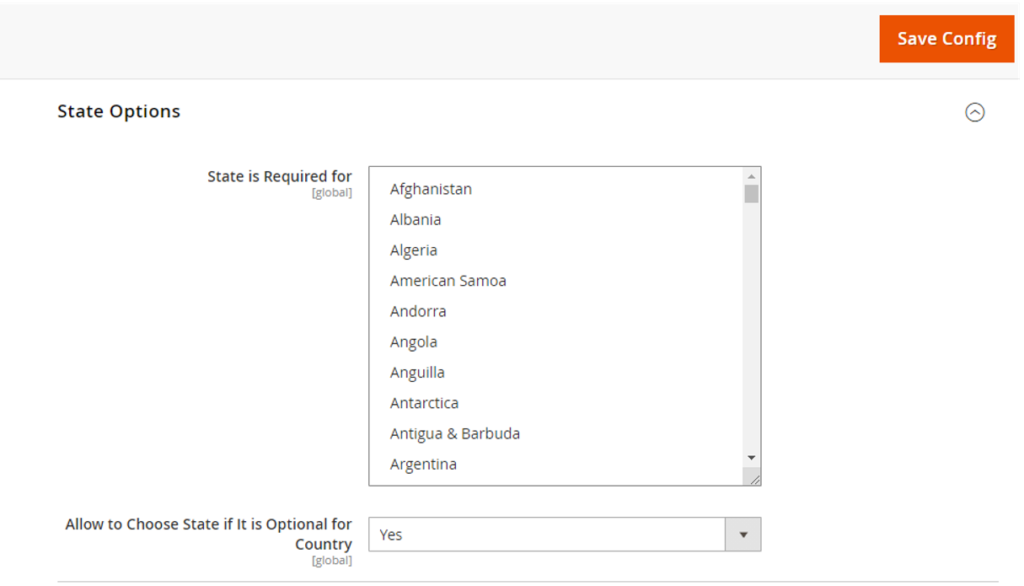
[2.2]- State Options : Once expanded State Options, The following below things displayed.
There are following below subsections of State Options are described as
State is Required for : This represents, How many countries are allowed by Admin for customers shopping, either can select or some selected countries,
By Default below following countries are selected, This is required field
Australia Brazil Canada China Colombia Croatia
Estonia India Latvia Lithuania Mexico Poland
Romania Spain Switzerland United States
Allow to Choose State if It is Optional for Country: This represents, allow State County to add, even if it is optional for Country
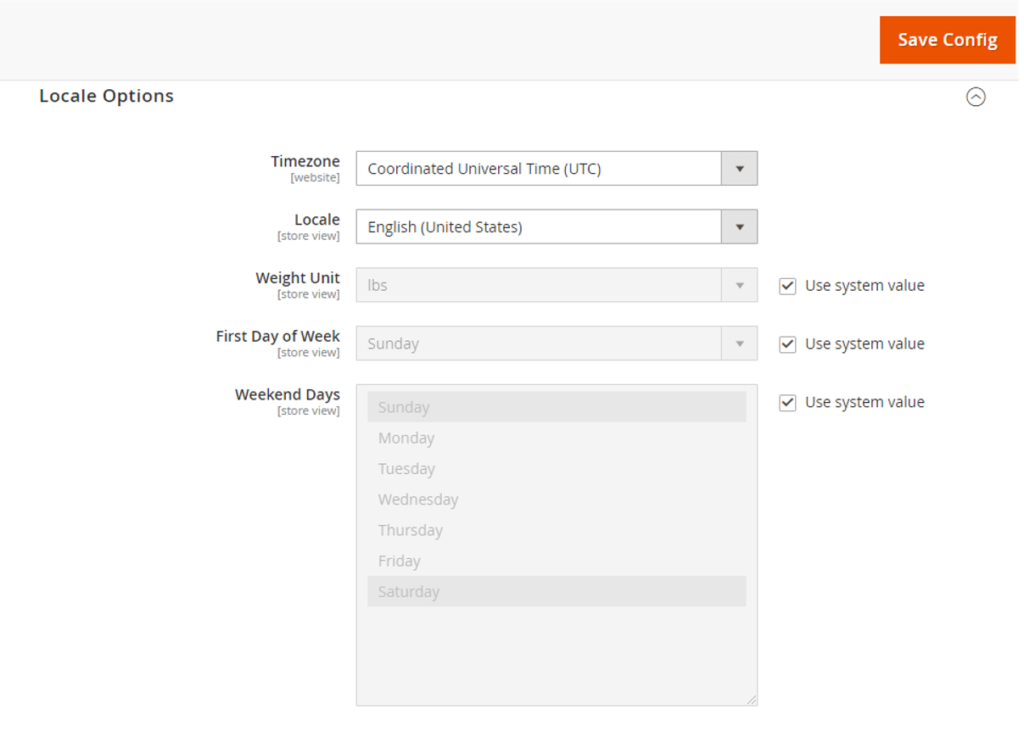
[2.3]– Locale Options : Once expanded Locale Options, The following below things displayed.
Timezone : This represents, Time Zone, Admin can choose Time Zone, as per Store Need. By Default Selected Time zone, depends on which Time zone selected @time of Magento 2 Installation
Locale : This represents, Language, Admin can decide Language, as per Store Need. By Default Selected Language, depends on which Language selected @timeof Magento 2 Installation
Weight Unit : This represents, the weight measurement unit
First Day of Week : This represents, which day, Admin want to select as “First Day of Week”, By Default Sunday selected
Weekend Days: This represents, which day, Admin want to select as “Weekend Days”, By Default Sunday & Saturday selected
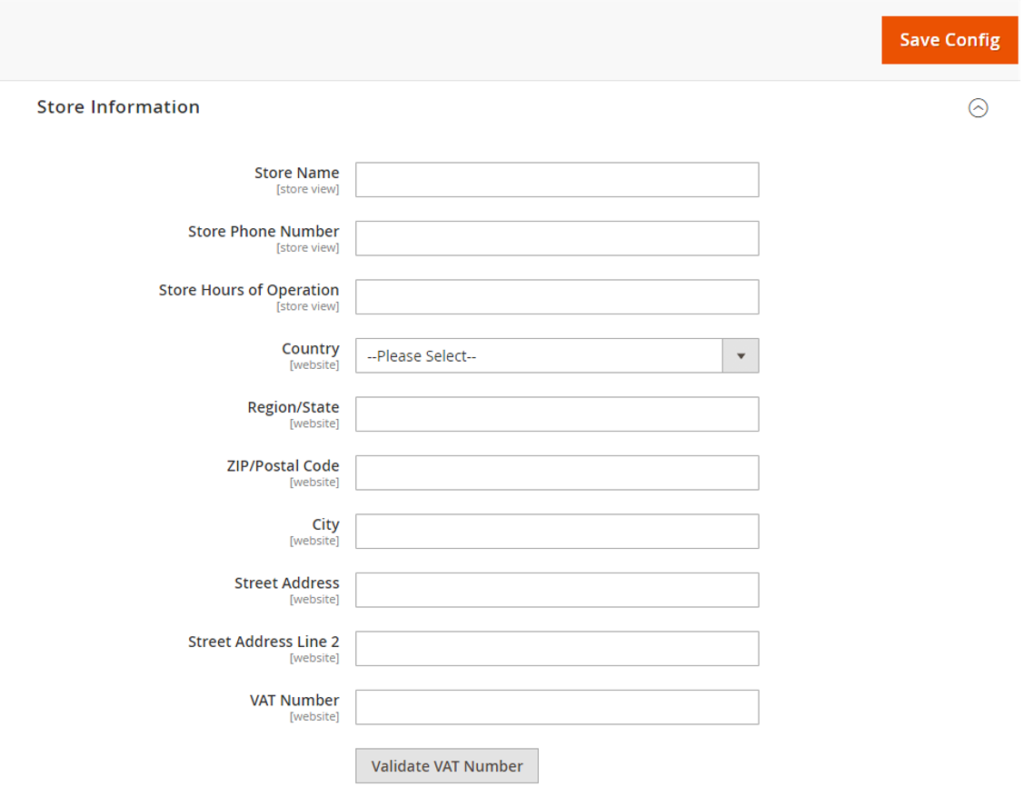
[2.4]– Store Information : Once expanded Store Information, The following below things displayed.
Store Name – This represents official name of your Online Store.
Store Phone Number – This represents official store’s contact phone number of your Online Store.
Store Hours of Operation – This represents official store’s working hours.
Country – This represents to select the country of your store’s base address..
Region/State – This represents to enter the Region/State of your store’s base address
ZIP/Postal code – This represents to enter the ZIP/Postal code of your store’s base address.
City – This represents to enter the ZIP/Postal code of your store’s base Address
Street Address – This represents to enter the Street Address of your store’s base address.
Street Address Line 2 – This represents to enter the second Street Address of your store’s base Address, this is optional second Street Address of your store’s base address.
VAT Number – This represents to enter the VAT number if applicable.
Validate VAT Number – This represents to initiate verification on the entered VAT number. If you have entered VAT number, please make sure to click on it, to verify VAT Number
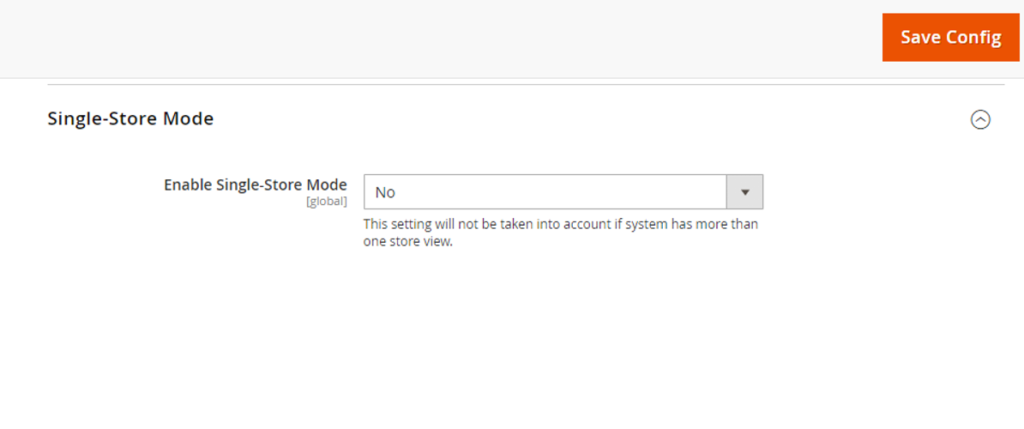
[2.5]– Single-Store Mode : This represents to allows to control whether the “Single-Store” mode is enabled or disabled.
[2.6] Click on Save Config button & run CLI command Flush
Magento 2.3.0 & higher version supports Multi Source Inventory (MSI)
Magento 2.3.0 provides high revolution, high flexibility, cost-effectiveness, and efficiency Inventory Management to allow the merchants to control inventory by using single or multiple sources and sales channels, It is called “Multi Source Inventory”
Magento 2.3.0 & higher version Multi Source Inventory[MSI] supports merchants to manage their inventory in more than one locations to accurately reflect their physical inventories.
Magento 2.3.0 & higher version MSI Configuration
There are two things [Magento 2 Admin]
[1] Multi Source Inventory Sources
MSI allows Admin to create sources for each product inventory location
There are following below steps need to follow
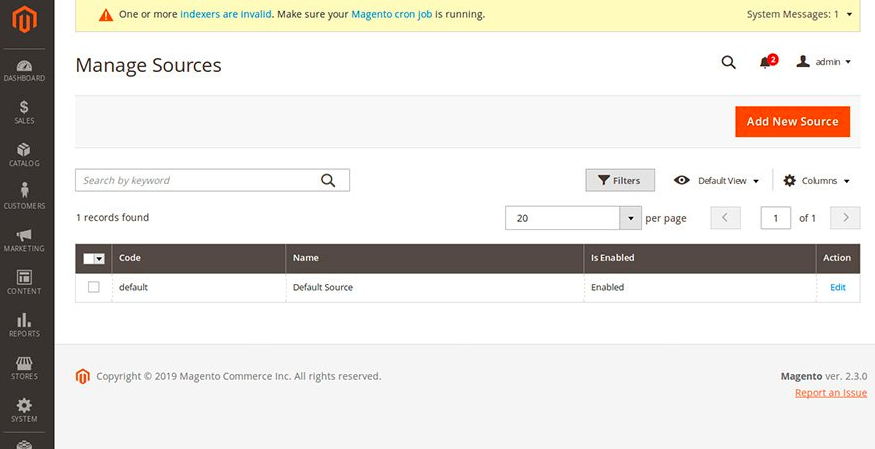
[1.1] Go to Admin -> Stores -> Inventory -> Sources
[1.2] Once clicked on Add New Source Button
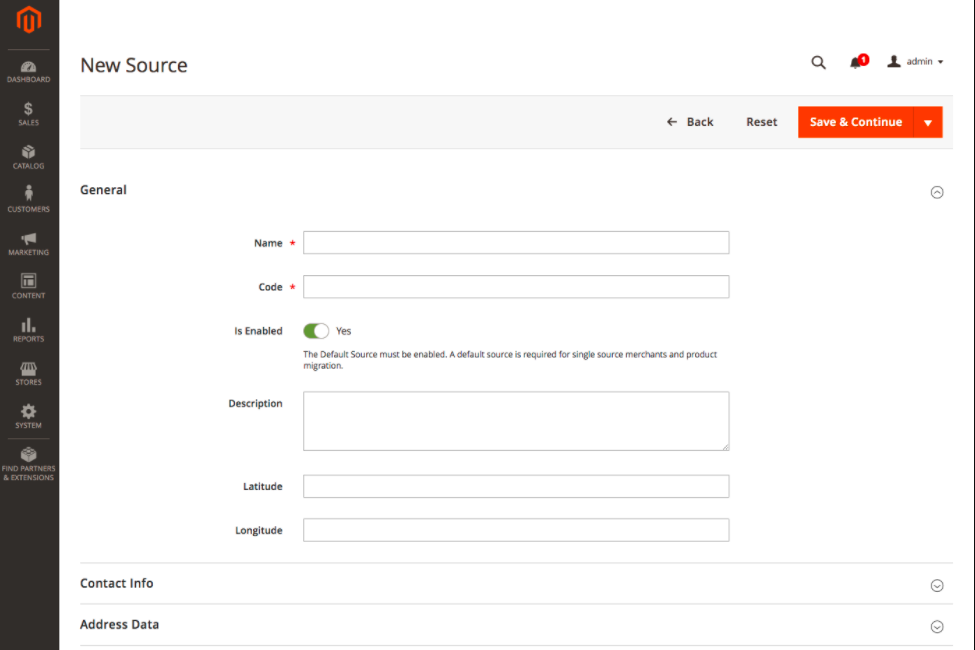
There are following General Form [New Create Source] field info
Name: Put Name of Source, Required Field
Code: Put Code of Source, Required Field “can’t change the Code of the source, once filled”
Is Enabled: Do Yes for Enabled
Description: Put Description, Optional Field
Latitude: Put Latitude, Optional Field
Longitude: Put Longitude, Optional Field
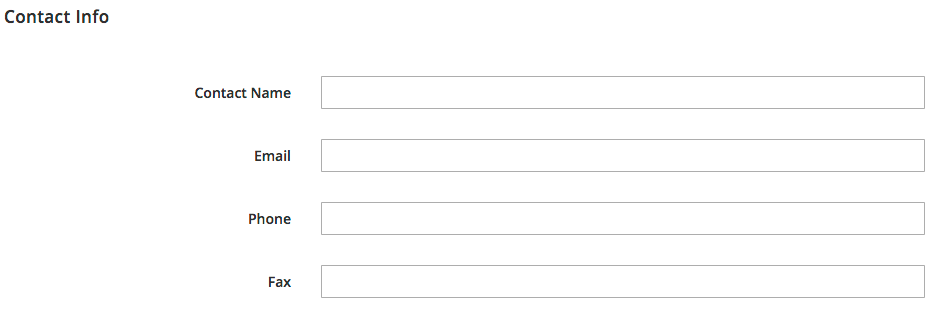
[1.3] Once clicked on Contact Info Tab & expanded
There are following Address Contact Form field info
Contact Name: Put Contact Name, Optional Field
Email: Put Email, Optional Field
Phone: Put Phone, Optional Field
Fax: Put Fax, Optional Field
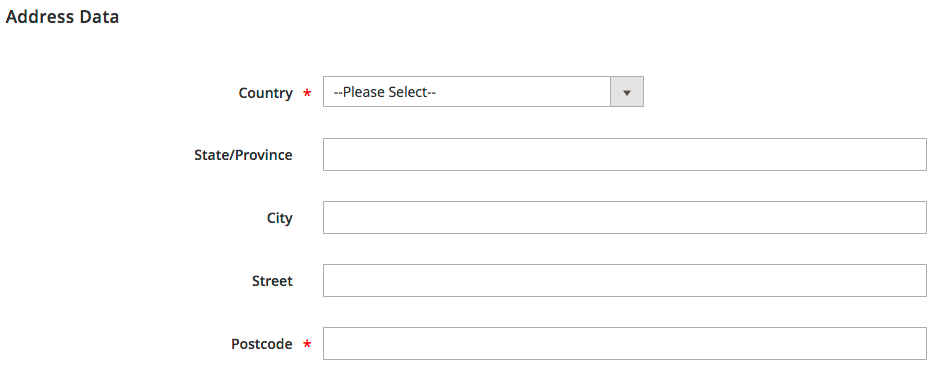
[1.4] Once clicked on Address Data Tab & expanded
There are following Address Data Form field info
Country: Select country from drop down country list, Required Field
State/Province: Put State/Province, Optional Field
City: Put City, Optional Field
Street: Put Street, Optional Field
Postcode: Put Postcode, Required Field
[1.5] Finally, clicked on Save Button.
[2] Multi Source InventoryStocks
[2.1] Go to Admin -> Stores -> Inventory -> Stocks
Select Stocks, redirects on Manage Stock
[2.1] Once Clicked on Add New Stock, redirects on below form
Name: Put name of stock, Required Field [must be unique name]
Sales Channels: Admin can assign the stock to one or more listed sales channels. The sales channel is (mostly) your Magento views.
Sources: Admin need to choose those Assign Sources., to apply to the new stock. Then, click Done.
[2.3] Finally clicked on Save Button
MSI allows to delete the product stocks and Admin can reassign any sales channel and sources to the Stocks. If a sales channel is not assigned to a custom stock, it will be assigned to the Default Stock.
Except default product stock, all other stocks can be modified as Stock Name , Stock sales channel and the assigned sources.
Once the sources are created and stocks are linked to the respective website, Next Step, MSI Saleable Quantity
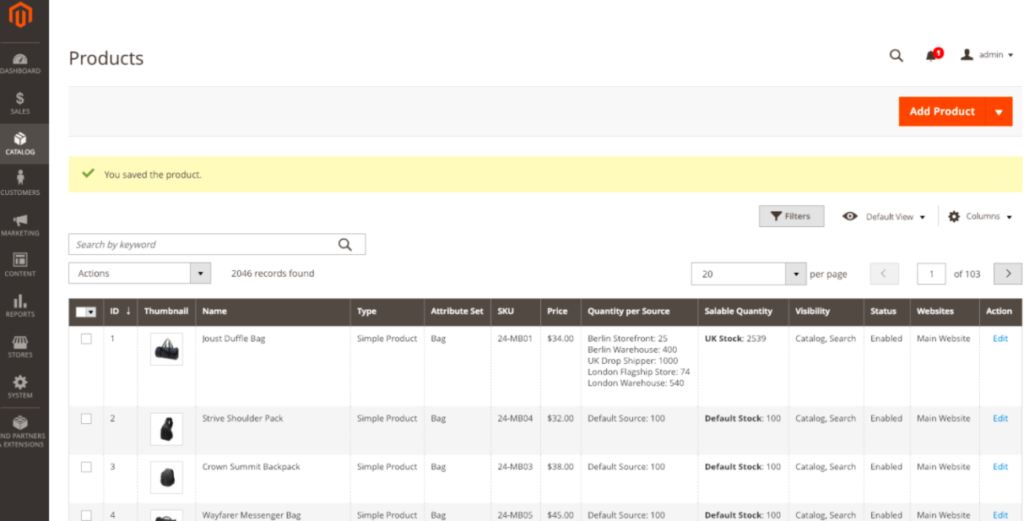
MSI Saleable Quantity :
This presents in Product Grid Page as ‘Quantity per Source’ and ‘Salable Quantity’.
Go To Catalog -> Products
The following terms are important as you work with Inventory Management APIs:
[a] – Sources:: represent physical locations that store and ship available products. These locations can include warehouses, brick-and-mortar stores, distribution centers, and drop shippers. (Any location can be designated as a source for virtual products.)
[b] – Stocks:: map a sales channel (currently limited to websites) to source locations and on-hand inventory. A stock can map to multiple sales channels, but a sales channel can be assigned to only one stock.
[c] – Aggregate Salable Quantity:: is the total virtual inventory that can be sold through a sales channel. The amount is calculated across all sources assigned to a stock.
[d] – Reservations:: track deductions from the salable quantity as customers add products to carts and complete checkout. When an order ships, the reservation clears and deducts the shipped amounts from specific source inventory quantities.
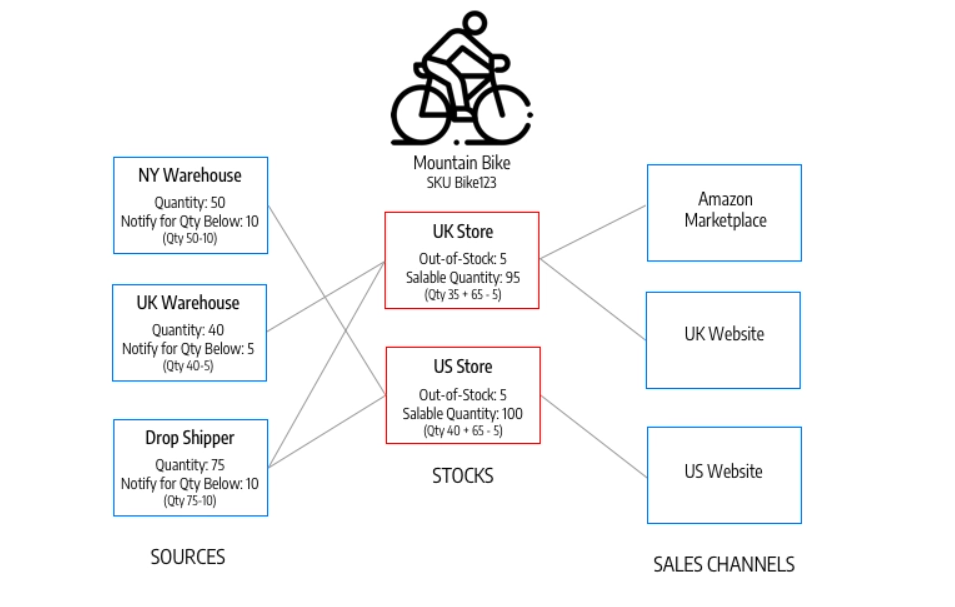
Briefly Explained With Example
In this below diagram, a bicycle merchant has inventory for a mountain bike in two warehouses and a drop shipper. He has two stocks with configured website sales channels and sources. When a customer shops through the UK website, Magento aggregates bike inventory from the UK warehouse and the drop shipper sources, for a salable quantity of 95. The bike can be shipped from either the warehouse or the drop shipper, but not the NY warehouse. Amazon Marketplace has the same stock, drawing from the same aggregate stock as the UK website.
[a] – Source – Defines a physical stock.
[b] – SourceItem – A relation object that represents the amount of a specific product at a physical source. We use this entity for updating inventory on each source. Quantities might change as a result of synchronizing with an external Product Information Management (PIM) or Enterprise Resource Planning (ERP) system, or internally as a stock deduction during the checkout process. A SourceItem cannot be used for retrieving data that must be rendered on front-end, because only aggregated data should be used for all validations and UI representation.
[c] – StockItem – Also known as Aggregated Virtual Stock. This is read-only data that the re-indexation process generates. Based on a pre-defined mapping, we define what sources are assigned to the current scope (sales channel) and aggregate quantities from all assigned sources. We also use StockItem to check if a product is in or out of stock. Making this segregation by Read-Only interface (StockItem) and Write-Only interface (SourceItem), the Inventory architecture achieves Command Query Responsibility Segregation (CQRS). As a result, all GET HTTP requests should use StockItem entity, and all POST/PUT should use SourceItem.
Magento 2 Store Email Addresses having different email addresses for different email transactions, These email addresses are used to send automated emails transactions to customers.
By default, Magento 2, There are five different email addresses for each store(view)
General Contact : Defines General Contact Email
Sales Representative : Defines Sales Email
Customer Support : Defines Customer Support Email
Custom Email 1 : Defines Custom Email 1
Custom Email 2 : Defines Custom Email 2
There are following steps need to follow.
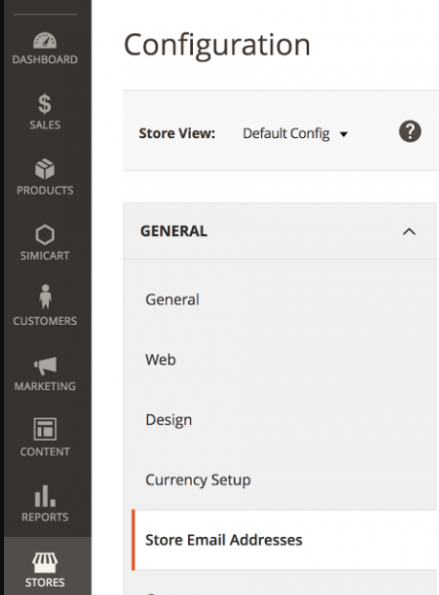
[1]- Go STORES > Configuration, redirects Configuration section.
[2]- Left panel, Configuration section choose
GERERAL > Store Email Addresses.
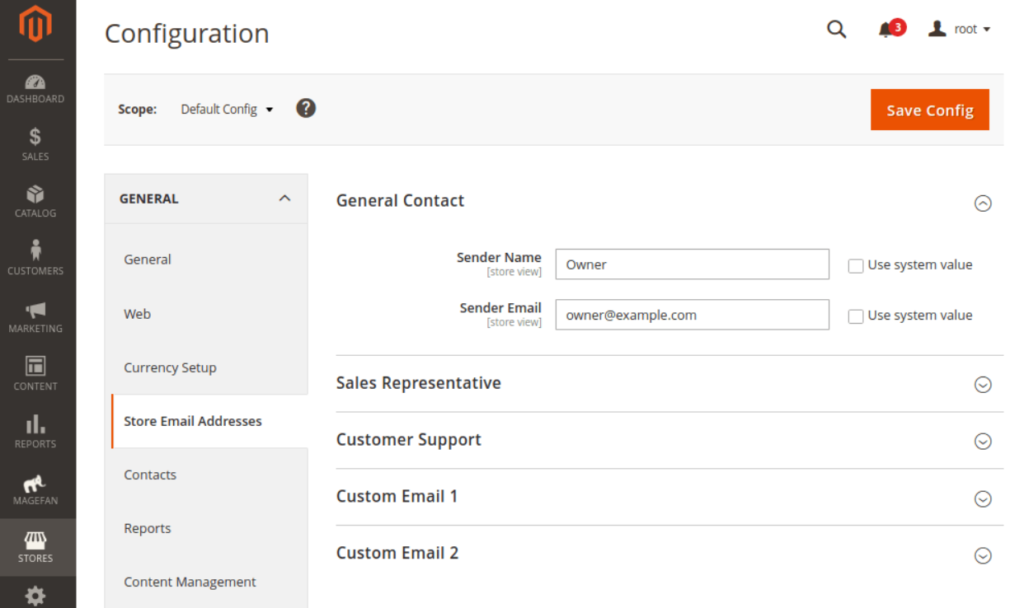
[3]- Once Clicked on Store Email Address, Right Panel Opened, with combination of five different email addresses
To Open any any email address, need to expand , particular Email Section
As above image, General Contact Section, Admin need to configure Sender Name and Sender Email for various roles inside your Magento store (Similarly put Sender Name and Sender Email for Sales Representative, Customer Support, Custom Email 1, Custom Email 2).
[5]- Click on Save Config button & run CLI command Flush
[1] Go STORES > Configuration, redirects Configuration section.
[2] Go to General –> Contacts
[3] Right Panel, Expand Contact Us
By Default Contact Us Form Enabled , Select No Option to Disable Contact Us Form
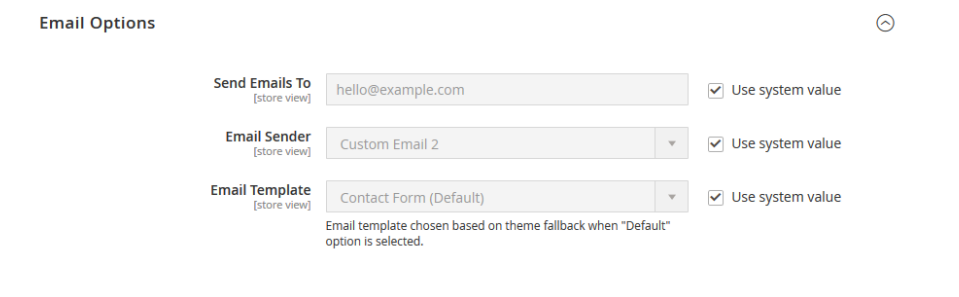
[4] Right Panel, Expand Email Options
Send Emails To: Admin need to put email on which Admin want to receive contact us inquiries.


Email Sender: While configuring the Store Email address section Admin already added sender and store email id, Same Senders are being displayed here, need to select the same Sender

Email Template: By default, "Contact form (Default)" is selected
If Admin want to change, can select any other Email Template
Magento 2 events are used to run custom code in response to any particular Magento 2 event or custom event. Events are dispatched by modules when certain actions are triggered. When an event is dispatched, it can pass data to any observers configured to watch that event.
How Can Use Magento 2 Events
Events are dispatched by Magento 2 modules whenever specific actions are triggered. When an event dispatches, it passes data to the observer that is configured to watch (or monitor) that event. You can dispatch Magento 2 Events using the Magento\Framework\Event\Manager class
List of All Events Magento 2 Events-Attachment-PDF-Format