

The Following below admin setting required to add Store Information in Magento 2 Store.
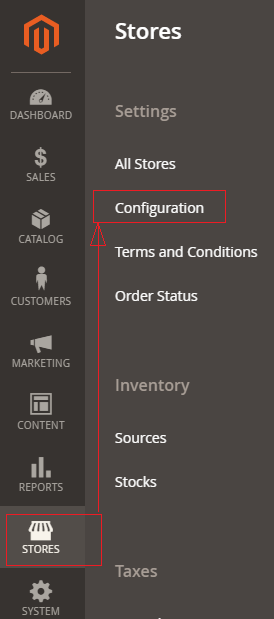
Step [1] – Go STORES > Configuration, redirects Configuration section.
Step [2] – Left panel, choose GENERAL > General, redirects right Panel section
Country Options Section:
Once click on Country Options of Right Panel section, each field explained as below
- Default Country: Select default country as per your Business Store need.
- Allow Countries: Select countries, where you want to sell
- Zip/Postal Code: Select zip or postal code as per your Business Store need.
- European Union Countries: Select European Union countries, if you want to sell in European Union countries
- Top Destinations: Select Top Destinations countries as per your Business Store need.
State Options Section:
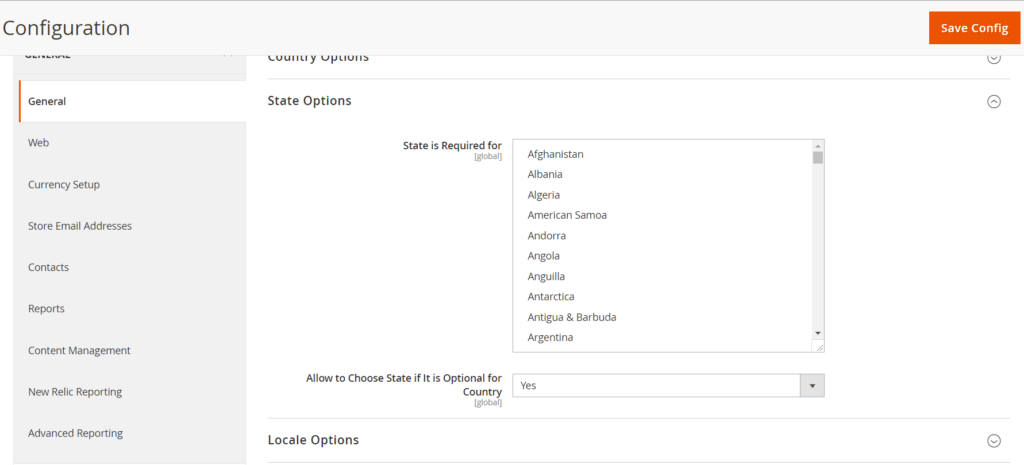
Once click on State Options of Right Panel section, each field explained as below
- State is Required for: Select state as per your Business Store need.
- Allow to Choose State if It is Optional for Country: Select state from optional country as per your Business Store need.
Locale Options:

Once click on Locale Options of Right Panel section, each field explained as below
- Timezone: Select Timezone as per your Business Store need.
- Locale: Select Locale as per your Business Store need.
- Weight Unit: Select Weight Unit as per your Business Store need.
- First Day of Week: Select First Day of Week as per your Business Store need.
- Weekend Days: Select Weekend Days as per your Business Store need.