Magento 2 Origin Shipping Setting need to calculate the shipping costs for the shipments made from your store as well as calculate product tax cost.
The following below admin settings need to follow.
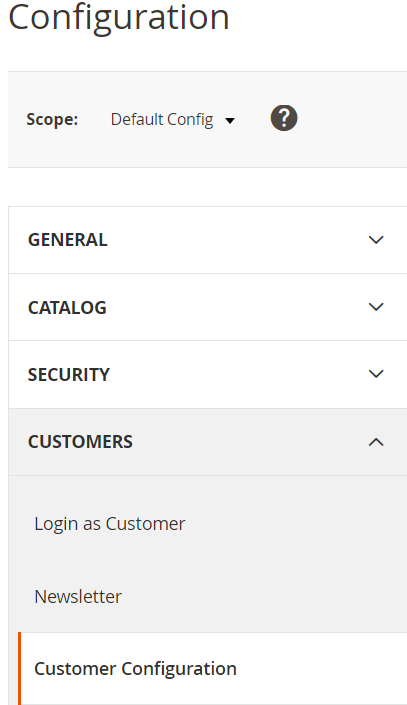
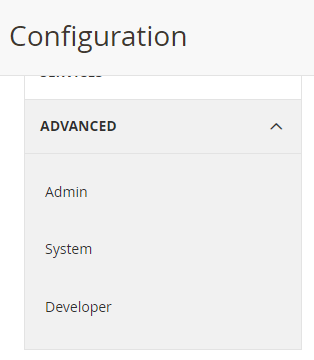
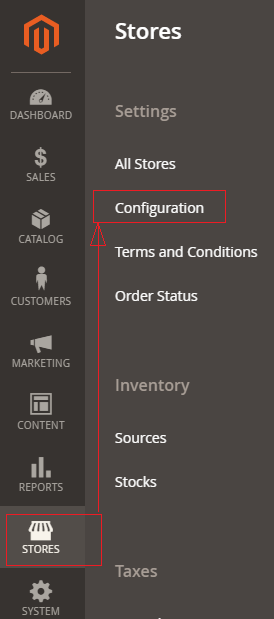
Step [1] – Go STORES > Configuration, redirects Configuration section.
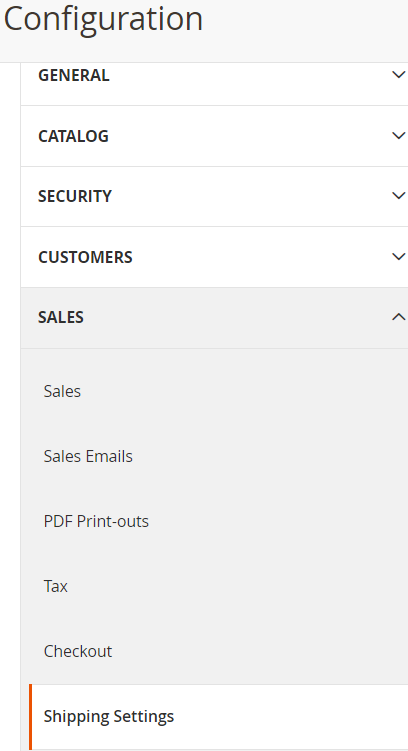
Step [2] – Left panel, choose SALES > Shipping Settings.
Step [3] – Right panel, Expand the
Origin section
&
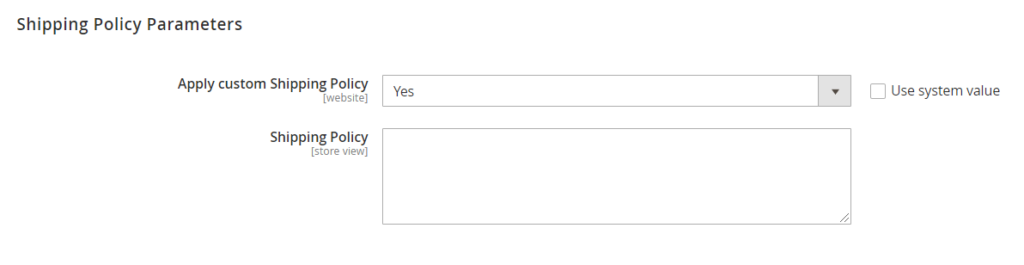
Shipping Policy Parameters section
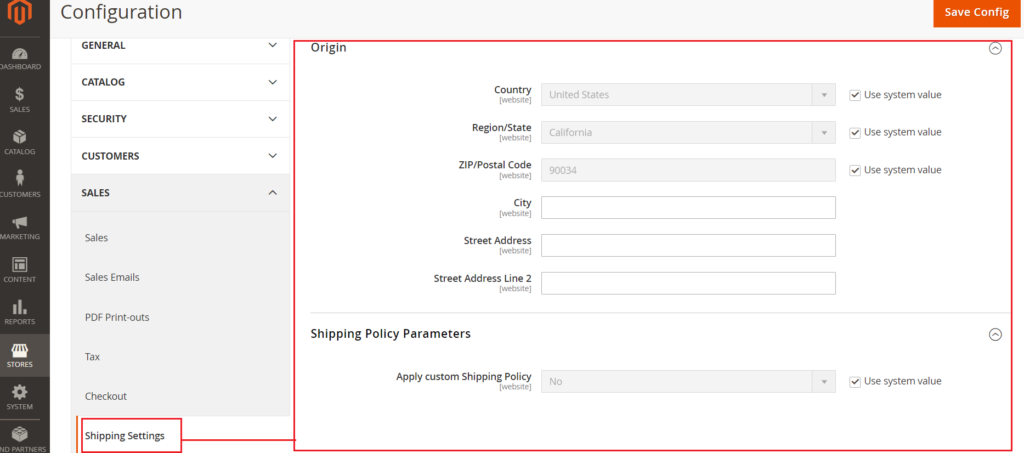
Step [4] – Origin section having the following below fields.
Before filling any input field, need to uncheck Use System Value
Country : By default, United States, fill as per Store Origin need.
Region/State : By default California, fill as per Store Origin need.
ZIP/Postal Code : By default 90034, fill as per Store Origin need.
City : fill City as per Store Origin need.
Street Address : fill Street Address as per Store Origin need.
Street Address Line 2 : fill Street Address Line 2 as per Store Origin need.
Shipping Policy Parameters section having Apply custom Shipping Policy, By default No selected
Once Yes selected , new input field Shipping Policy displaying to fill
shipping policy content as per Store Shipping Policy need
Click on Save Config button & run CLI command Flush
Finally, Origin Shipping setting has been done.
Magento 2 All Database Tables [500 & more Tables]
How To Set Multi Shipping Settings In Magento 2
How To Set Origin Shipping in Magento 2
Difference Between Offline Shipping Method and Online Shipping Method
Magento 2 Online Customers Options
How To Apply Customer Group Price of Products in Magento 2
How To Add Customer Groups Dropdown in Magento 2 Admin Form and Grid By UI Component
How To Get all Customers Data in Magento 2
How To Create Customer Order in Magento 2 Admin Panel
Magento 2 Login As Customer Not Enabled
How To Configure Customer Account Sharing Options in Magento 2
Magento 2 Redirect To Customer Dashboard After Login
Which Magento 2 database table store customer shipping and billing address
How To Remove Sales Order Data & Customer Data in Magento 2
Which Magento 2 database table store customer’s Email Data
Which Magento 2 Database Table Store Customer Newsletter Data
Which Magento 2 database table store customer’s shipping and billing address
How To Remove Sales Order Data & Customer Data in Magento 2
Which Magento 2 Database Tables Store Customer Rating
Which Magento 2 Database Tables Store Customer Wishlist Products
Magento 2 Increase Customer Session Time
Which Magento 2 Database Table Store Patches