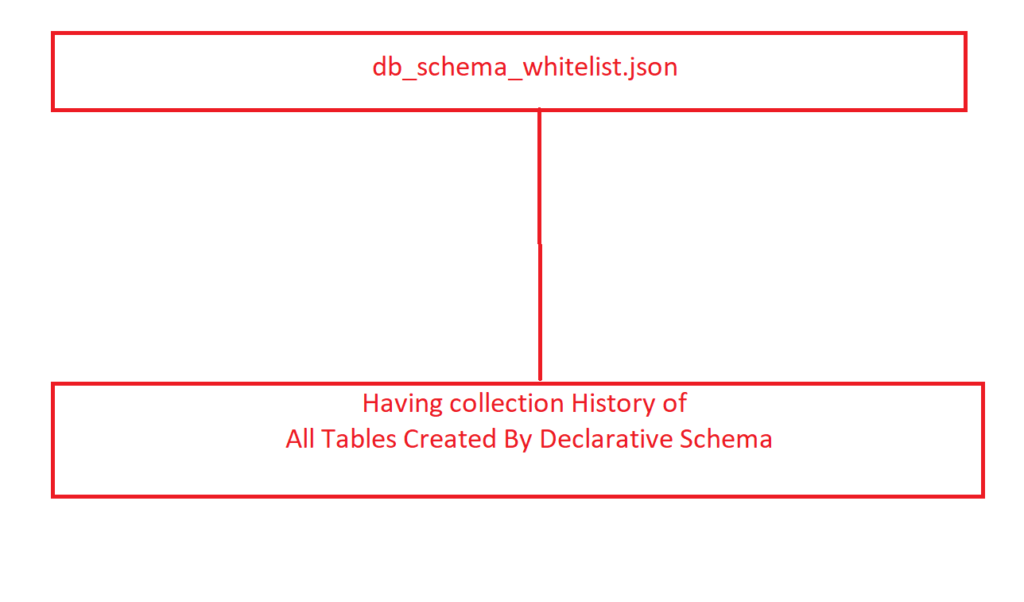
db_schema_whitelist.json file having history of all tables, columns, primary keys, foreign key, constraint keys combination etc, those are created by using the declarative schema.
There are two ways to generate db_schema_whitelist.json by following below methods
Step [1] – Manually To Create db_schema_whitelist.json
fint fromDefinition() method and then add debug code to find column name as below , we have addedd (debugging) code inside
/* Starts Add Code for Debug */ and /* Code End for Debug */
To find column name
public function fromDefinition(array $data)
    {
        $type = $data['type'];
        if (!isset($this->definitionProcessors[$type])) {

            /* Starts Add Code for Debug */

            echo "<pre>";
            print_r($data); exit();

            /* Code End for Debug  */

            throw new \InvalidArgumentException(
                sprintf("Cannot process definition to array for type %s", $type)
            );
        }

        $definitionProcessor = $this->definitionProcessors[$type];
        return $definitionProcessor->fromDefinition($data);
    }
Step [2] – Runsetup:upgrade command and you will get an array of column data in the console. so from this array, you will get the name of the column from your third party extension table.
Now from that table please change column’s data type “tinytext” to “text”
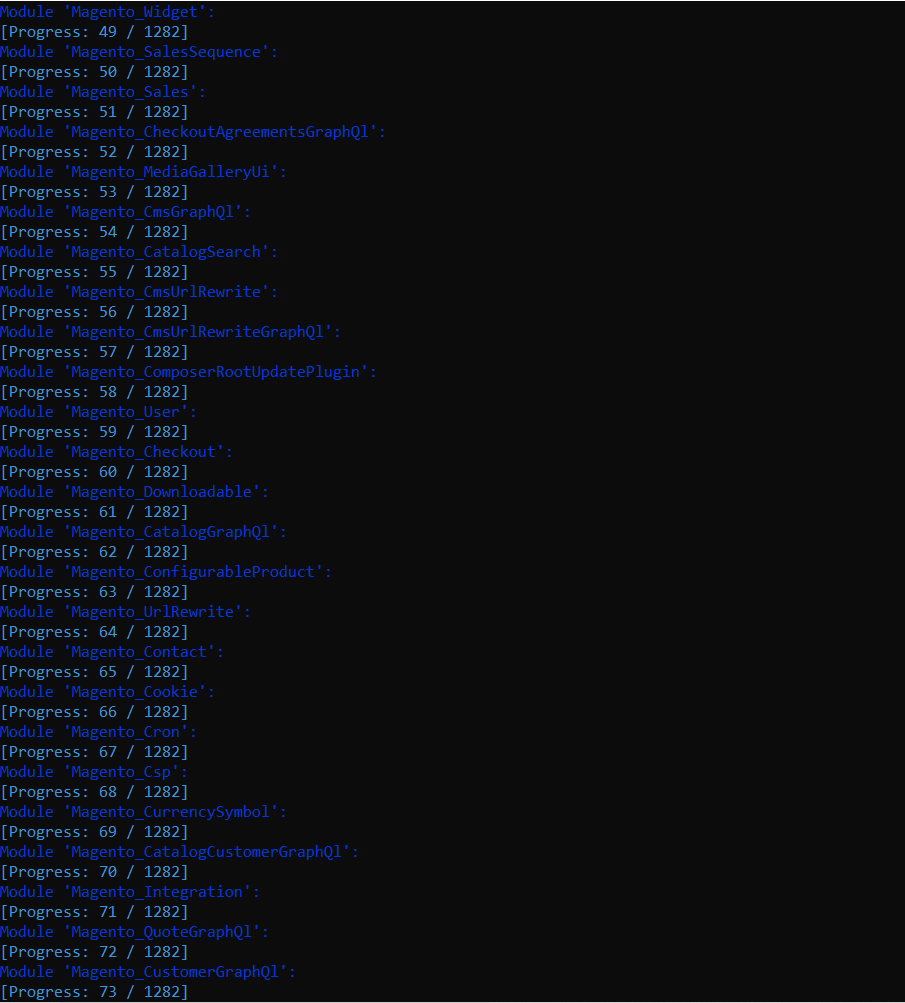
Module is backbone of Magento 2, Module having collection of Controllers, Models, Blocks, Helpers, Layouts, Templates, Plugins, Observer etc. These ineract with each other as well as ineract with Magento 2 exisiting functionalities in order to add a specific feature to a Magento 2 application.
There are following below steps need to follow to create Magento 2 custom module.
Step [1] – Nominate Module Name :: Syntax as below
Namespace_Modulename or Vendorname_Modulename
Namespace(Vendorname) always must be unique.
Step [2] – Create a new directory for the custom module
Syntax as below
Namespace / ModuleName or Vendorname / ModuleName
Step [3] – Create a module’s registration file :: This file name is registration.php & used to registered module.
Step [4] – Create a module’s naming configuration file :: This file name is module.xml & used to define module name ( Namespace_Modulename ) as well as store module into database table setup_module
namespace Mage2db/AllCustomers/Block;

use Magento\Backend\App\Action;


class AllCustomers extends Action
{

    protected $customerCollection;

    public function __construct(
        \Magento\Customer\Model\ResourceModel\Customer\CollectionFactory $customerCollection
    )
    {
        $this->customerCollection = $customerCollection;
    }

    public function getAllCustomers()
    {
            return $this->customerCollection->create();


    }
}
Step [2] – Now call function getAllCustomers() inside template & get data.
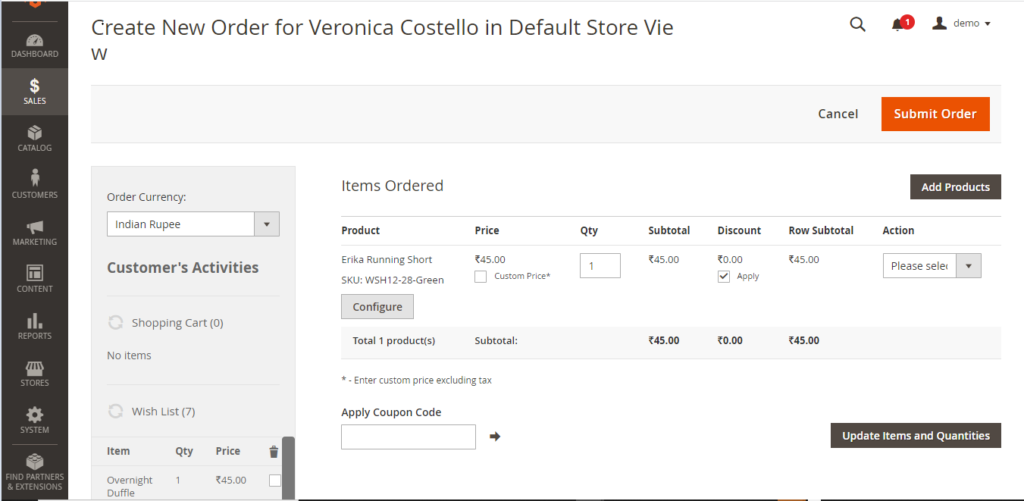
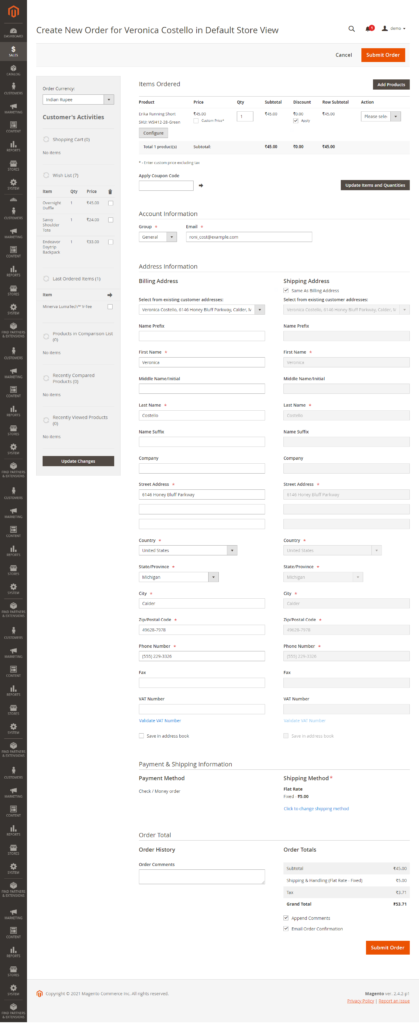
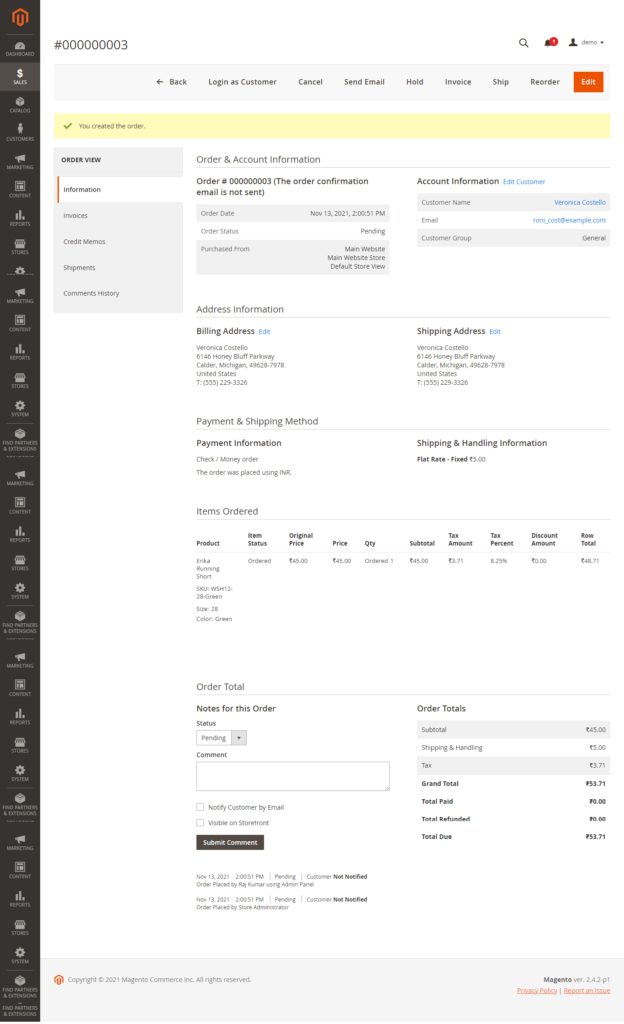
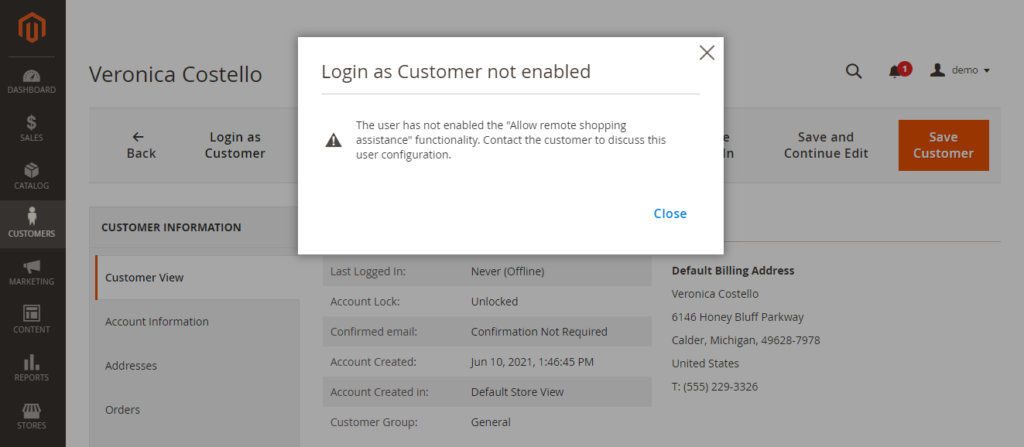
Mageno 2, this errors occurs while Admin trying to login as Customer Login from admin end due to following below reasons.
[1] – To view store as Customer’s point of view.
[2] – To modify Customer’s Data as per their permission.
[3] – To check Sales Order, Invoice, Shipment process, delivery status as per customer’s permission.
[4] – To assist customers, how to shopping, as Best Shopping Deals, Best Running Discount, Festive Offers etc.
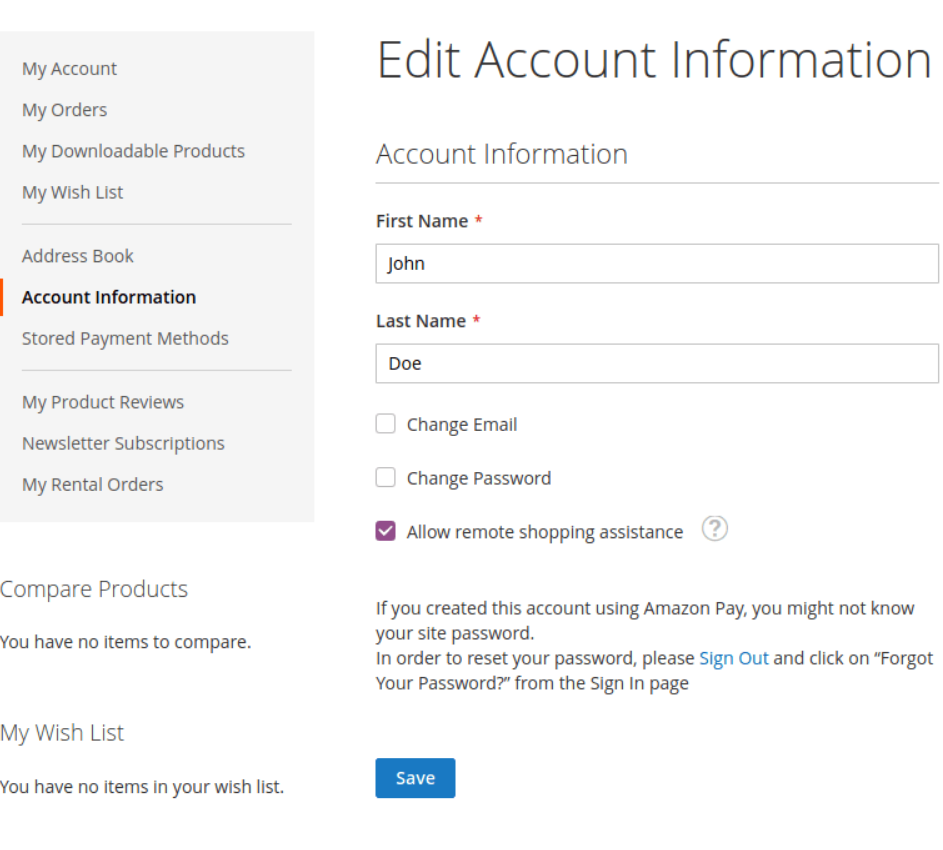
Solution For :: The user has not enabled the Allow remote shopping assistance functionality. Contact the customer to discuss this user configuration
There are following below steps need to follow
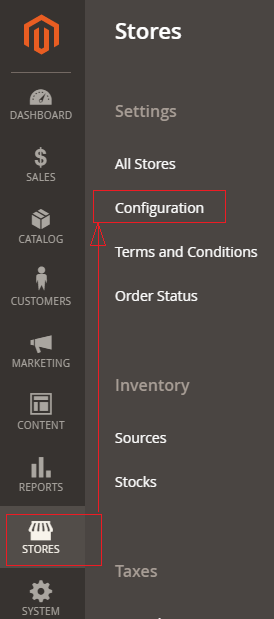
Step [1] – Go STORES > Configuration, redirects Configuration section.
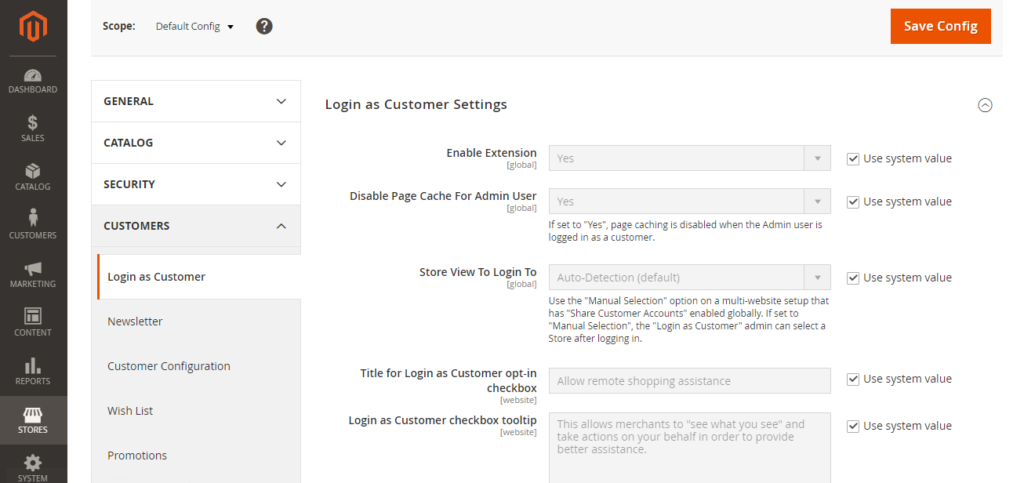
Step [2] – Left panel, choose CUSTOMERS > Login as Customer
Step [3] -Right panel opened Login as Customer Settings
Login as Customer Settings having following fields
Enable Extension : Select Yes to enable Admin Login as Customer
Disable Page Cache For Admin User : If Yes, the page cache will be disabled for the admin user.
Store View To Login To : There two drop down values
by default Auto-Detection & Manual selection
Use the “Manual Selection” option on a multi-website setup that has “Share Customer Accounts” enabled globally. If set to “Manual Selection”, the “Login as Customer” admin can select a Store after logging in.
TitleFor Login As Customer Opt in Checkbox : To change name for Title For Login As Customer, by default “Allow remote shopping assistance”
Login As Customer Checkbox Tooltip : To change description for Login As Customer Checkbox Tooltip
By default “This allows merchants to “see what you see” and take actions on your behalf in order to provide better assistance.”
Step [4] – Finally clicked on Save Config button & clear cache
All above steps settings applicable upto Magento 2.3.7
Once Release Magento 2.4, customers will also have to enable Allow remote shopping assistance from their Dashboard before an admin can log in:
Go Customer’s Account Dashboard & left side click on Account Information & checked Allow remote shopping assistance
If a customer has not enabled this option (Magento 2.4 and Later Version), then when an admin tries to log in to their account, an error message will be displayed: “The user has not enabled the “Allow remote shopping assistance” functionality. Contact the customer to discuss this user configuration.”
If Admin want to avoid this exta step, disable the module LoginAsCustomerAssistance via command line in Root Directory (Magento 2.4 & later version)
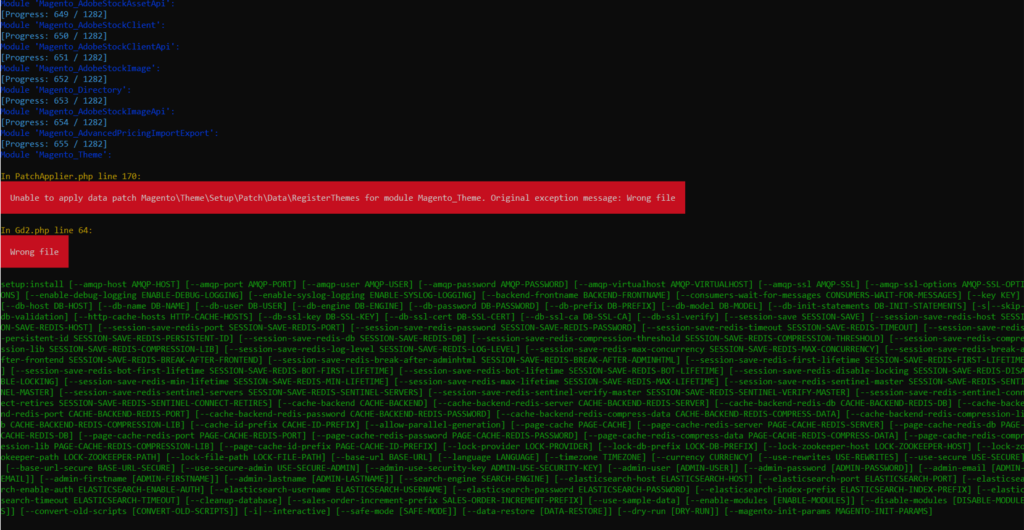
When installing Magento 2.4.x & if getting below error
In PatchApplier.php line 170:
Unable to apply data patch Magento\Theme\Setup\Patch\Data\RegisterThemes for module Magento_Theme. Original exception message: Wrong file
In Gd2.php line 64:
Wrong file
Error format as below
Solution: Find validateURLScheme function in vendor\magento\framework\Image\Adapter\Gd2.php file. at line 96. Replace function with this: !file_exists($filename)
Replace existing validateURLScheme function with modified validateURLScheme function as per below code