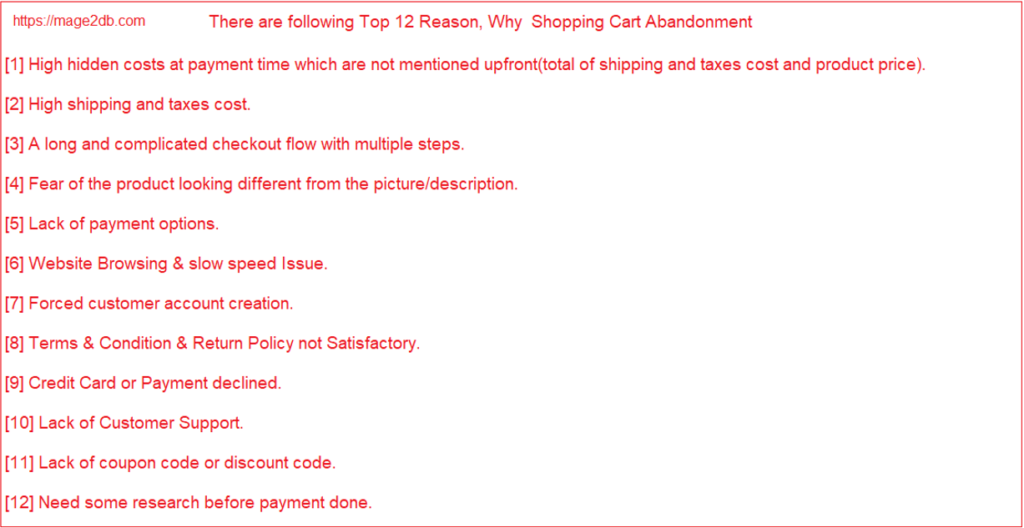
There are following below reasons, Why Shopping Cart Abandonment
[1]- High hidden costs at payment time which are not mentioned upfront(total of shipping and taxes cost and product price). [2]- High shipping and taxes cost [3]- A long and complicated checkout flow with multiple steps. [4]- Fear of the product looking different from the picture/description. [5]- Lack of payment options. [6]- Website Browsing & slow speed Issue. [7]- Forced customer account creation. [8]- Terms & Condition & Return Policy not Satisfactory. [9]- Credit Card or Payment declined. [10]- Lack of Customer Support. [11]- Lack of coupon code or discount code. [12]- Need some research before payment done.
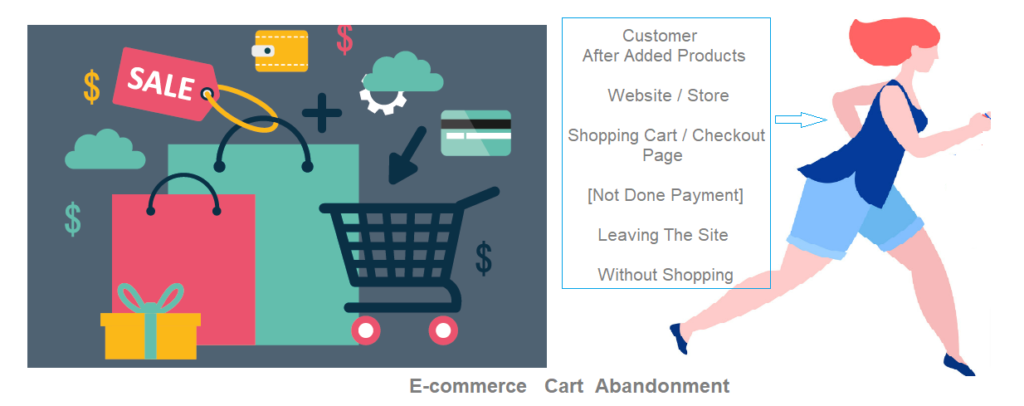
Ecommerce Abandonment or Shopping Cart Abandonment as “Once potential customers visiting shopping websites, added products as per their need into Shopping Cart & process for checkout step, but they did not complete payment step & left shopping websites”
Shopping cart abandonment rate is calculated by dividing the total number of completed transactions by the total number of transactions that were initiated, This indicates what percentage of a shopping website’s users signal purchase intent by adding an item to the cart, but do not complete the purchase
Admin can enable redirecting customers feature to customer dashboard after they logged in. by default this feature (Redirect Customer to Account Dashboard after Logging in) disabled.
If Admin wants as customers logged & redirects on Customer Dashboard page, this feature (Redirect Customer to Account Dashboard after Logging in) need to enable.
If Admin wants as customers logged & redirects on same page or current page need to disable this feature (Redirect Customer to Account Dashboard after Logging in), this feature By Default Disabled.
There are following steps need to follow.
Magento 2 Admin End
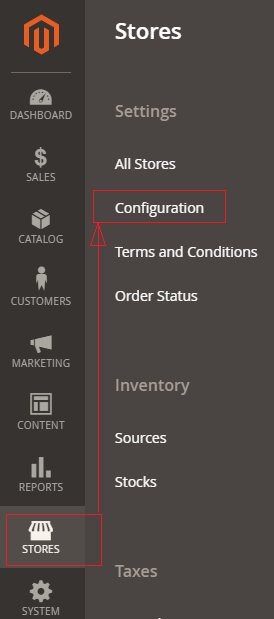
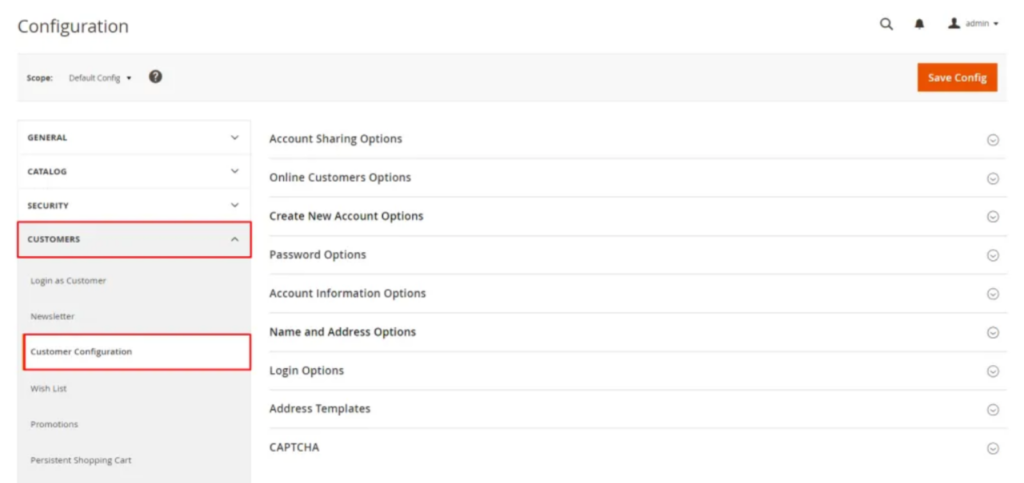
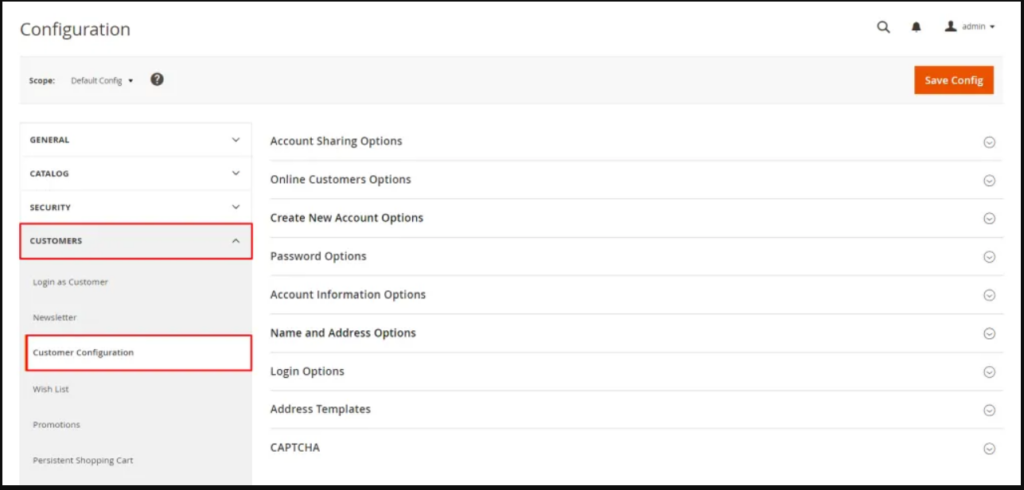
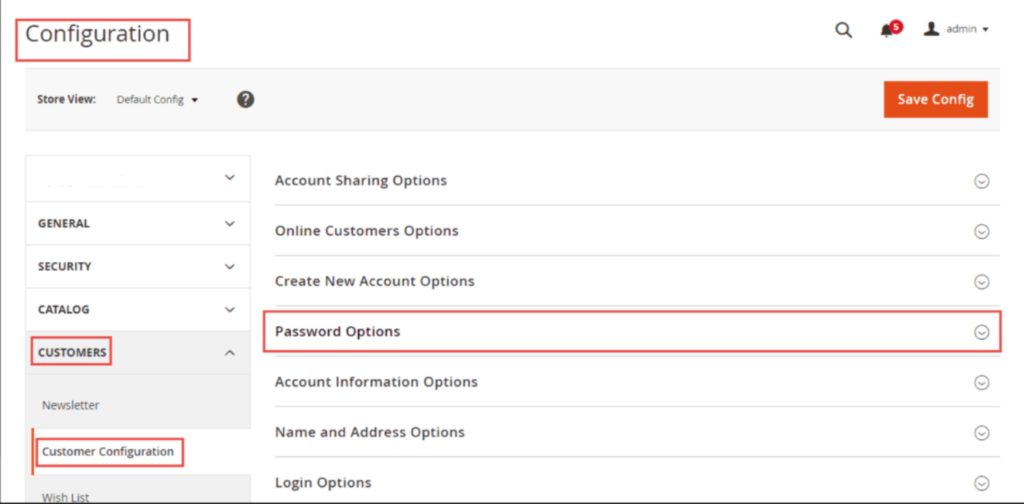
[1] Go STORES > Configuration, redirects Configuration section.
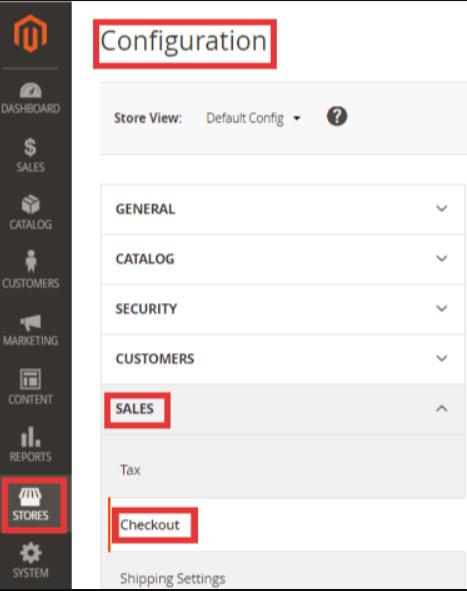
[2] Left panel, choose CUSTOMERS > Customer Configuration.
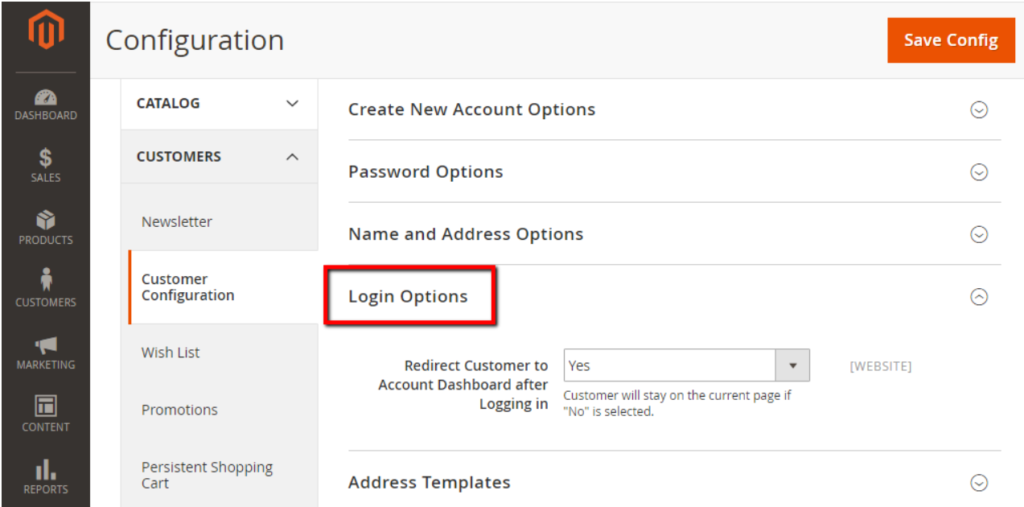
[3] Once expanded Login Options.
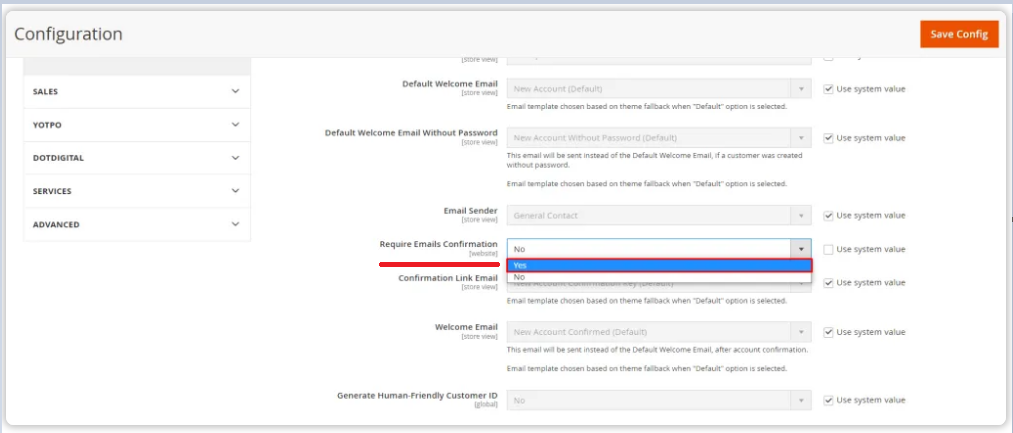
[4] Redirect Customer to Account Dashboard after Logging in By Default Yes, need to set No
Select Yes: allow showing the customer account dashboard when customers log in to their accounts.
Select No : no redirect to customer account dashboard when customers log in to their accounts, customer stay on same page.
[5] Finally clicked on Save Config Button & run CLI command Flush
Newsletter is a essential things for Store to notify their customers about some discount offers, special offers, occasion offers or weekly / monthly special sales running as well as provide them with latest product updates.
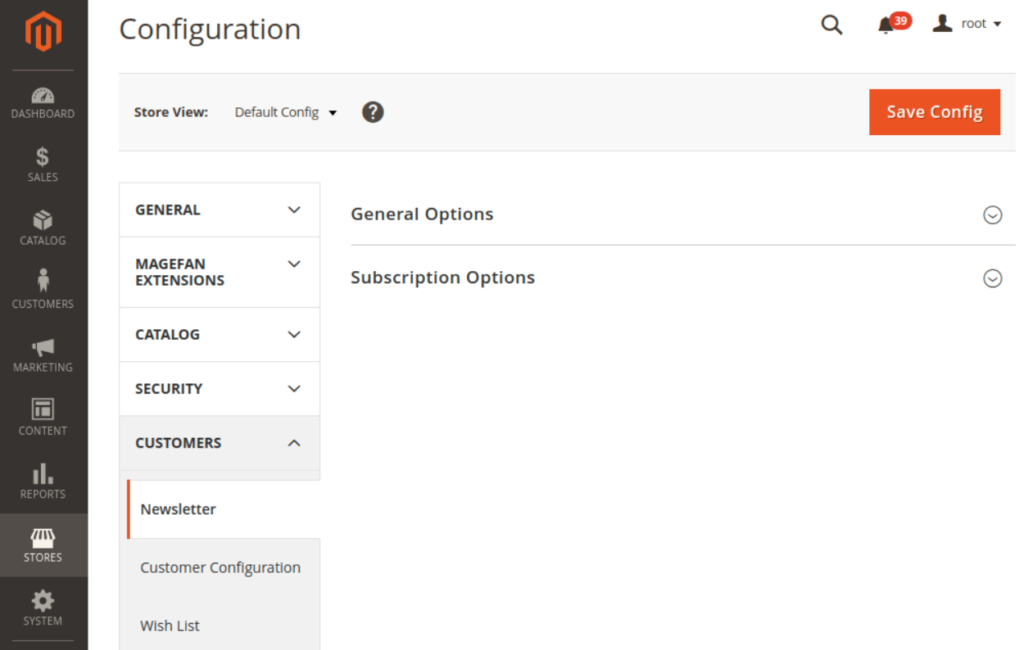
There are following steps need to follow.
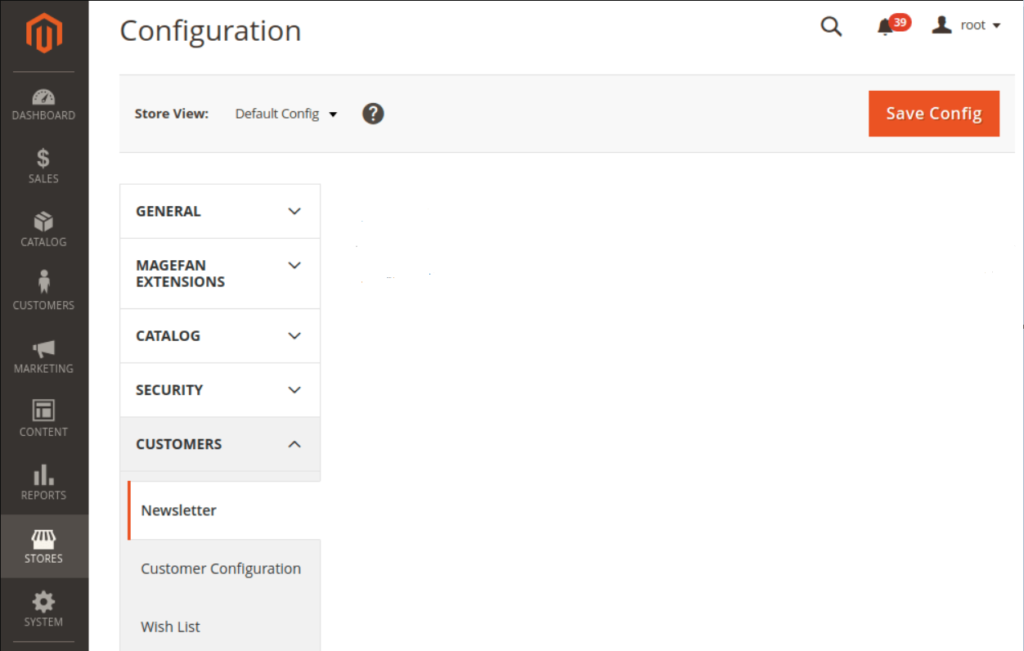
[1] Go STORES > Configuration, redirects Configuration section.
[2] Left panel, choose CUSTOMERS > Newsletter.
[3] Once Clicked Newsletter, Right Panel opened with
General Options & Subscription option
[4] Once expanded General Options & Subscription option
The following below things enabled / disabled
General Options: Enable newsletters.
Allows Guest Subscription: Set as Yes, Allows Guest Subscription option to Yes, if Admin wants unregistered users to be able to subscribe to store newsletter
Need To Confirm: Choose whether the newsletter subscription Needs to be Confirmed by the user. This option is to prevent users from being subscribed to a newsletter without their confirmation.
Confirmation Email Sender: Select Confirmation Email Sender and Confirmation Email Template to set store contact and the email template that will appear in the email about the newsletter confirmation
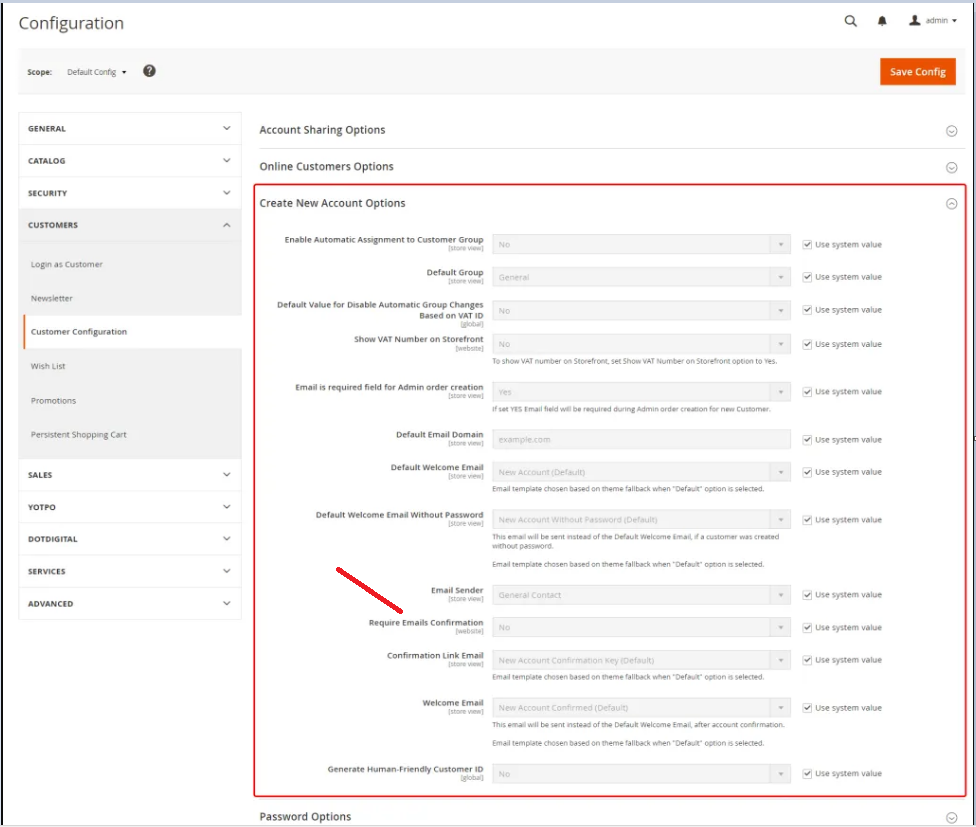
Magento 2 Customer Groups allows you to divide your customers into groups so that you have an opportunity to set different discounts, share different information and define different custom rules for them to follow.