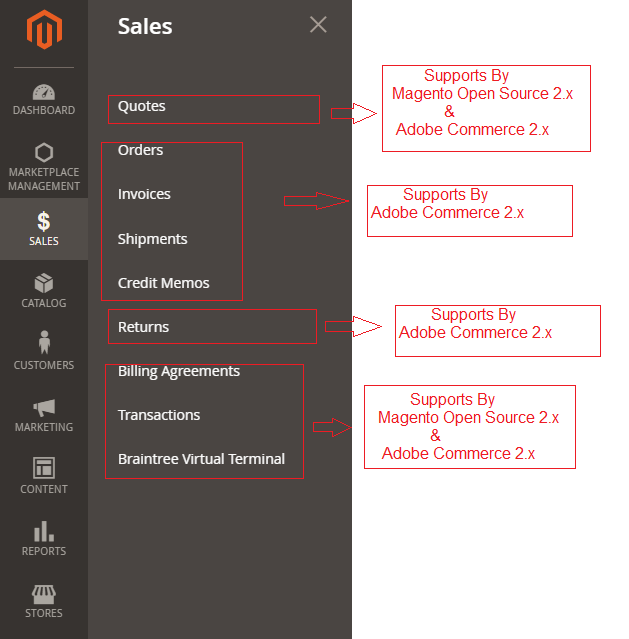
Step [1] – Left Panel Menu Sales

Step [1] – Left Panel Menu Sales

Magento Magento 2.x & Adobe Commerce 2.x , Full Page Cache is the Free In Built service for smart caching solution that allows to reduce the server load time, speed performance and improves the response time due to the fast loading of API, Block, CMS, Product, & Catalog pages.
The following below steps need to follow to create Custom 404 Page.
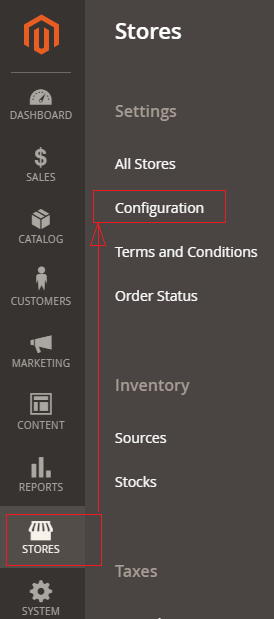
Step [1] – Go To STORES > Configuration, redirects on configuration.


As per business need, multiple times need to configure Email Template as
New User Account Creation Email Template
User Forgot Password Email Template
User Remind Password Email Template
Payment Confirmation Email Template
Payment Failed Email Template
Sales Order Email Template
Sales Invoice Email Template
Sales Shipment Email Template
Here we are putting example ,
How To Configure New User Account Creation Email Template
Step [1] – Go To Admin Panel > Marketing > Communications > Email Templates.

The following below Top 10 Ecommerce Platforms 2022
1- Shopify
3- BigCommerce
4- Squarespace
5- Tiendanube
6- VTEX
7- Big Cartel
8- WIX
9- Zyro
10- Weebly

Magento 2 events are used to run custom code in response to any particular Magento 2 event or custom event. Events are dispatched by modules when certain actions are triggered. When an event is dispatched, it can pass data to any observers configured to watch that event.
The following below display list of Magento 2.x & Adobe Commerce 2.x List of Events.
Continue reading “Magento 2.x or Adobe Commerce 2.x List of Events”
The following below steps to create custom module using Events & Observer
Step [1] – Nominate Module Name ::
Syntax as below
Namespace_Modulename =Mage2db_John
Magento2 Root Directory / app /code / Mage2db / JohnStep [2] – Create a module’s registration file :: This file name is registration.php & used to registered module.
File Path as below
Magento2 Root Directory / app /code / Mage2db / John / registration.phpWrite below code in registration.php
<?php

\Magento\Framework\Component\ComponentRegistrar::register(
    \Magento\Framework\Component\ComponentRegistrar::MODULE,
    'Mage2db_John',
    __DIR__
);
The following below steps to create custom module using plugin
Step [1] – Nominate Module Name ::
Syntax as below
Namespace_Modulename =Mage2db_John
Magento2 Root Directory / app /code / Mage2db / John

The following below steps to create custom module using preference
Step [1] – Nominate Module Name ::
Syntax as below
Namespace_Modulename =Mage2db_John
Magento2 Root Directory / app /code / Mage2db / John
Frontend developers need to design the custom Magento themes to come with packages, custom themes, or extended default theme design directories located at the below path
app/design/frontend/<Vendor>/ CustomTheme structure.
Each theme follows the directory structure as:
├── <theme1>

├── <theme2>/

├── <theme3>

├--...
app/design/frontend/John/
├── <mytheme1>

├── <mytheme2>/

├── <mytheme3>

├--...
Custom Magento 2.x Theme Directory Structure
Continue reading “How To Create Magento 2.x / Adobe Commerce 2.x Custom Theme Design / Development”

As we know Magento 1 generated hash by md5(salt + password) and save in database with the following below format
1 colon like
$password-hash : $saltMagento 2.x / Adobe Commerce 2.x has changed logic and logic has been written in file path as below
vendor/magento/framework/Encryption/Encryptor.phpMagento 2.x / Adobe Commerce 2.x generate hash like hash(‘sha256’, $salt . $password); and save with 2 colons in database with the following below format
Continue reading “Which Algorithm is used by Magento 2.x / Adobe commerce 2.x for Password Hashing”