Magento 2.4 Installation

There are following below Magento 2.4.X server requirements:

  • Support PHP Latest Version 7.4
  • Support Elastic Search Latest Version 7.6 & above
  • Support MYSQL Latest Version 8.0
  • Support Maria DB Latest Version 10.4
  • Support RabbitMQ Version 3.8
  • Support Radis Version 5.0
  • Support Varnish Version 6.0
  • Support Apache Version 2.4
  • Support Nginx Version 1.8

Step[1]Download Magento 2.4 Community or Enterprise Edition

Download Magento 2.4 Community or Enterprise Edition & keep inside Directory magento24sample

composer create-project –repository-url=https://repo.magento.com/ magento/project-community-edition 2.4.x

Step[2] Magento 2.4 Instllation Command

Run the following below command to Magento 2.4

php bin/magento setup:install --base-url="http://127.0.0.1/magento24sample/" --db-host="localhost" --db-name="magesampledata24" --db-user="root" --admin-firstname="admin" --admin-lastname="admin" --admin-email="admin@admin.com" --admin-user="admin" --admin-password="admin123" --language="en_US" --currency="INR" --timezone="America/Chicago" --use-rewrites="1" --backend-frontname="admin"

--------------------------------------------------------------------

Above Command Need to Install Magento 2.4 having following below data

[1] base-url=http://127.0.0.1/magento24sample/
[2] db-host="localhost"
[3] db-name::" magesampledata24"
[4] db-user:: "root"
[5] admin-firstname="admin"
[6] admin-lastname="admin"
[7] admin-email="admin@admin.com"
[8] admin-user="admin"
[9] admin-password="admin123"
[10] language="en_US"
[11] currency="USD"
[12] timezone="America/Chicago"
[13] use-rewrties="1"
[14] backend-frontname="admin"

Step [3]Magento 2.4 Installation Process Showing

Similarly, way as above will be displayed other running steps

Finally last two running steps

If Message displaying as below, indicates, Magento 2 Installation has been successfully installed.

[SUCCESS]: Magento installation complete.
[SUCCESS]: Magento Admin URI: /admin

Run below CLI Command

php bin/magento deploy:mode:set developer
php bin/magento setup:upgrade
php bin/magento setup:static-content:deploy -f
php bin/magento indexer:reindex
php bin/magento cache:clean
php bin/magento cache:flush

Now run, Magento 2 Frontend URL as well as Admin URL

http://127.0.0.1/magento24sample/
http://127.0.0.1/magento24sample/admin 
& admin credentials admin / admin123 

During Installation,

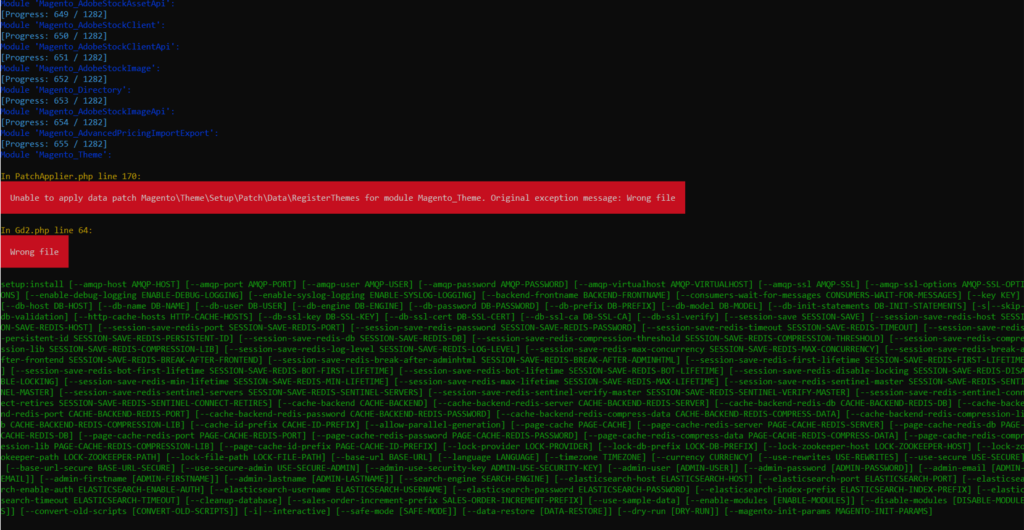
When installing Magento 2.4 & getting below error

In PatchApplier.php line 170:

Unable to apply data patch Magento\Theme\Setup\Patch\Data\RegisterThemes for module Magento_Theme. Original exception message: Wrong file

In Gd2.php line 64:

Wrong file

Error format as below
Solution: Find validateURLScheme function in vendor\magento\framework\Image\Adapter\Gd2.php file. at line 96. Replace function with this: !file_exists($filename)

Replace existing validateURLScheme function with modified validateURLScheme function as per below code

private function validateURLScheme(string $filename) : bool
  {
      $allowed_schemes = ['ftp', 'ftps', 'http', 'https'];
      $url = parse_url($filename);
      if ($url && isset($url['scheme']) && !in_array($url['scheme'], $allowed_schemes) && !file_exists($filename)) {
          return false;
      }

      return true;
  }

Finally, Magento 2.4 or 2.4.x Installation will be completed 100% after above changes

Other important Magento 2.4.x issue as below

Magento 2.3 To Magento 2.4.5 Comptibility For PHP, MYSQL, Composer, Apache etc


Magento 2.4.3-p1 Installation Steps


Magento 2.4.3 Installation Steps


Magento 2.4.3 Features


Magento 2.4.3 – p1 Features


Magento 2.4 Two Factor Authentication


Magento 2.4.1 Features


Magento 2.4 Features


Magento 2.4 Installation


Magento 2.2, Magento 2.3, Magento2.4 Installation Issue on Windows 10, XAMPP


Magento 2 Installation at 51% Error: (Wrong file in Gd2.php:64) Module ‘Magento_Theme’

Magento 2.x Redis Install & Configure

Redis Centos 7 Installation & Configure by below command

sudo yum install redis -y

sudo systemctl start redis.service

sudo systemctl enable redis

sudo systemctl status redis.service

Redis Ubuntu Installation & Configure by below command

sudo apt-get install redis

sudo systemctl start redis.service

sudo systemctl enable redis

sudo systemctl status redis.service

Once Redis installation done, need to configure in Magento 2
Redis Magento 2 Configure by below methods

There are two ways to include Redis code inside env.php

Step-1: By using CLI Command

php bin/magento setup:config:set –session-save=redis –session-save-redis-host=127.0.0.1 –session-save-redis-log-level=4 –session-save-redis-db=2

php bin/magento setup:config:set –cache-backend=redis –cache-backend-redis-server=127.0.0.1 –cache-backend-redis-db=0

Step-2: By using direct put code in env.php
Download below file & copy redis code in env.php file

https://mage2db.com/Redis_Cache_Code_In_ENVdotphp.pdf

As Redis working fine, need to run below following command redis monitor,  session storage value, redis flush cache

[1] redis-cli  redirects in Host with Port as below

Here also checking as cache store value properly as well as get properly as below.

ubuntu@ip-172-31-43-109:/var/www/html/magento234$ redis-cli

127.0.0.1:6379> set test “Hello”

OK

[1.1] 127.0.0.1:6379>

[1.2] 127.0.0.1:6379> set test “Hello”

OK

127.0.0.1:6379> get test 

“Hello”

[1.3] 127.0.0.1:6379> exit

[1.4] Restart Redis

    sudo systemctl restart redis-server

[2] Type command redis-cli monitor 

and refresh your front website or press F5, you will see an output on your screen.

It Means, Magento 2 Redis working fine , if display like after command

[3] Type redis-cli ping

and you’ll get a reply PONG which means everything is looking good.

[4] Type php -m | grep redis 

by which you’ll see redis in reply, which confirms that the PHP Redis Extension is ready to go.

[5]  Type redis-cli FLUSHALL 

if you need to clear Redis cache, simply type redis-cli FLUSHALL and an OK reply will confirm that your cache has been cleared successfully.

[6] To check Redis Version  Type   redis-server -v

[7] Default Port used by Redis 6379

[8] Other Important Redis command as below

redis-cli info–Complete info about the redis-instance
redis-cli info server–Server Information, cersions, configs, binary
redis-cli info clients–Connected clients
redis-cli info memory–Statistics about memory usage and limits
redis-cli info persistence–Info about RDB and AOF
redis-cli info stats–Connection, network, keyspace statistics
redis-cli info replication–Replication settings and status

Elasticsearch 7.x cluster_block_exception & disk usage exceeded Issue

if Elasticsearch 7.x having following below error cluster_block_exception & disk usage exceeded Issue

{“error”:{“root_cause”:[{“type”:”cluster_block_exception”,”reason”:”index [magento2_product_1_v79] blocked by: [TOO_MANY_REQUESTS/12/disk usage exceeded flood-stage watermark, index has read-only-allow-delete block];”}],”type”:”cluster_block_exception”,”reason”:”index [magento2_product_1_v79] blocked by: [TOO_MANY_REQUESTS/12/disk usage exceeded flood-stage watermark, index has read-only-allow-delete block];”},”status”:429}

Solution: once run below step-1 & 2 command, issue will be resolved

Step-1: Need to be run below curl command & issue will be resolved

curl -XPUT -H "Content-Type: application/json" http://localhost:9200/_cluster/settings -d '{ "transient": { "cluster.routing.allocation.disk.threshold_enabled": false } }'

Step-2: Need to be run below curl command & issue will be resolved

curl -XPUT -H "Content-Type: application/json" http://localhost:9200/_all/_settings -d '{"index.blocks.read_only_allow_delete": null}'

Magento 2.4 with Elasticsearch 7.x

Headless Commerce / Magento 2.x

Headless Ecommerce / Magento 2

headless commerce is an eCommerce solution where the frontend presentation (head) has been decoupled from the backend commerce functionality & data exchange is set up via API-driven platforms.

The frontend presentation (head) – think user interface, social commerce, digital marketplace, IoT and more – can be displayed & updated by using API-driven platforms, without interfering with the backend.

The headless commerce approach benefits having following below things

      Greater flexibility
      High speed performance
      Strong web security
      Significantly improved performance
      Significantly tailor content
      Wonderful experience to customers

Differentiate Between UpSell & CrossSell Products

Differentiate Between Upsell & Cross Sell Product

What is Cross-Selling?
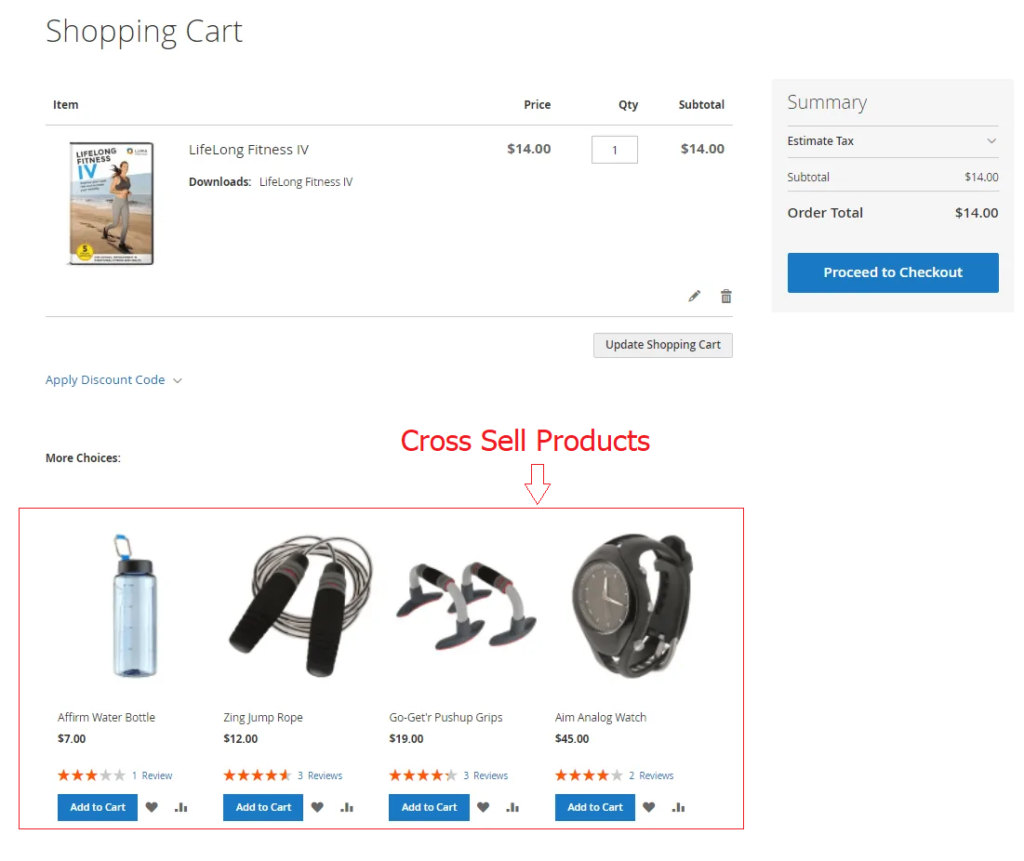
Cross Sell Products are displaying shopping cart pages before checkout process

Cross-selling is a sales strategy to sell products that are different, but possibly related to a product your customer already has already added to cart. It offers customers the option to buy complementary products in addition to the main product they intended to purchase.

For example, if a customers are purchasing a mobile phone, Site Owner might want to suggest they purchase headphones or an additional charging cord along with their new phone.

In Magento 2 products that are offered as cross-sells appear on the shopping cart page just before your customer starts to check out. Think about how items such as candy, gum, and magazines are placed near the checkout in grocery stores. These are items that your customers may not have intended to buy while they were shopping, but these items enhance the shopping experience.

What is Up-Selling?
Up Sell Products Displaying like “You May Be Interested In The Following Products” on product page

Up-selling is a sales technique where you suggest to your customer that they might prefer to buy a more expensive version of an item, to upgrade an item they already have, or to add features or other add-ons to an item.

For example, if a customer is browsing for a laptop on your site, and they are looking at a model with a 500gb hard drive, you might suggest an upsell of a larger (and therefore more expensive) hard drive.

In Magento 2 up-sells appear on a product page under a heading that might say something like “You May Be Interested In The Following Products”.