What is AI?
AI (Artificial Intelligence) refers to machines or software that can perform tasks that usually require human intelligence. These tasks include learning, problem-solving, recognizing speech, understanding images, and making decisions.
How does AI work?
AI works by processing data, learning from that data (often through algorithms), and then using what it has learned to make predictions or decisions.
AI Key Elements:
- Data: AI systems need large amounts of data to learn from.
- Algorithms: These are sets of rules or instructions that guide the system to analyze data and learn patterns.
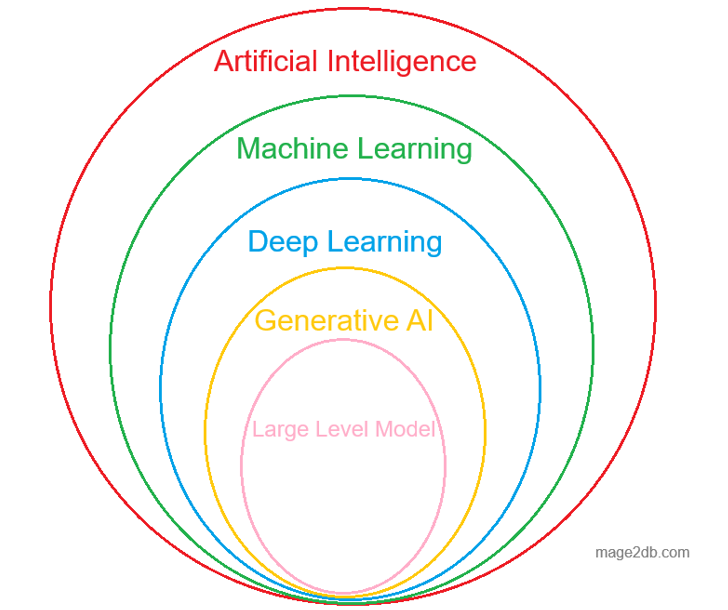
- Machine Learning: A subset of AI where the system learns from data and improves over time without being explicitly programmed.
- Neural Networks: A more advanced form of machine learning, inspired by how the human brain works, which helps in tasks like image and speech recognition.
Key Aspects of AI:
- Machine Learning (ML) – A subset of AI where systems learn from data without explicit programming, improving over time through experience.
- Deep Learning – A specialized form of ML using artificial neural networks to model complex patterns (e.g., image recognition, natural language processing).
- Natural Language Processing (NLP) – Enables machines to understand, interpret, and generate human language (e.g., chatbots, translation).
- Computer Vision – Allows machines to interpret and analyze visual data (e.g., facial recognition, object detection).
- Robotics – Combines AI with mechanical systems to perform physical tasks (e.g., autonomous robots, industrial automation).
- Expert Systems – AI programs that mimic human expertise in specific domains (e.g., medical diagnosis, financial analysis).’
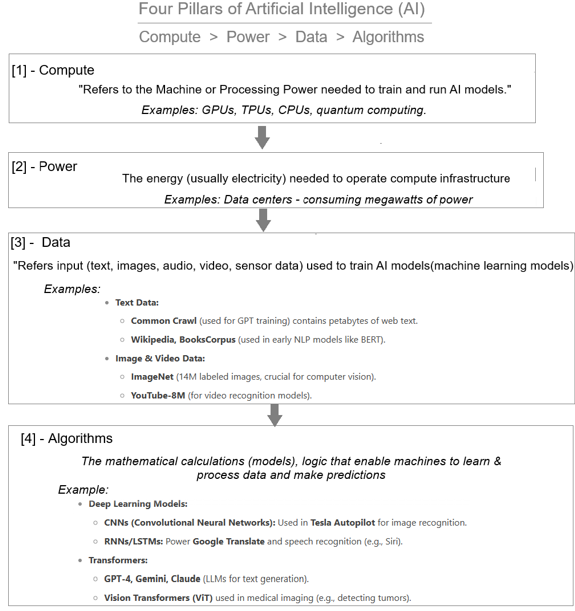
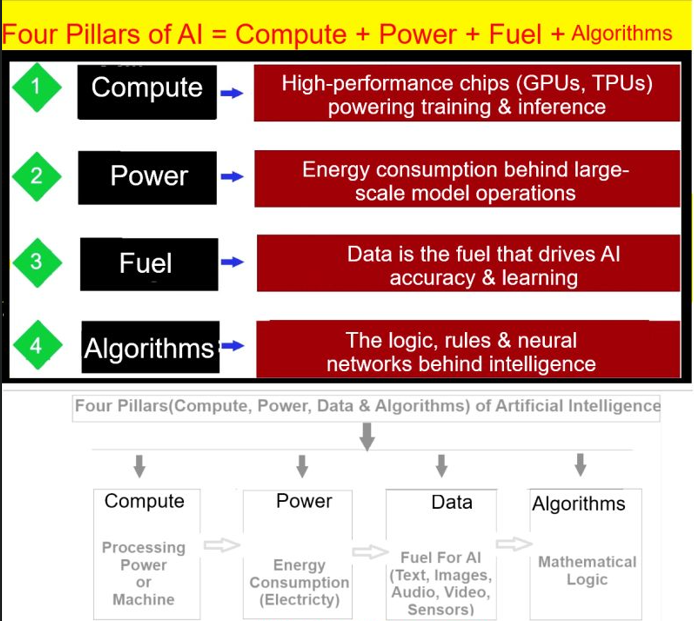
Four Pillars (Compute , Power , Data & Algorithms) of Artificial Intelligence
[1] – Compute (Processing Power or Machine)
Computer – Refers to the Processing Power or Machine needed to tarin & run AI Models
Example: GPUs (Graphics Processing Units) and TPUs (Tensor Processing Units) are used to accelerate deep learning computations in AI applications like image recognition (e.g., NVIDIA’s AI hardware powering autonomous vehicles).
[2] – Power (Electricity)
The Energy(Electricity) needed to run computer Infrastructure
Example: Data centers using optimized cooling and energy-efficient hardware (e.g., Google’s AI-driven cooling system for its data centers) help reduce power consumption in AI workloads.
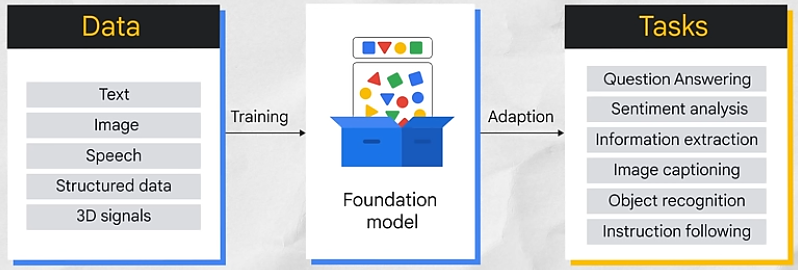
[3] – Data (Fuel For AI) – (Text, Images, Audio, Video, Sensors etc.)
Data – Refers (Text, Images, Audio, Video, Sensors etc.) are used to train AI Models (Machine Learning Models)
Example: Large datasets like ImageNet (used for training visual recognition models) or customer transaction data in e-commerce platforms (used for personalized recommendations).
[4] – Algorithms(Mathematical Logic or Decision-Making Intelligence Models) –
Algorithms – Refers Mathematical Logic that enables AI Machine to Learn & process data & make predictions (execute on the bases of User’s Queries)
Example: Neural networks in AI chatbots (e.g., conversational AI like ChatGPT or Copilot) use algorithms to understand and generate human-like responses