The following below steps need to follow to setup Shopify Store
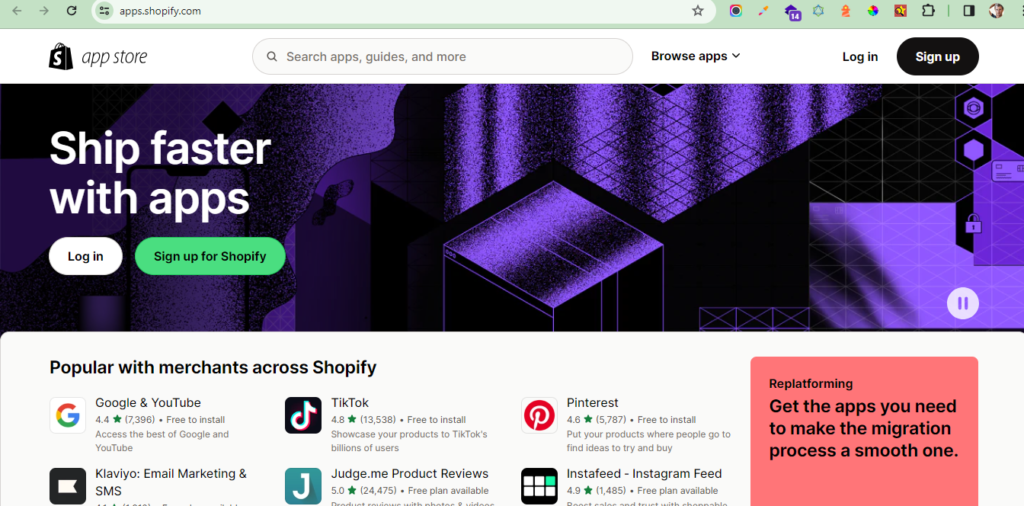
[1] – Sign up For Shopify:
Browse Shopify website and sign up for an account. You’ll need to provide basic information about yourself and your store business
[2] – Set up Your Store:
Once you’ve created an account, you’ll be directed to the Shopify admin dashboard. Here, you can begin setting up your store by adding details such as your store name, address, currency, and payment gateway preferences.
[3] – Choose a Theme:
Shopify offers a variety of themes that you can use to customize the look and feel of your store. Browse through the available themes and select one that fits your brand and aesthetic preferences. You can customize the theme further to match your branding.
[4] – Add Products:
After setting up your store, you can start adding products. In the Shopify admin dashboard, navigate to the “Products” section and click on “Add product” to add your products. You can add product details such as title, description, price, images, and variants.
[5] – Set up Payments:
Shopify supports various payment gateways, including Shopify Payments, PayPal, Stripe, and others. Set up your preferred payment gateway to accept payments from customers.
[6] – Configure Tax Settings
Set up your shipping settings, including shipping rates, shipping zones, and carrier integrations if applicable. You can specify shipping rates based on factors like weight, price, or location.
[7] – Configure Shipping Settings:
Create and customize your store policies, including terms of service, privacy policy, and refund policy. These policies help establish trust with your customers and outline expectations for transactions.
[8] – Create Important Static Pages / Blogs for Your Store:
Create Static page as Privacy / Policy, Terms & Conditions, Shipping Policy, Payment Policy & Blog as per your requirement
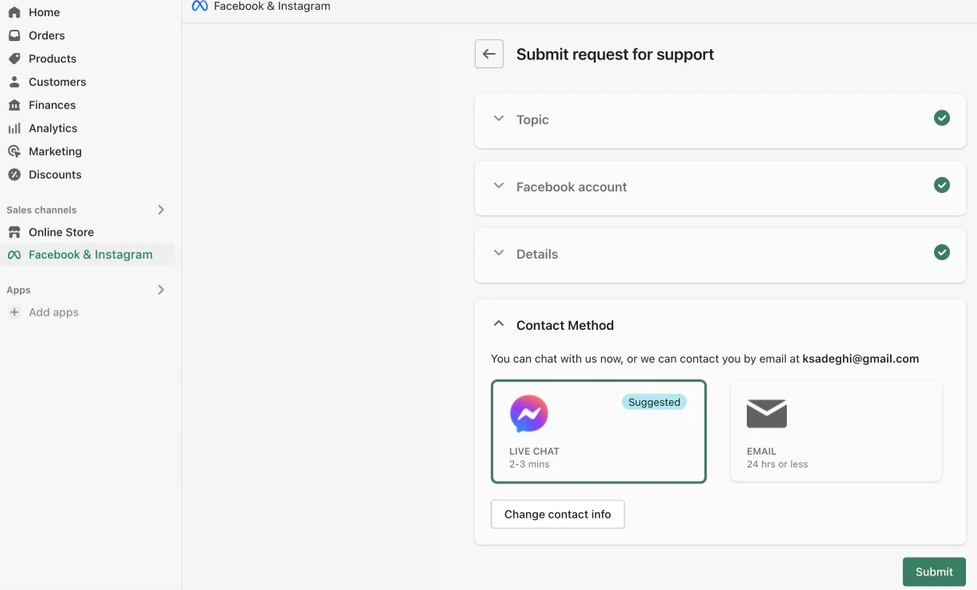
[9] – Install Shopify Third Party Plugins as Per Needed::
Install Shopify third Party Plugins as per your Business store requirement
Create and customize your store policies, including terms of service, privacy policy, and refund policy. These policies help establish trust with your customers and outline expectations for transactions.
[10] – Launch Your Store:
Once you’ve completed the setup process and customized your store to your liking, you’re ready to launch. Review your store settings, double-check everything is in place, and then click on the “Launch” button to make your store live.
[11] – Market Your Store:
After launching your store, focus on marketing and promoting your products to attract customers. Utilize various marketing channels such as social media, email marketing, content marketing, and search engine optimization (SEO) to drive traffic to your store.
[12] – Manage Your Store:
Regularly monitor your store’s performance, analyze sales data, and make adjustments as needed to optimize your store for success. Continuously engage with your customers, address their inquiries and feedback, and strive to provide a positive shopping experience.
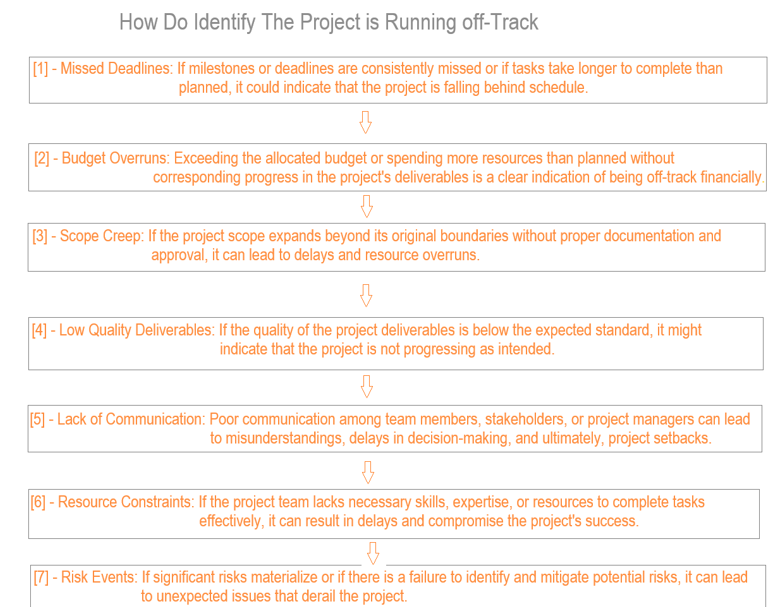
The following below steps of off-track involves monitoring various aspects of the project against the planned objectives, timelines, and budgets.
Missed Deadlines: If milestones or deadlines are consistently missed or if tasks take longer to complete than planned, it could indicate that the project is falling behind schedule.
Budget Overruns: Exceeding the allocated budget or spending more resources than planned without corresponding progress in the project’s deliverables is a clear indication of being off-track financially.
Scope Creep: If the project scope expands beyond its original boundaries without proper documentation and approval, it can lead to delays and resource overruns.
Low Quality Deliverables: If the quality of the project deliverables is below the expected standard, it might indicate that the project is not progressing as intended.
Lack of Communication: Poor communication among team members, stakeholders, or project managers can lead to misunderstandings, delays in decision-making, and ultimately, project setbacks.
Resource Constraints: If the project team lacks necessary skills, expertise, or resources to complete tasks effectively, it can result in delays and compromise the project’s success.
Risk Events: If significant risks materialize or if there is a failure to identify and mitigate potential risks, it can lead to unexpected issues that derail the project.
Stakeholder Dissatisfaction: Negative feedback or lack of engagement from stakeholders may indicate that their expectations are not being met or that the project is not delivering the desired outcomes.
Decreased Team Morale: A decline in team motivation, increased stress levels, or conflicts among team members can be indicators of underlying issues that are affecting project progress.
Virtual Type & Type of DI.xml :: The di. xml supports two types of nodes which are a node type and a node virtualtype
Virtual Type & Type of DI.xml:: Virtual Type is considered as a perfect method instead of the type . Virtual types are similar to the types but provides additional flexibility as they allow defining a virtual class.
Type adjusts existing classes, whereas Virtual Types creates a new class.
Virtual Types allows us to modify existing classes without affecting the other classes and without having to create a new class file(it isn’t necessary but if we want then we can create it as well)
virtual Type accepts two attributes – name and type . Name is the virtual Type’s name and type is an existing class we use to create the virtual Type
Difference Between Virtual Type & Type of DI.xml::
Virtual Types are like a sub-class for an existing class
Type adjusts existing classes, whereas Virtual Types creates a new class.
Type affect all the instances, whereas Virtual Type is equivalent of a sub class,
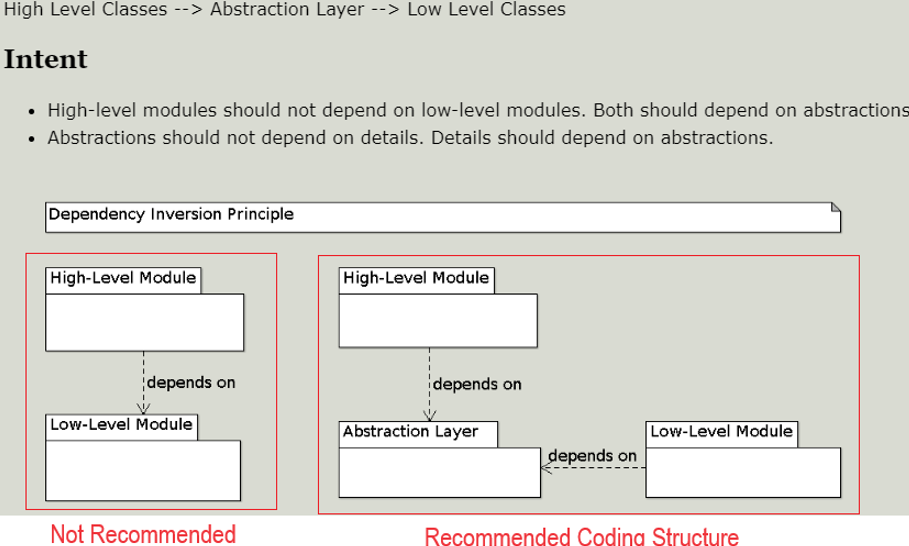
Dependency Inversion Principle:: DIP using abstraction layer in code to reduce code dependencies.
As per DIP the way of designing a class structure is to start from high level Classes to Low Level Classes
This means that your high level classes or modules should use the interfaces of low level classes or modules instead of working with them directly, it is Standard coding structure as per SDLC
High level classes or modules should should not use direct level classes or modules directly, it is bad coding structure
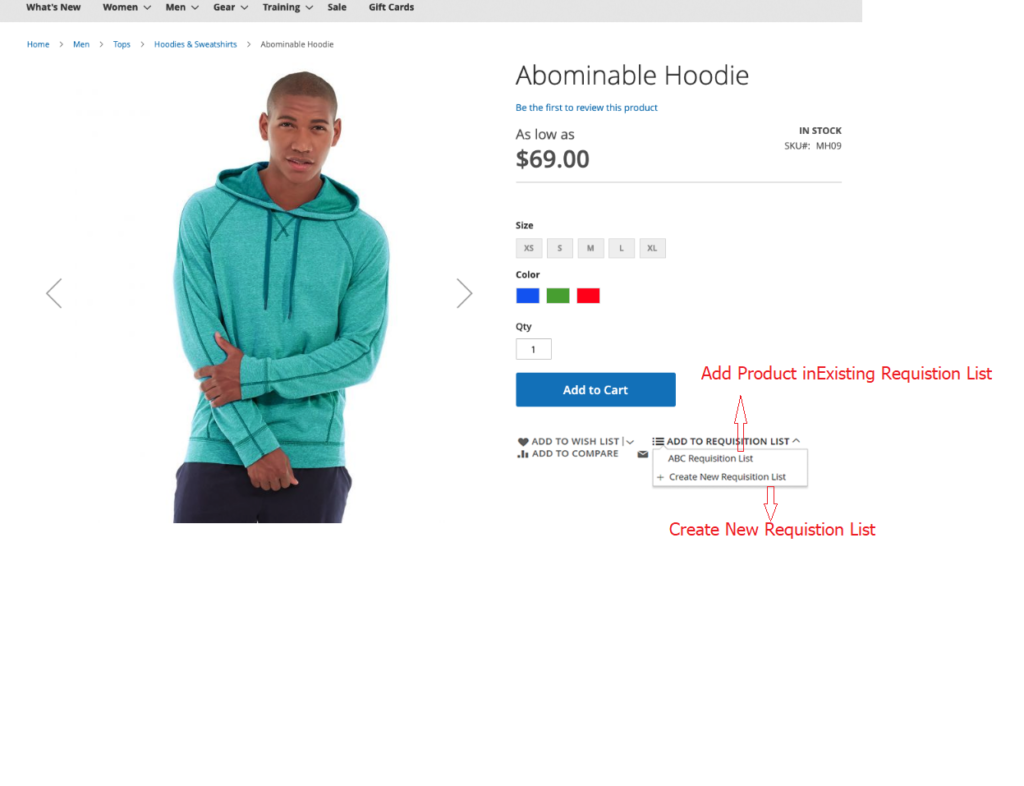
Requisition List easy to manage, create, delete , once Requisition List has been created, customer can add products, modify products as per their requirement on regular bases.
Once Products has been added in Requisition List, customer can order all added products (Requisition List) as per single checkout and also reorder in future if required.
Creation of RequisitionLists: Customers can create multiple lists of products categorized according to their preferences, needs, or ordering patterns.
Adding Products in RequisitionLists: Once a list is created, customers can add products to it from the catalog.
Managing RequisitionLists: Customers can manage their lists by adding, removing, or editing products as needed. They can also create new lists or delete existing ones.
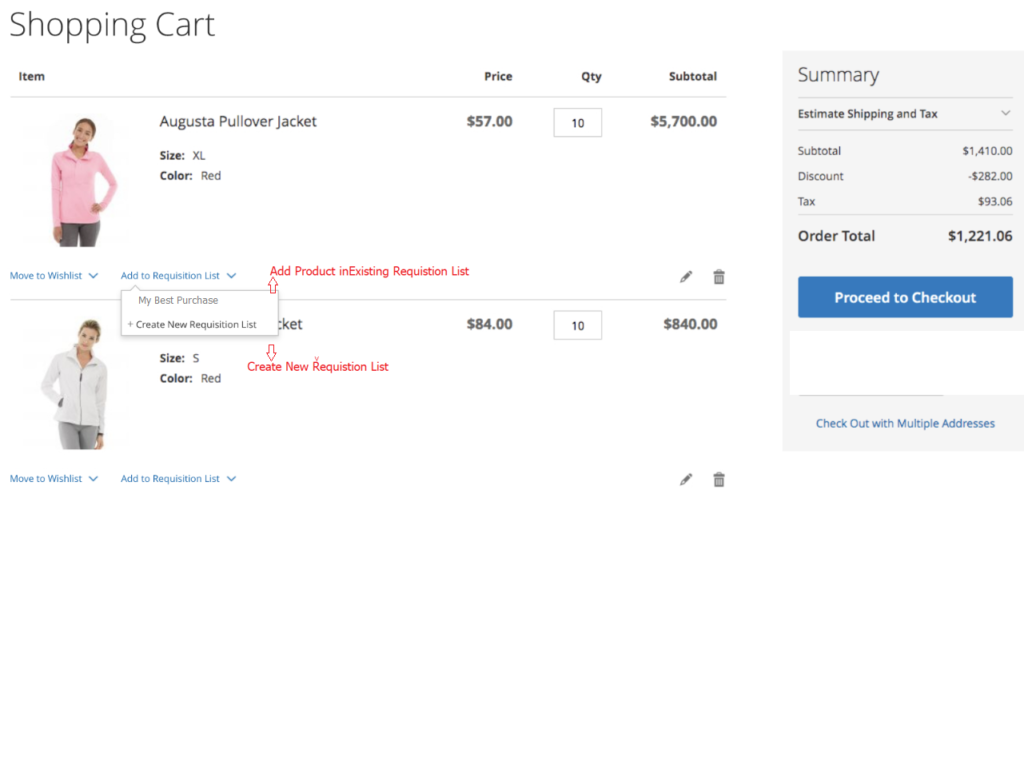
Easy Ordering by RequisitionLists: When customers need to place an order, they can simply select the desired list and add all the products from that list to their cart with a single click.
Reordering: Requisition Lists also facilitate easy reordering of previously purchased items.
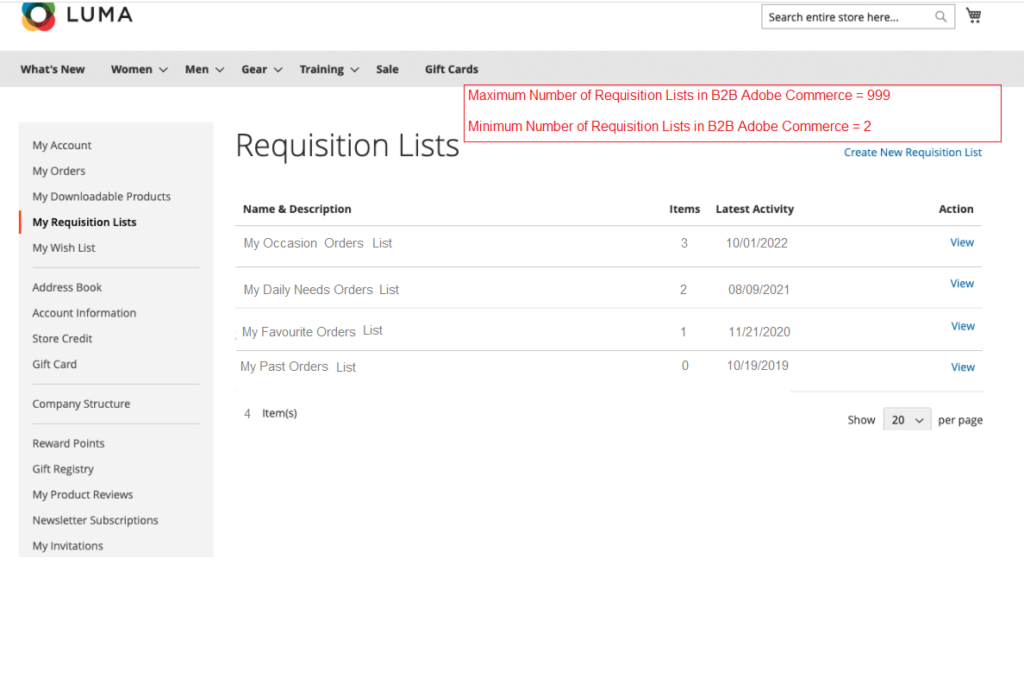
The The minimum number is 2 & The maximum number is 999 requisition lists to be maintained for each customer account in ‘B2B Adobe Commerce
Maximum Number of Requisition Lists in B2B Adobe Commerce = 999
Minimum Number of Requisition Lists in B2B Adobe Commerce = 2
Customers can add products to a requisition list below following pages
Product pages
A catalog page
The shopping cart
Existing orders
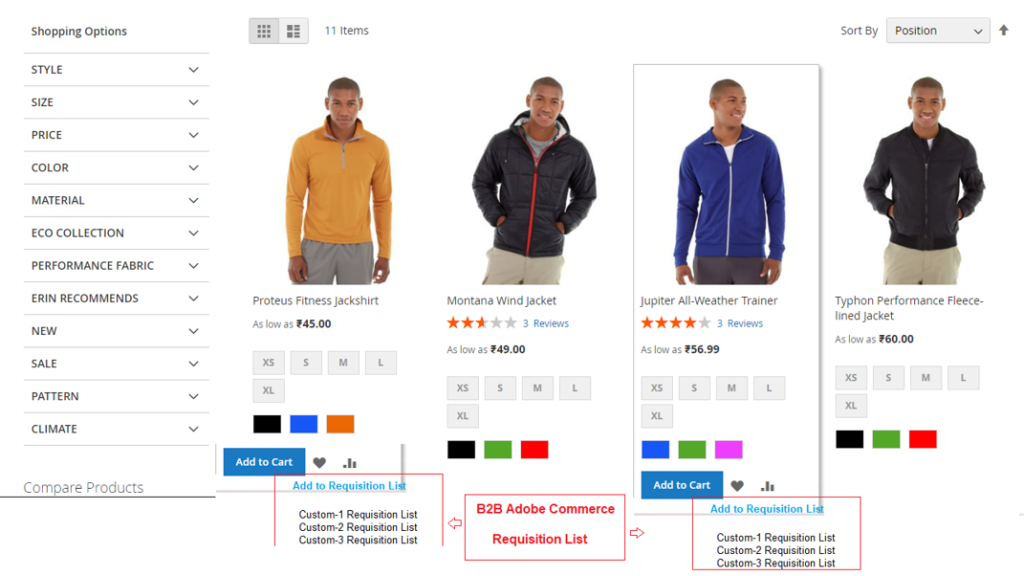
B2B Adobe Commerce Requisition List on Product Listing Page (Category Page)
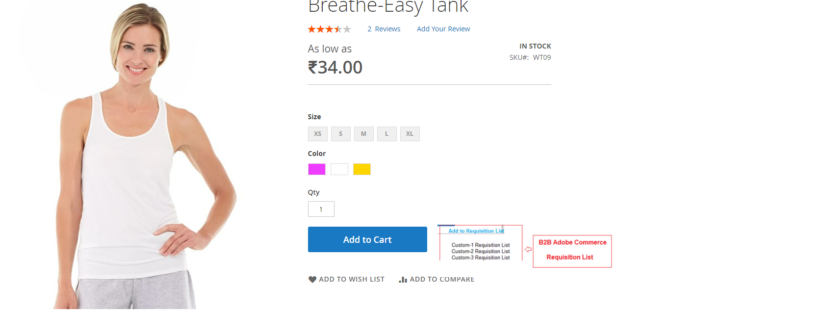
B2B Adobe Commerce Requisition List on Product Details Page
B2B Adobe Commerce Requisition Customer DashBoard B2B Adobe Commerce Requisition List Product Detail Page (PDP) B2B Adobe Commerce Requisition Customer Shopping Cart
Step [1] –Unique or Random Admin URL: Changing the default admin URL to a unique one can make it harder for hackers to find. This is an effective measure to protect the admin panel from unauthorized access
Step [2] –Two-Factor Authentication (2FA): Implementing 2FA for admin access adds an extra layer of security by requiring users to provide two different authentication factors to verify themselves
Step [3] –IP Address Restrictions: Restricting access to the admin panel based on IP addresses to prevent unauthorized access
Step [4] –Update Security Extensions: Update Security extensions tools as per latest version
Step [5] –Regular Updates and Patches: Keeping the Magento installation up to date with the latest security patches and updates is crucial to protect against known vulnerabilities
Step [6] –SSL Certificate Installation: Using an SSL certificate helps secure the connection between the user’s browser and the server, ensuring that all data passed between them remains private and integra
Step [7] –Magento 2 Security Scan Tool: Using Magento 2 Security Scan Tool to scan application on regular Interval
Step [8] – Application Firewall: Integrate Application firewall on cloud server
Step [9] – Upgrade to the latest release of Magento 2.x or Adobe Commerce: Update latest version of Magento 2.x or Adobe Commerce as per latest release Version
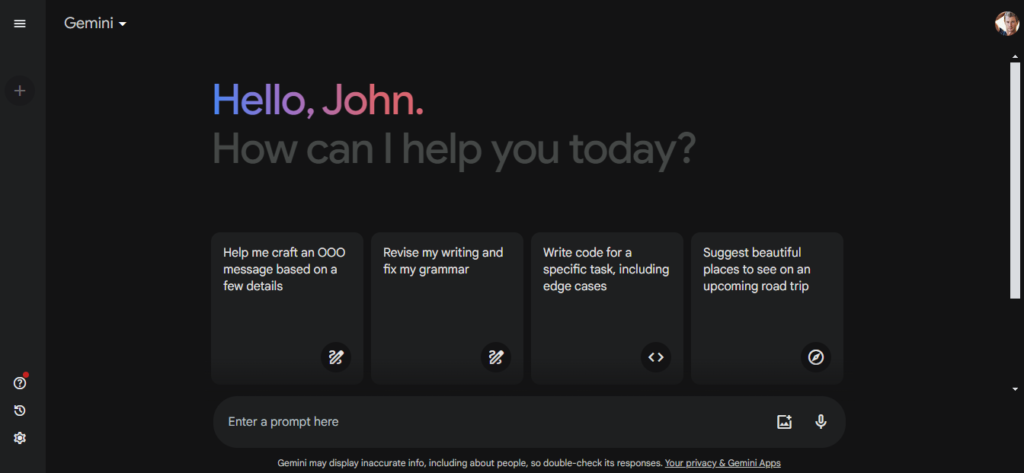
The Following steps need to follow to get Gemini Advanced Subscription
Step [1] – Navigate https;//gemini.google.com in web browser (Mobile / System). User must be signed in to your Google account and must older than 18 years old, Gemini Advanced is not yet available for Google Workspace accounts.
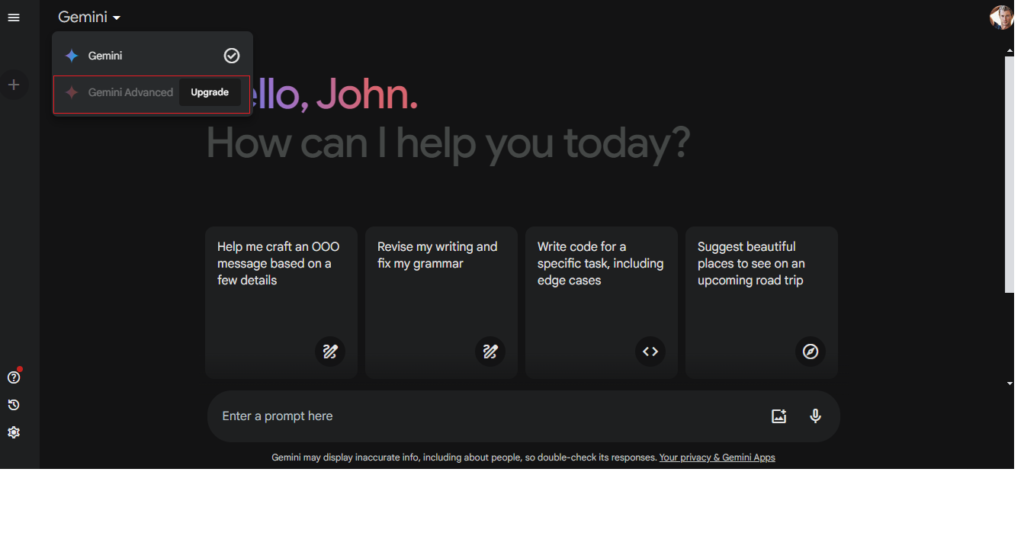
Step [2] – Click on the right side Gemini drop-down menu in the top-left corner of the screen.
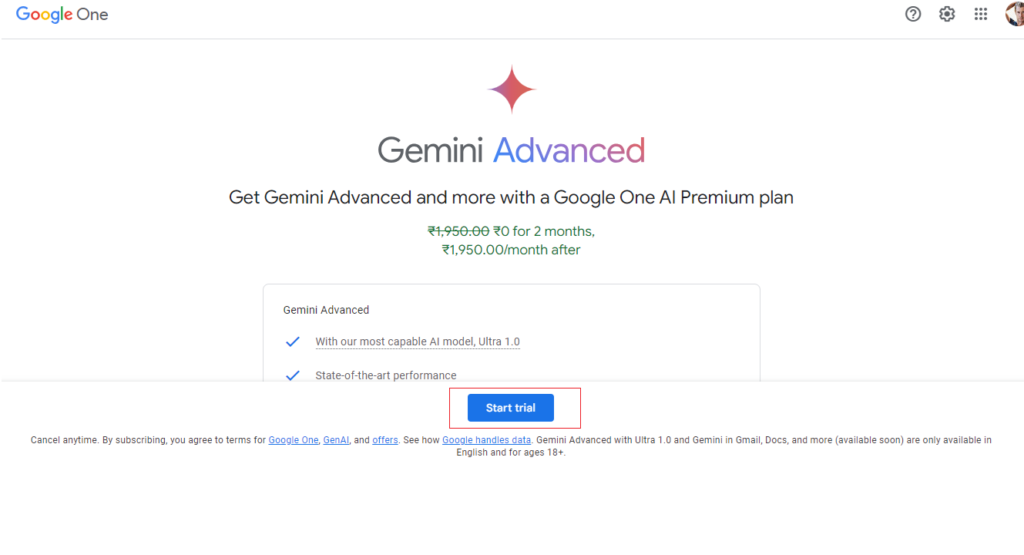
Step [3] – Click on the right side Upgrade next to Gemini Advanced
Step [4] – Once clicked, redirecting on to a new page. Click on the Start Trial button.
Step [5] – Add a payment method to your Google account, if you do not have one and complete the signup process.
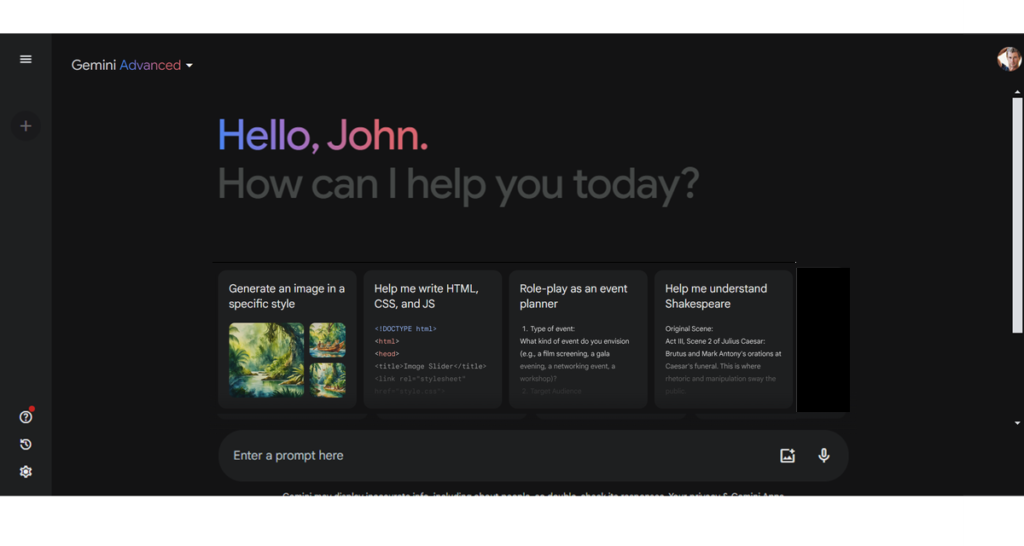
Step [6] – Once you completed the payment process, your subscription has been done. Click on Go to Gemini Advanced to start using the Ultra 1.0 model.