
Magento 2 Configuration General Settings is important terms.
There are following below section included as:
- Country Options
- State Options
- Locale Options
- Store Information
- Single-Store Mode
How to configure Magento 2 General Settings
Magento 2 Admin
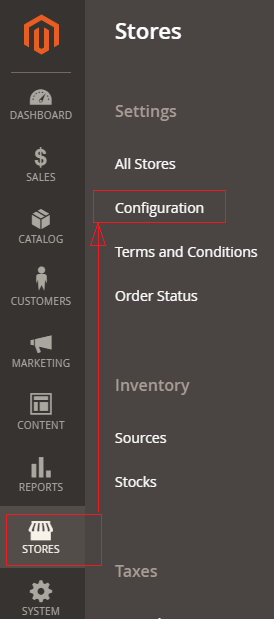
[1]- Go To STORES > Configuration, redirects on configuration page
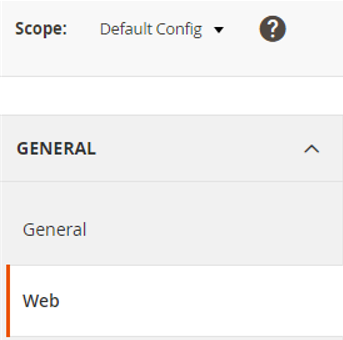
[2]- Left Panel click on General > General , expanded Right Panel with combination of following things as
[2.1]- Country Options
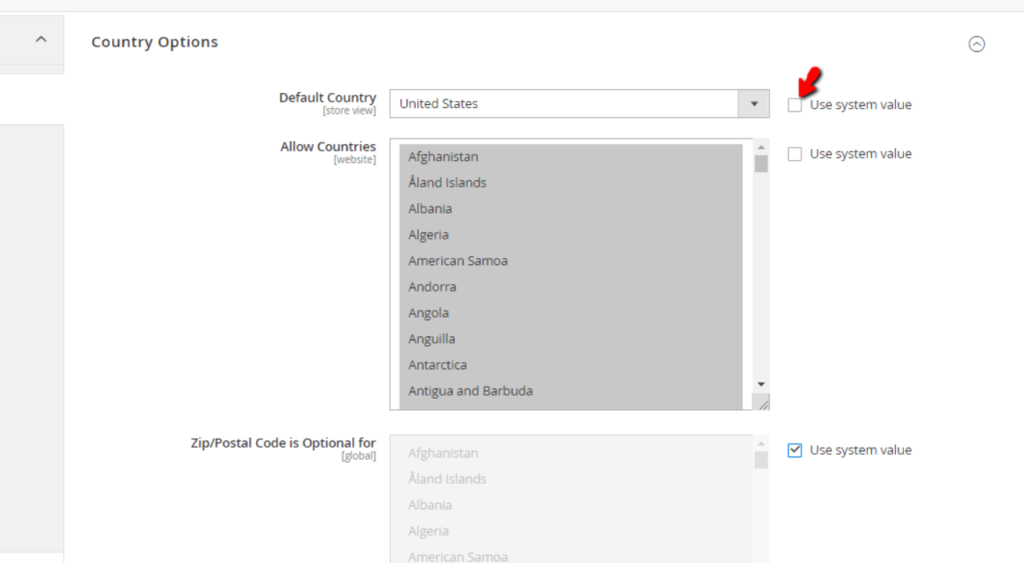
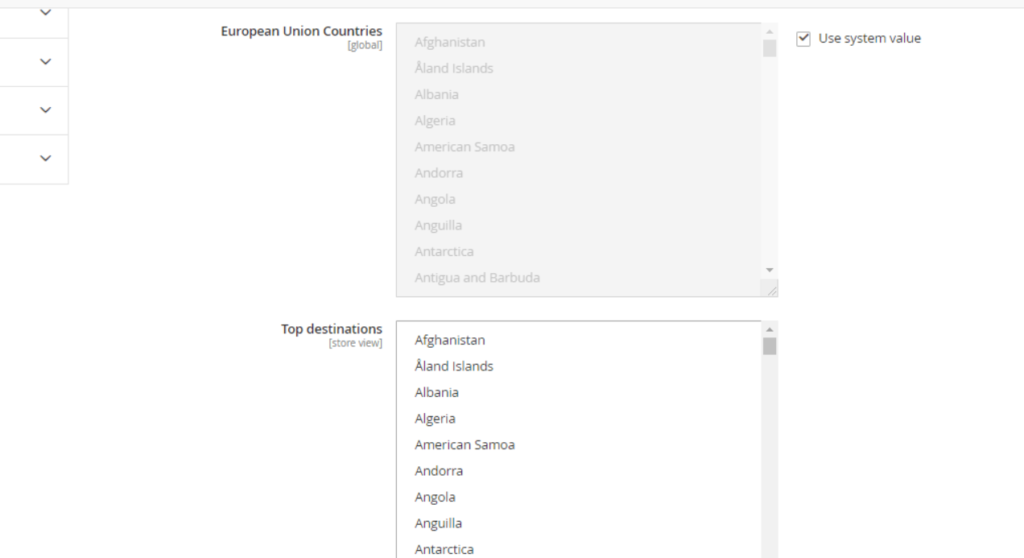
There are following below subsections of Country Options are described as
- Default Country : This represents, which country admin want to operate store, By Default United States selected.
- Allow Countries : This represents, Admin, how many countries are allowed to view store, By Default, all countries are selected.
- Zip/Postal Code is Optional for : This represents, Admin, how many countries [Zip/Postal Code] are allowed to view store, By Default, all Zip/Postal Code are selected, this is optional field
- European Union Countries : Admin can exclude countries that will not be considered as members of the EU for the purposes of store
- Top destination : Admin can select counties that will be positioned at the top of any county list displayed for customers before it gets to alphabetic order.
[2.2]- State Options : Once expanded State Options, The following below things displayed.
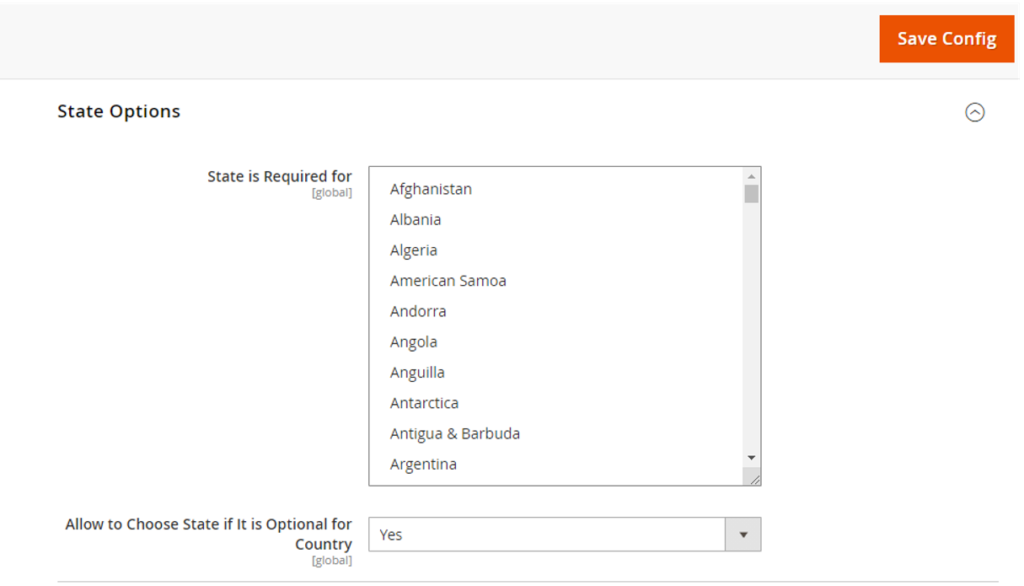
There are following below subsections of State Options are described as
- State is Required for : This represents, How many countries are allowed by Admin for customers shopping, either can select or some selected countries,
By Default below following countries are selected, This is required field
Australia
Brazil
Canada
China
Colombia
Croatia
Estonia
India
Latvia
Lithuania
Mexico
Poland
Romania
Spain
Switzerland
United States
- Allow to Choose State if It is Optional for Country: This represents, allow State County to add, even if it is optional for Country
[2.3]– Locale Options : Once expanded Locale Options, The following below things displayed.
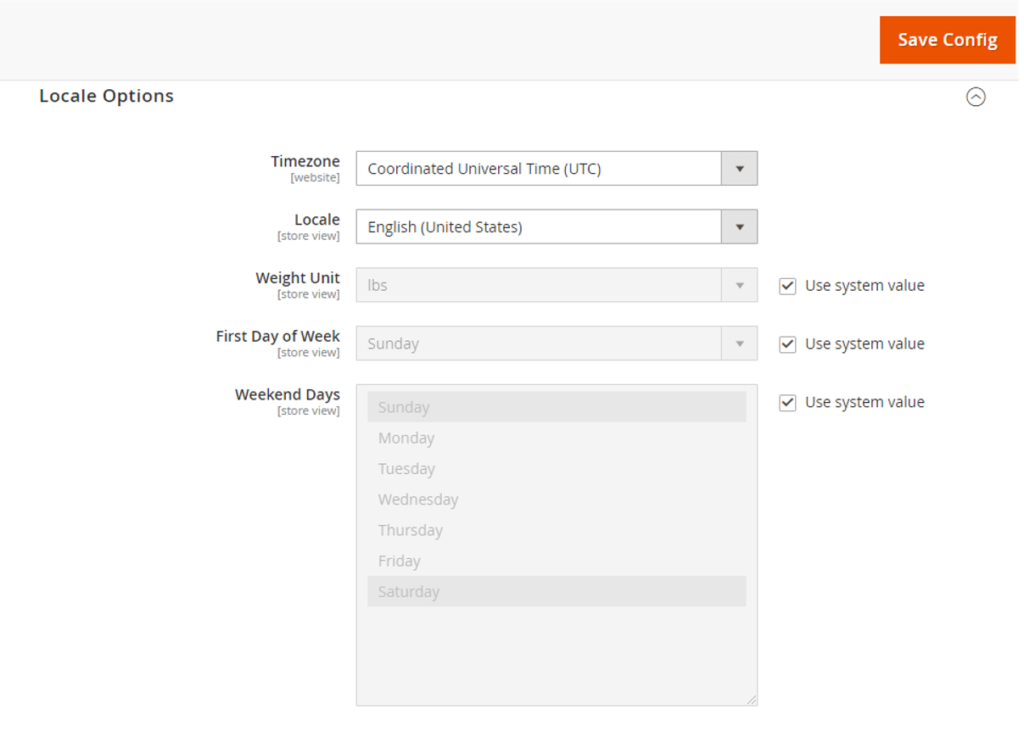
- Timezone : This represents, Time Zone, Admin can choose Time Zone, as per Store Need. By Default Selected Time zone, depends on which Time zone selected @time of Magento 2 Installation
- Locale : This represents, Language, Admin can decide Language, as per Store Need. By Default Selected Language, depends on which Language selected @timeof Magento 2 Installation
- Weight Unit : This represents, the weight measurement unit
- First Day of Week : This represents, which day, Admin want to select as “First Day of Week”, By Default Sunday selected
- Weekend Days: This represents, which day, Admin want to select as “Weekend Days”, By Default Sunday & Saturday selected
[2.4]– Store Information : Once expanded Store Information, The following below things displayed.
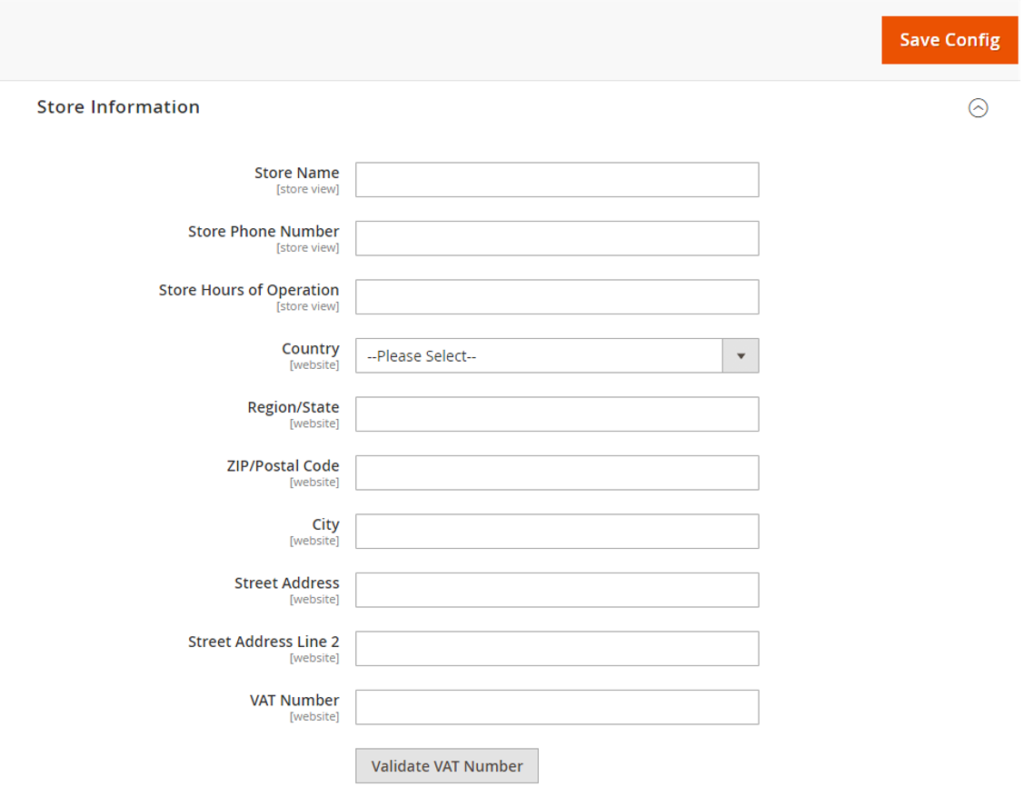
- Store Name – This represents official name of your Online Store.
- Store Phone Number – This represents official store’s contact phone number of your Online Store.
- Store Hours of Operation – This represents official store’s working hours.
- Country – This represents to select the country of your store’s base address..
- Region/State – This represents to enter the Region/State of your store’s base address
- ZIP/Postal code – This represents to enter the ZIP/Postal code of your store’s base address.
- City – This represents to enter the ZIP/Postal code of your store’s base Address
- Street Address – This represents to enter the Street Address of your store’s base address.
- Street Address Line 2 – This represents to enter the second Street Address of your store’s base Address, this is optional second Street Address of your store’s base address.
- VAT Number – This represents to enter the VAT number if applicable.
- Validate VAT Number – This represents to initiate verification on the entered VAT number. If you have entered VAT number, please make sure to click on it, to verify VAT Number
[2.5]– Single-Store Mode : This represents to allows to control whether the “Single-Store” mode is enabled or disabled.
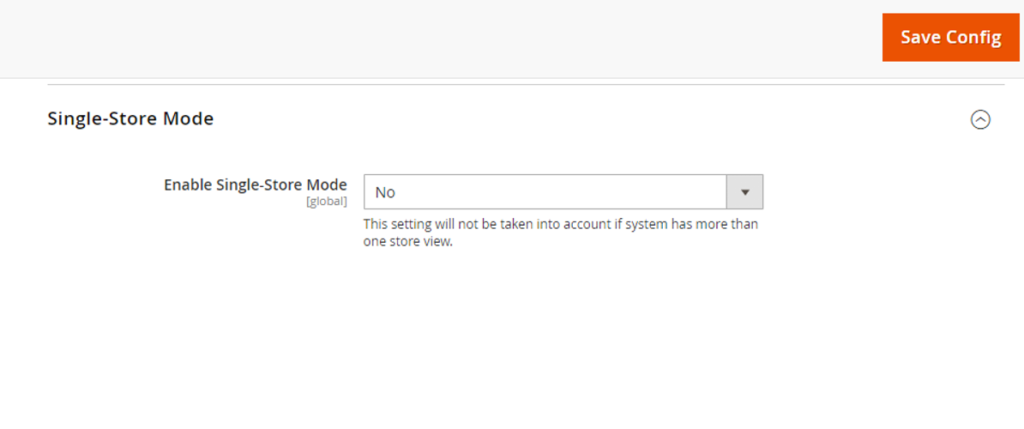
[2.6] Click on Save Config button & run CLI command Flush
