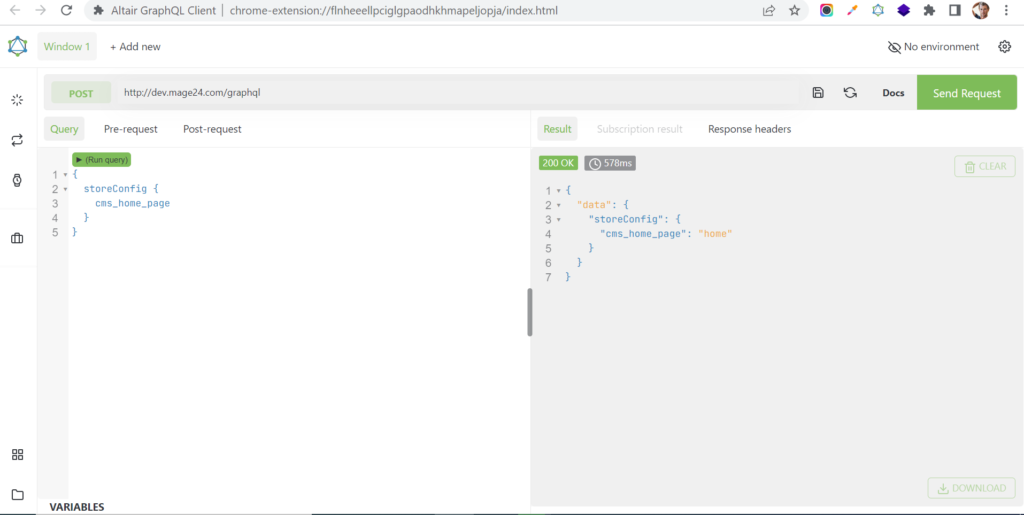
Algolia is an American company that provides fast web search results through Software-as-a-Service (SaaS) model, It is Hosted based search engine accessible via an API powering computer grade search for websites / app, Using Algolia, Users feel personalized site search &s a fast and reliable search experience.
The following below Algolia Search Features
[1] – Search as a Service [SAAS]]
[2] – API Integrate with Real Time Search
[3] – Auto Complete / Auto Suggest
[4] – Accurate Results
[5] – Full Text Search
[6] – AI Based Search
[7] – Instant Search Result
[8] – Find Answer Faster
[9] – Full Text Search Result
[10] – Globally 70 Data Center
[11] – Highly Optimized & Consumer Grade Search
[12] – Fast Response Time & Relevant Results
Algolia for Magento 2.x available the following below plans
[1] Free Plans ::Only limited features available [2] Paid plans ::All features available
The following below steps to integrate Algolia with Magento 2.x
Step [1] – Run the below composer require command
Path=Magento 2 Root Directory
composer require algolia/algoliasearch-magento-2
Step [2] – Run below command to enable AlgoliaSearch
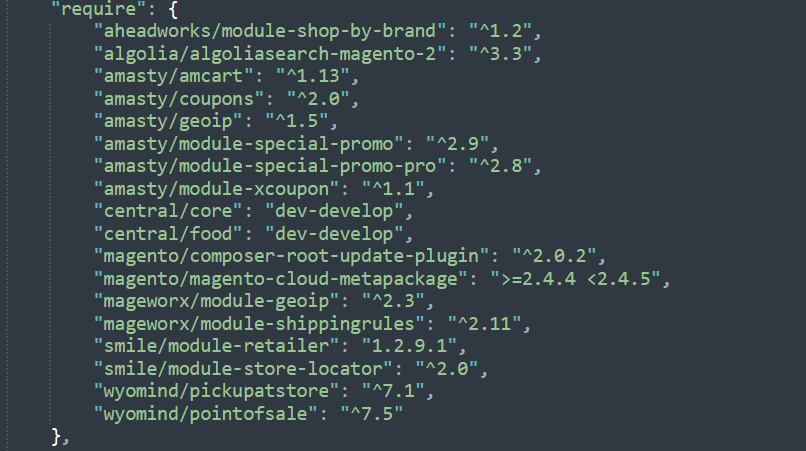
Step [3] – Check composer.json on Magento 2.x Directory
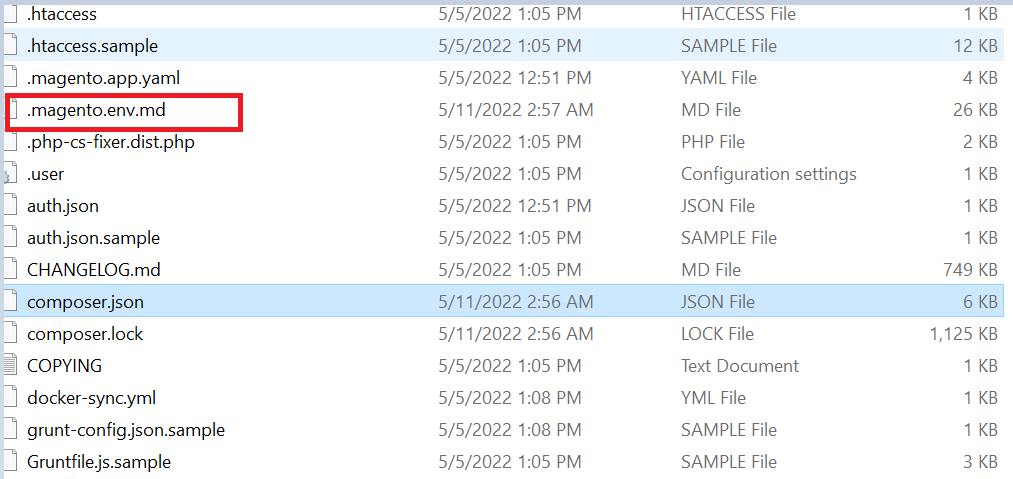
Step [4] – Check below file on Magento 2.x Directory
.magento.env.md
Step [5]– Magento 2.x Admin settings for Algolia
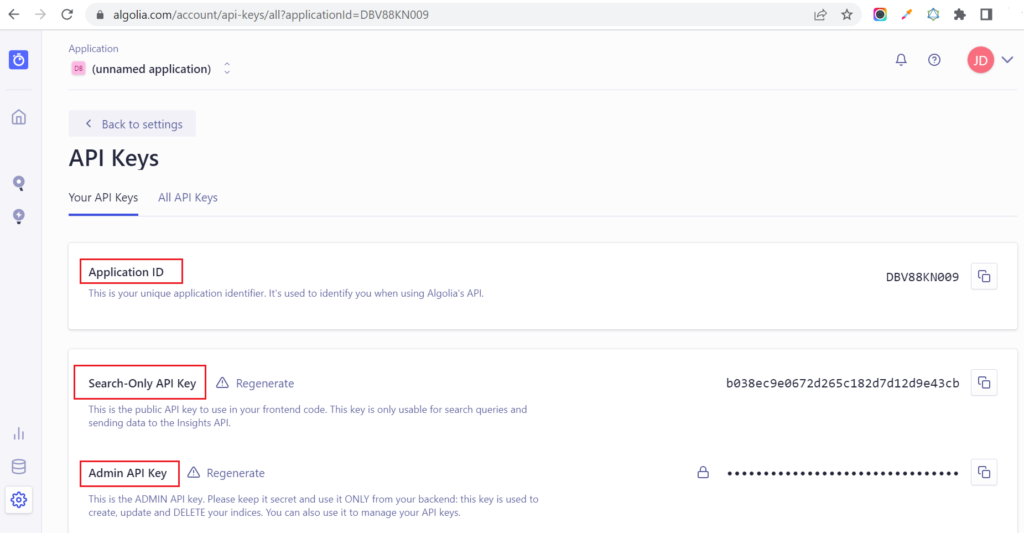
To configure the Magento 2.x admin Algolia configuration, need the following Algolia credentials:
Application ID Search-only API key Admin API key
You can find these credentials on the Algolia Dashboard, on the API Keys page from the menu.
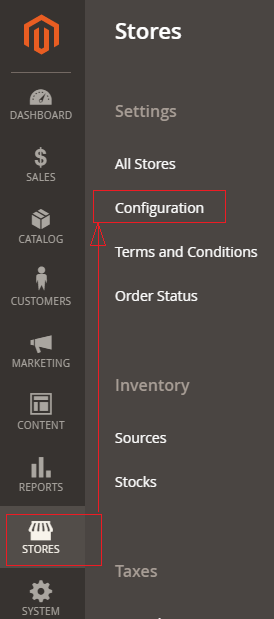
Step [6]– Go To STORES > Configuration, redirects on configuration.
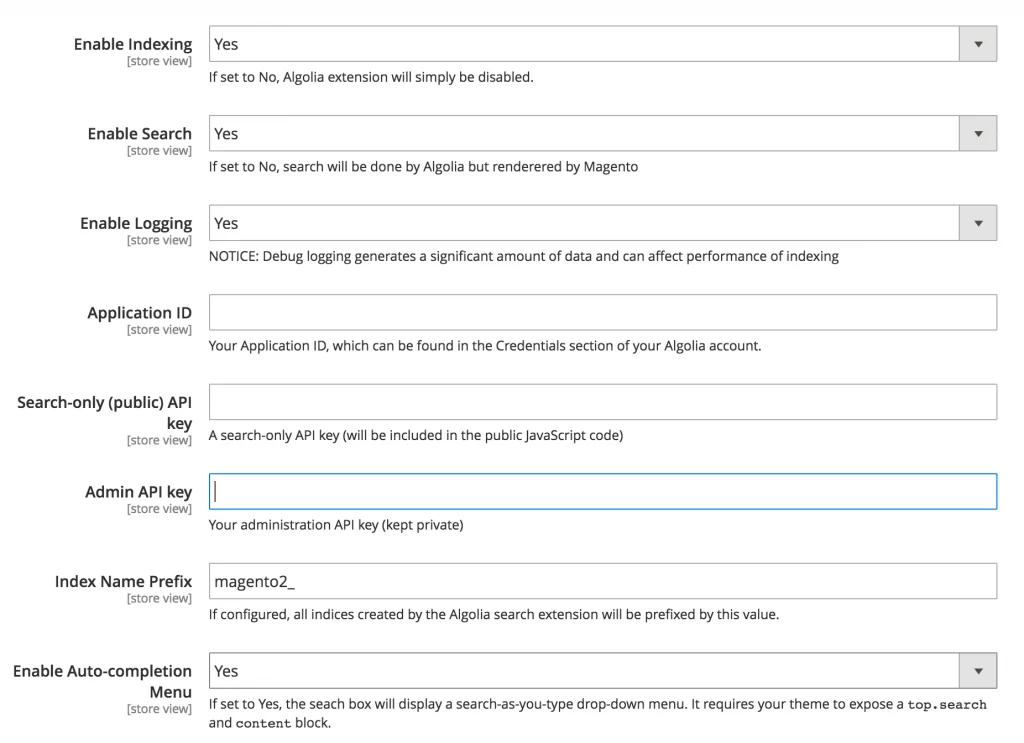
Step [7] – Go To Left Side Panel Algolia > Search, It redirects below Algolia Search Panel.
Fill Application ID, Search-only API key, Admin API key from previous Step [5]
Step [8] – Once, Magento 2.x Aloglia Admin Configuration has been done, send the data in your Magento 2.x installation to Algolia using the indexing process.
For Algolia Indexing Process, run below CLI Command
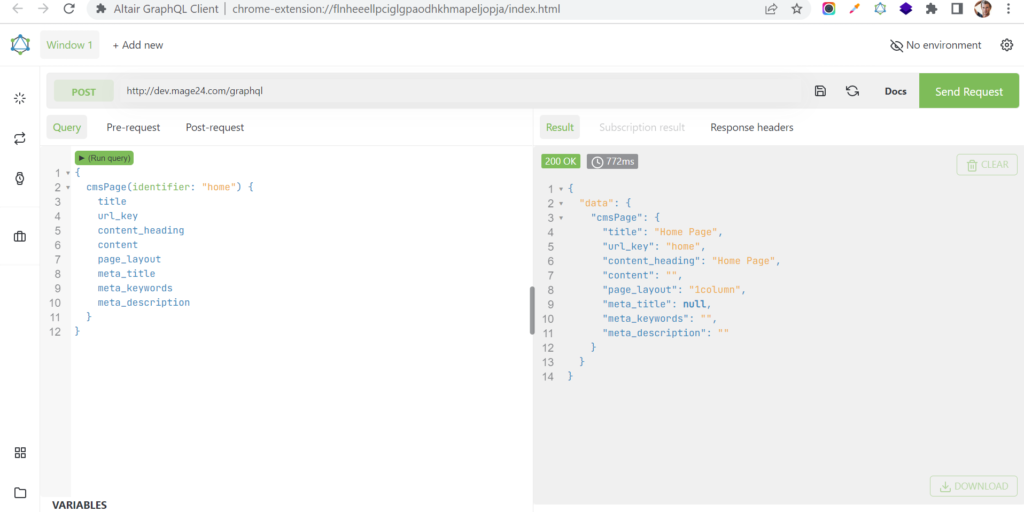
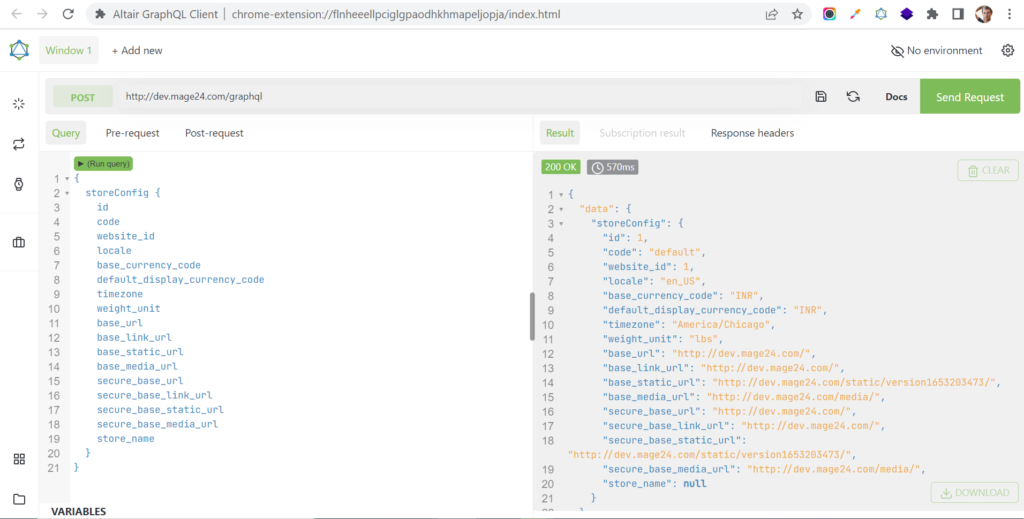
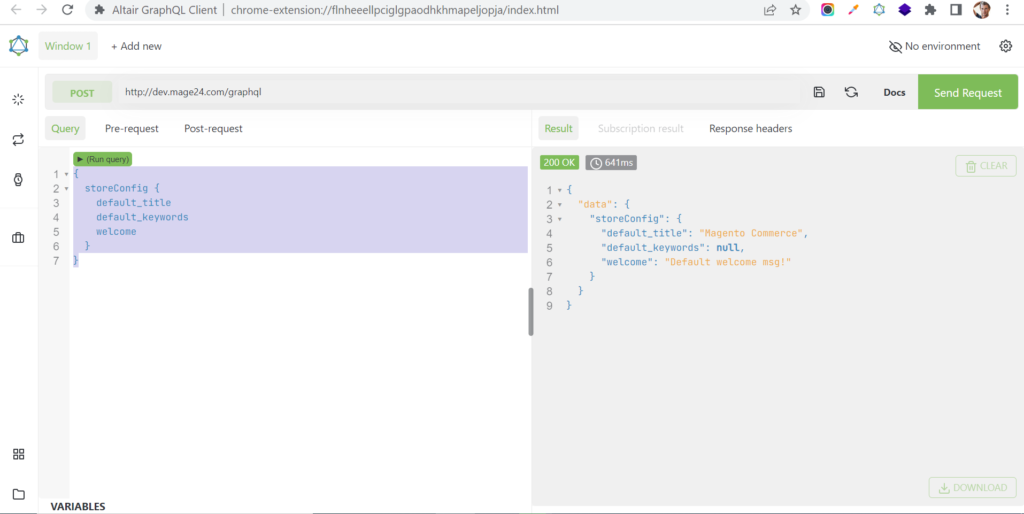
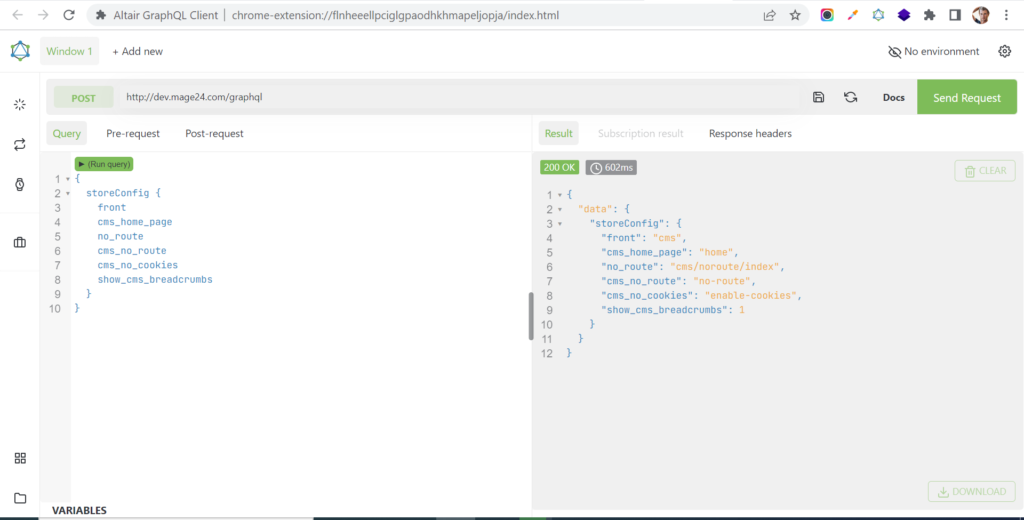
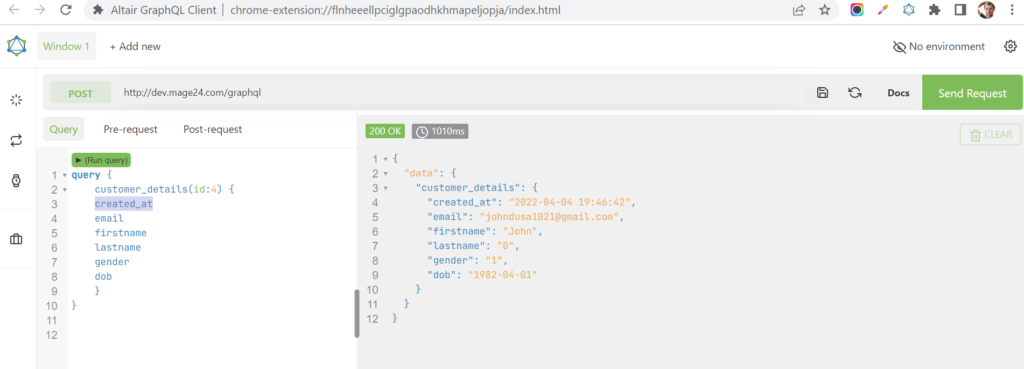
We are going to explain, Custom GraphQL Query Module to fetch the Customer’s Data in Magento 2.x to retrieve basic information of the customer entity as below
email
firstname
lastname
gender
dob
created_at
There are following below steps need to follow.
Customer GraphQL Query Module by using custom module
Here, we are considering as Namespace / ModuleName = Mage2db / CustomerGraphQl
Step [1]– Create registration.php file under your module [ Namespace / ModuleName ]
#Custom Module Customer GraphQL
type Query {

    customer_details(

    id: Int! @doc(description: "Specify The ID of The Customer.")

    ): CustomerData @resolver( class: "Mage2db\\CustomerGraphQl\\Model\\Resolver\\Customerlist") @doc(description: "Get list of Customer Data for the given customer id.")

}

type CustomerData {
        firstname: String
	lastname: String
	email: String
	gender: String
	dob: String
        city: String
	created_at: String
}
id: Int @doc(description: “Id of the Customer”) map to Stored Customers Listing id as Int type
Step [4] – Need to create Customerlist.php file from defined resolver from above schema.
CustomerData @resolver( class: “Mage2db\CustomerGraphQl\Model\Resolver\Customerlist”) @doc(description: “Get list of Customer Data for the given Customer ID.”)
Add below content in this file.
<?php
/**
 * @author       John
 * @email        johndusa1021@gmail.com
 * @copyright    Copyright (c) 2022 (https://mage2db.com)
 * @package      CustomerGraphQl
 */
namespace Mage2db\CustomerGraphQl\Model\Resolver;

use Magento\Framework\GraphQl\Config\Element\Field;
use Magento\Framework\GraphQl\Exception\GraphQlInputException;
use Magento\Framework\GraphQl\Query\ResolverInterface;
use Magento\Framework\GraphQl\Schema\Type\ResolveInfo;
use Magento\Framework\Exception\NoSuchEntityException;
use Magento\Framework\GraphQl\Exception\GraphQlNoSuchEntityException;
use Magento\Store\Model\StoreManagerInterface;

class Customerlist implements ResolverInterface
{

        protected $_customerSession;
	protected $_customerFactory;
	protected $_addressFactory;
	protected $storeManager;

     /**
     * @param Field $field
     * @param \Magento\Framework\GraphQl\Query\Resolver\ContextInterface $context
     * @param ResolveInfo $info
     * @param array|null $value
     * @param array|null $args
     * @return array|\Magento\Framework\GraphQl\Query\Resolver\Value|mixed
     * @throws GraphQlInputException
     */

	 public function __construct(

     \Magento\Customer\Model\SessionFactory $customerSession,
     \Magento\Customer\Model\CustomerFactory $customerFactory,
     \Magento\Customer\Model\AddressFactory $addressFactory,
     \Magento\Framework\Url $url,
     StoreManagerInterface $storeManager
     )
     {
	   $this->_customerSession = $customerSession->create();
           $this->_customerFactory = $customerFactory;
           $this->_addressFactory  = $addressFactory;
           $this->urlHelper = $url;
	   $this->storeManager = $storeManager;

      }

    public function resolve(
        Field $field,
        $context,
        ResolveInfo $info,
        array $value = null,
        array $args = null)
    {
         $currentStoreId = $this->storeManager->getStore()->getId();

         $Customer_Collection = $this->_customerFactory->create()->load($args['id']);

		 return $Customer_Collection->getData();
    }
}
As per above script, resolve() method having script which is responsible for getting Customer GraphQl Data.
Step [5] – Finally your Customer GraphQl Query Module has been created
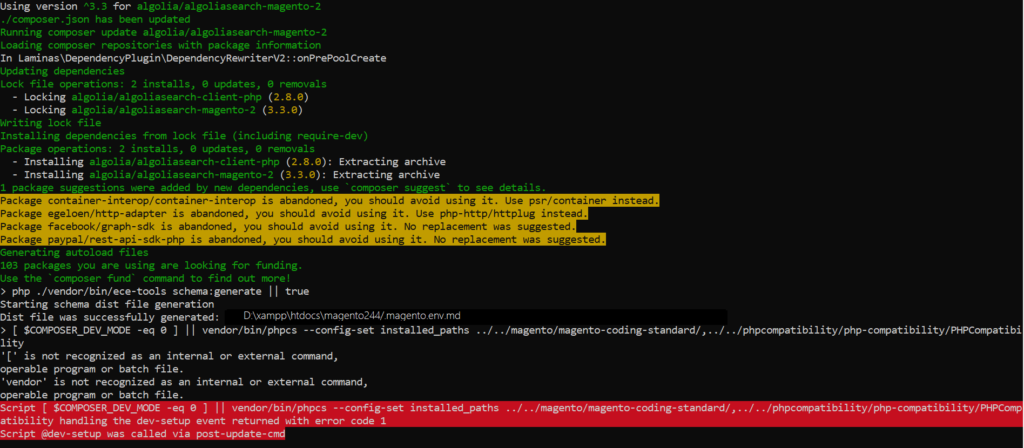
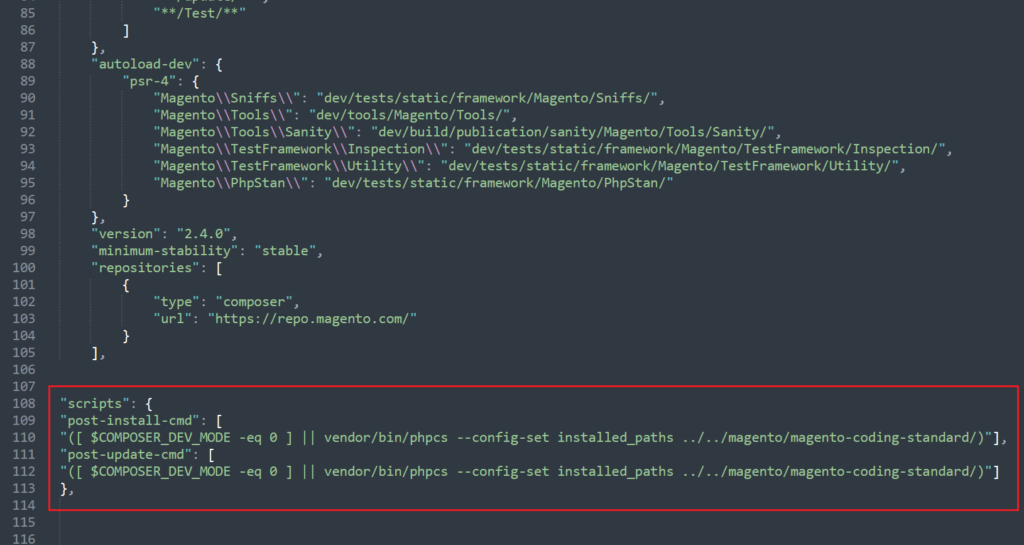
Run the following below commands at your Magento 2 root directory
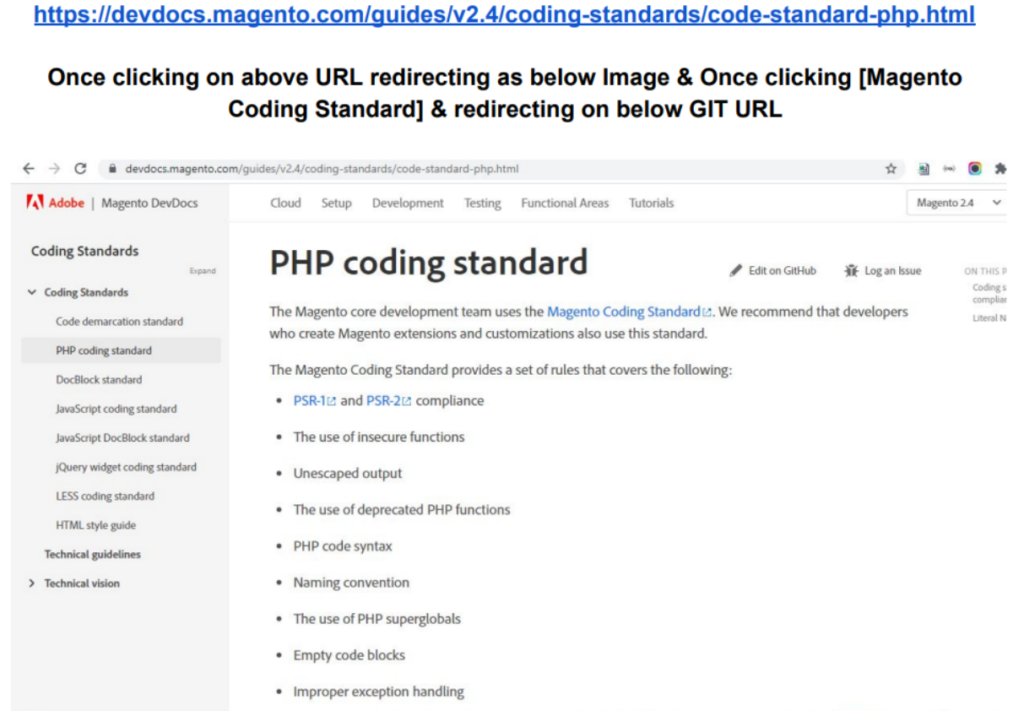
Coding Standard is a set of rules / regulations to specify Magento 2.xCoding Standard, every developer / designer must follow while a participating in the Magento 2.x Project Development / Designing.
Magento 2.x Coding Standard design Application’s Security, Stability, Maintainability and Extensibility (extend or modify existing behavior)
The following below steps need to follow.
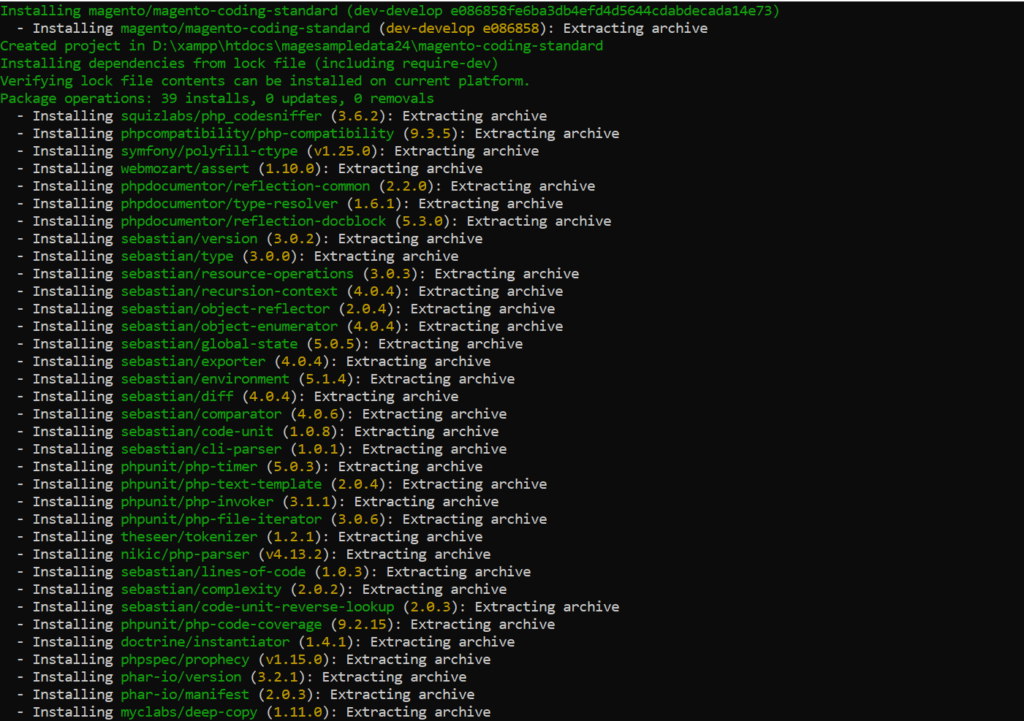
Step [1] – Go to Magento 2 Root Directory & run below command
Step [4] – Verify Installation Command should return the list of installed coding standards . go inside magento-coding-standard
cd magento-coding-standard
Step [4.1] – Once go inside magento-coding-standard, Run below command
cd vendor\bin
phpcs -i
The installed coding standards are MySource, PEAR, PSR1, PSR12, PSR2, Squiz, Zend, Magento2, Magento2Framework and PHPCompatibility
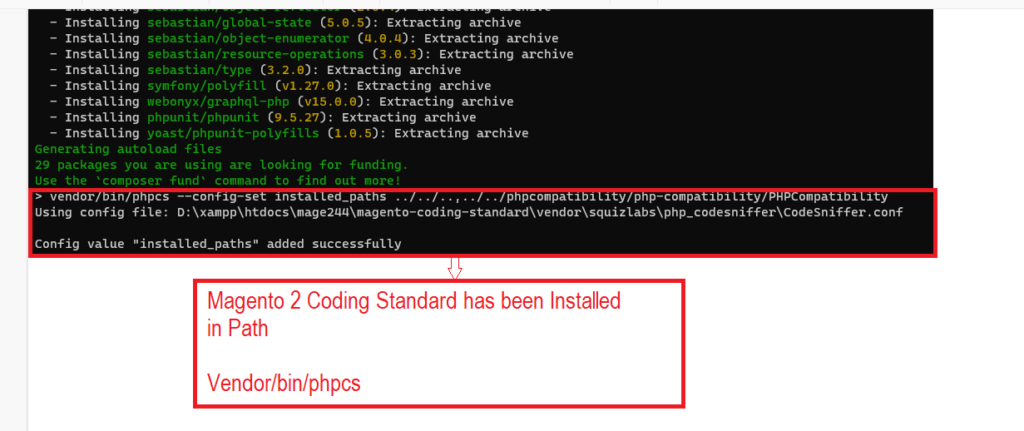
Finally Magento 2.x Coding Standard has been installed successfully.
Step [5] – Run Below command to check either Installed Magento 2 Coding Standard proper working or not
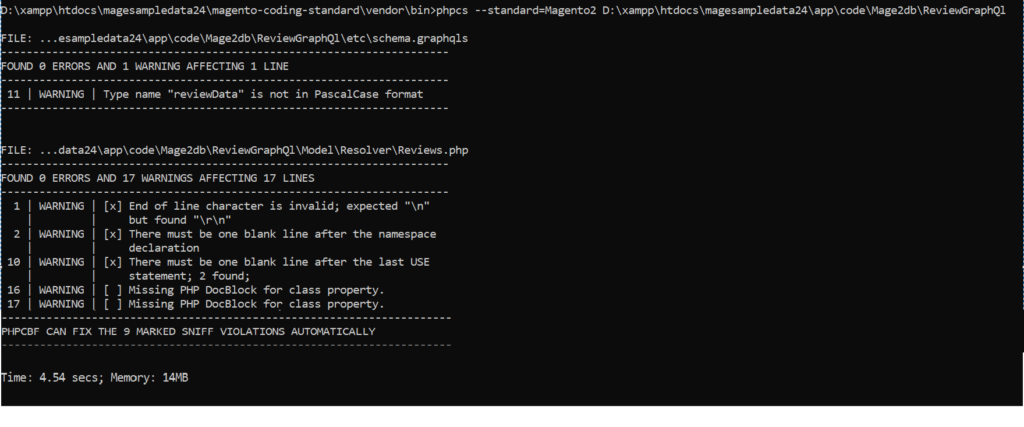
phpcs --standard=Magento2 D:/xampp/htdocs/VendorName/ModuleName or Particular File Path
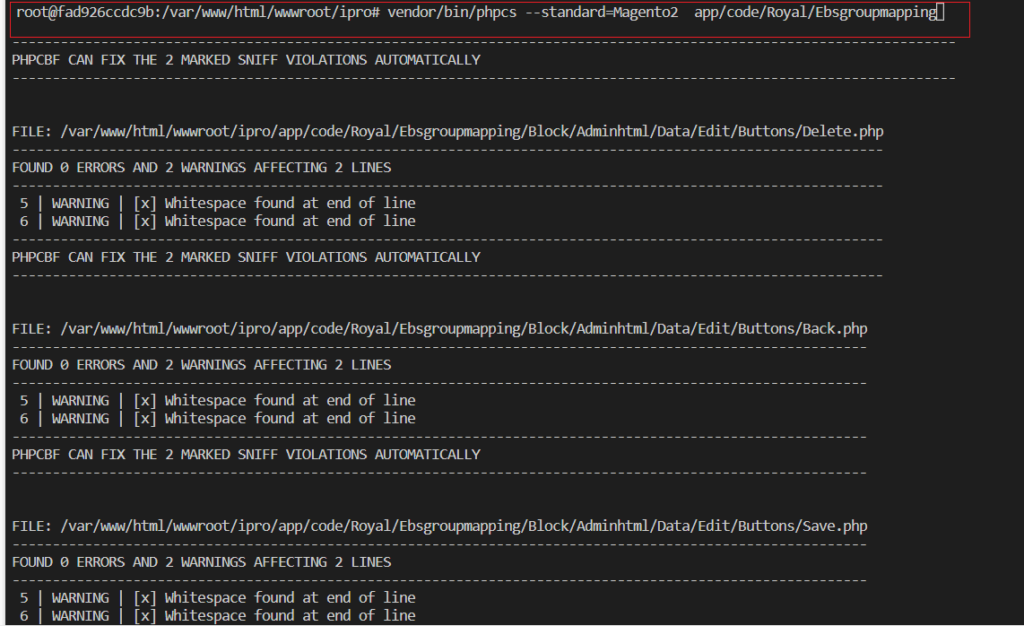
Once running phpcs command Solution as PHPCBF CAN FIX THE 1 MARKED SNIFF VIOLATIONS AUTOMATICALLY Everytime once running phpcs after that need to run below command always vendor/bin/phpcbf –standard=Magento2 D:/xampp/htdocs/HNI/yourcustomModule or particular file Once running above command, minor issue (Line indented Issue, Space Issue, Whitespace Issue, End of Line Issue etc) auto resolved Again need to run below command & resolve issue according instruction vendor/bin/phpcs –standard=Magento2 D:/xampp/htdocs/HNI/yourcustomModule or particular file
In Magento 2.4.x or Adobe Commerce 2.4.x — Magento 2.x Coding Standard already inbuilt just need to run CLI command as below
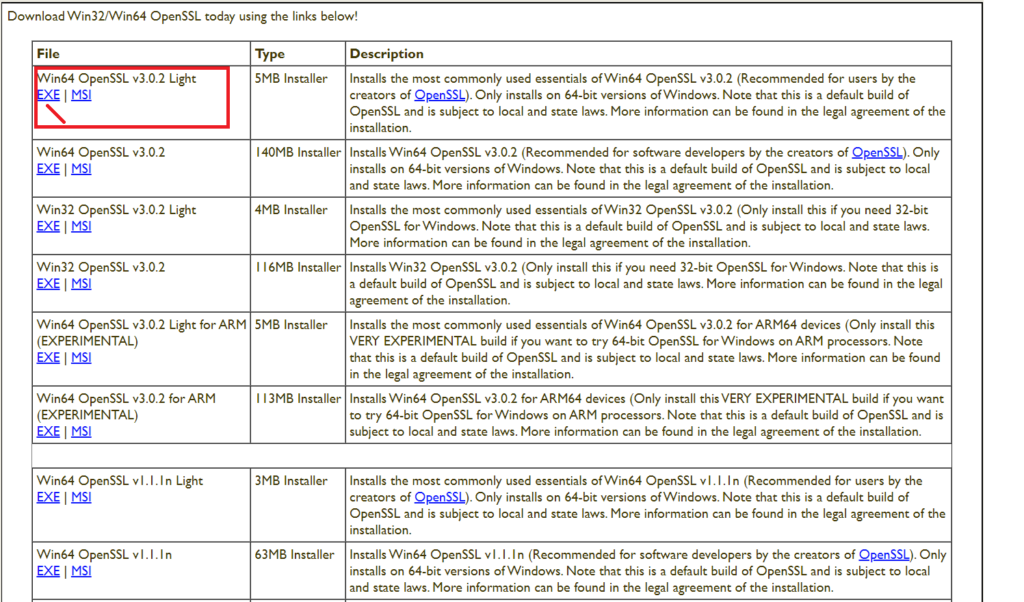
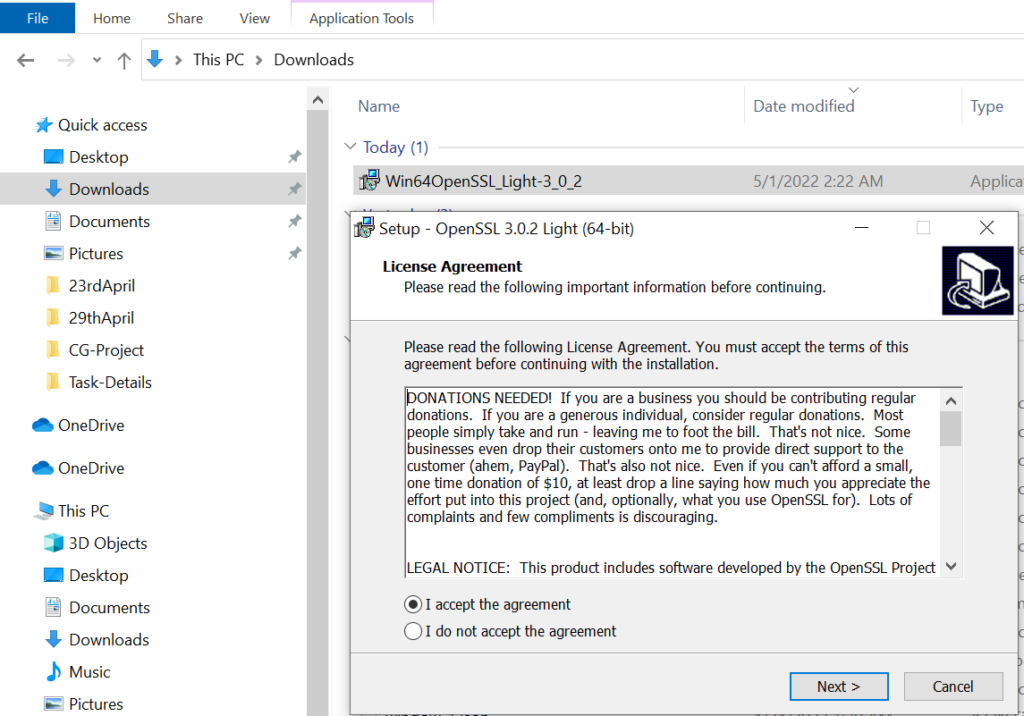
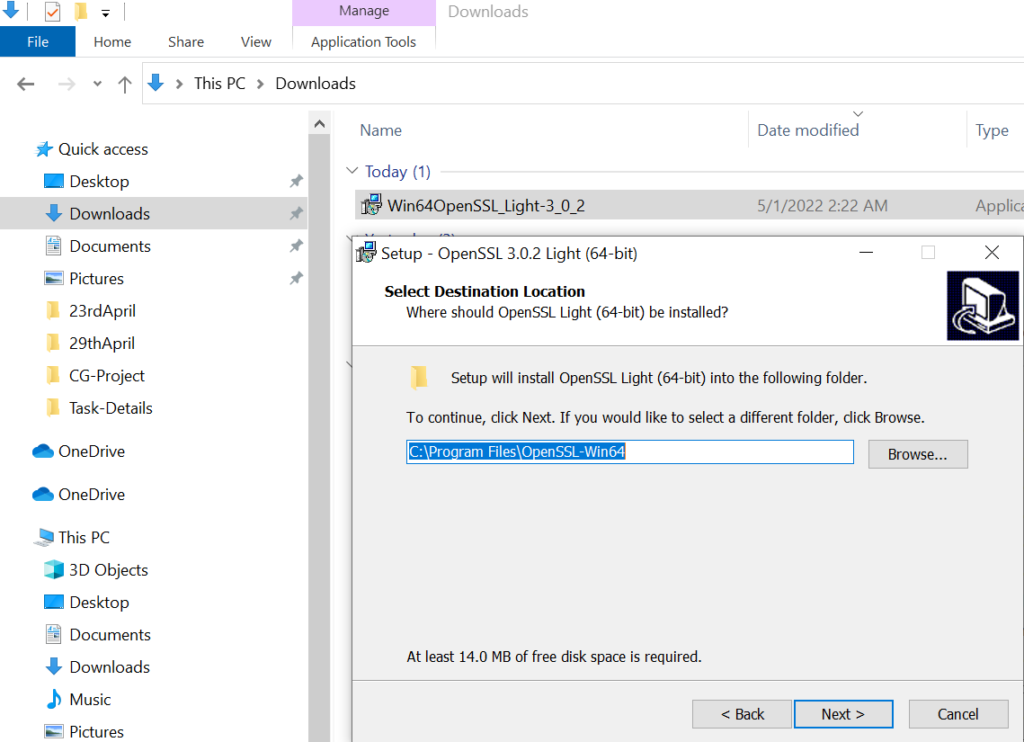
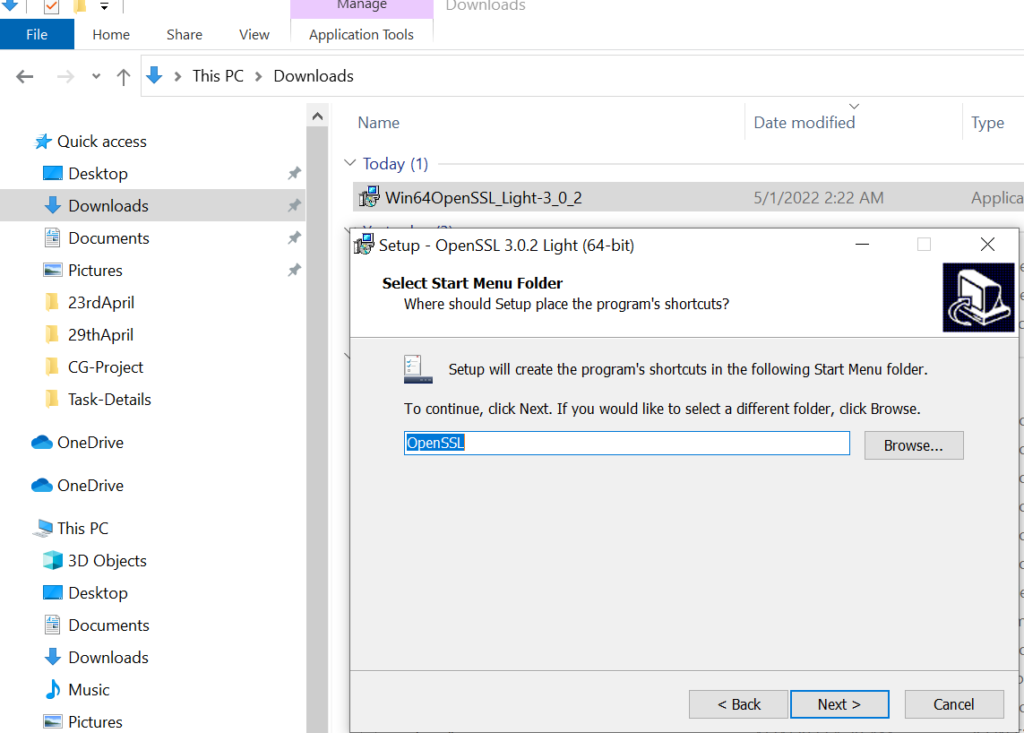
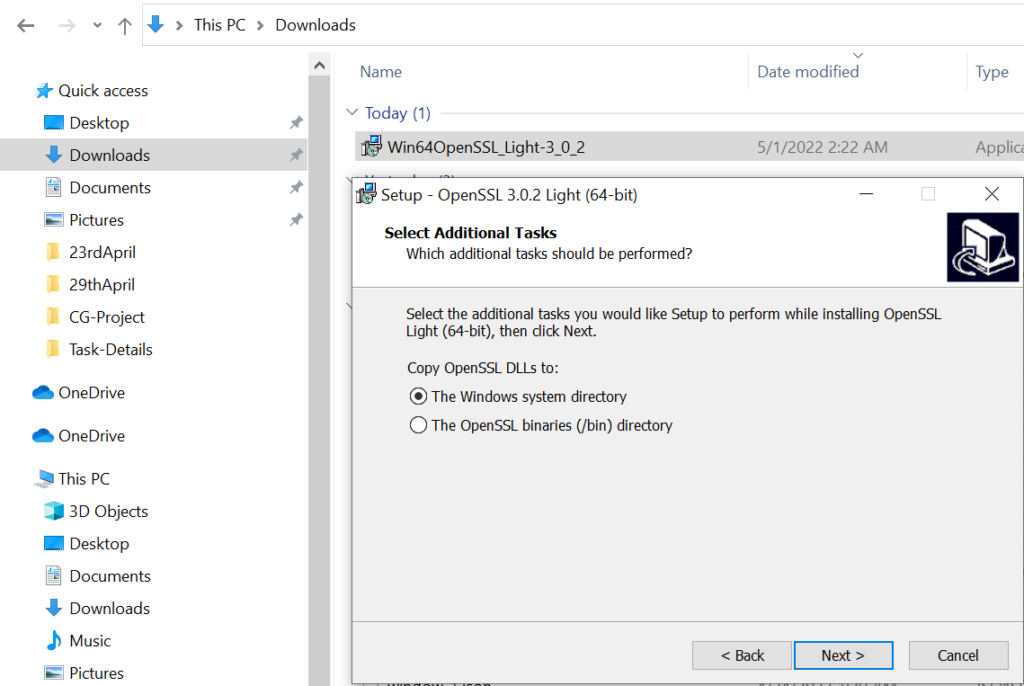
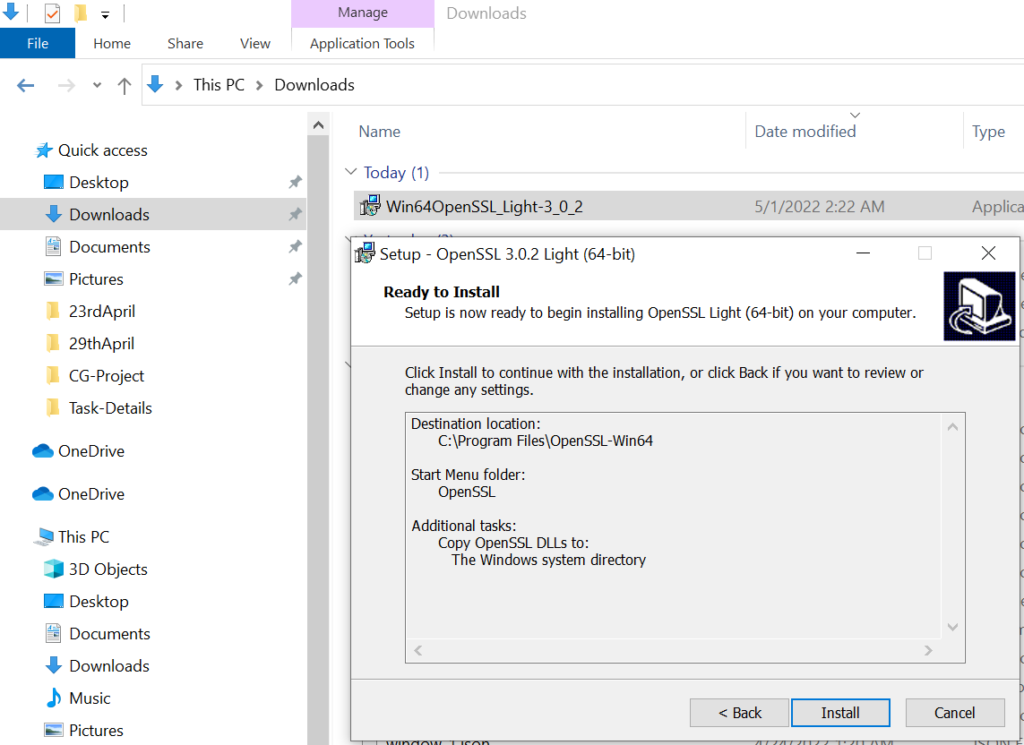
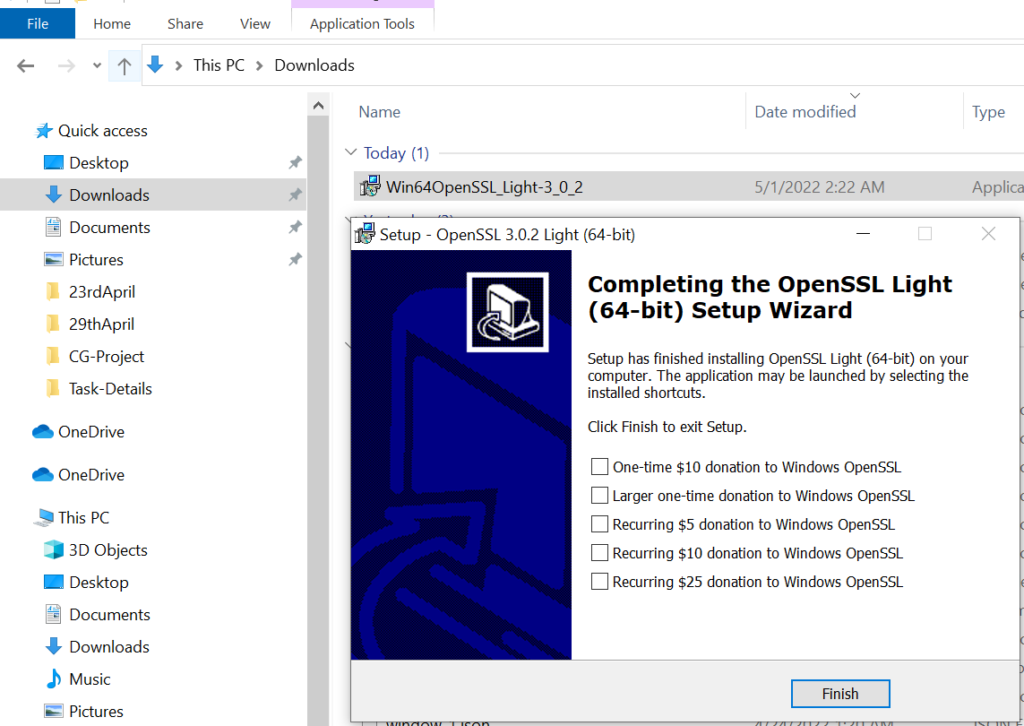
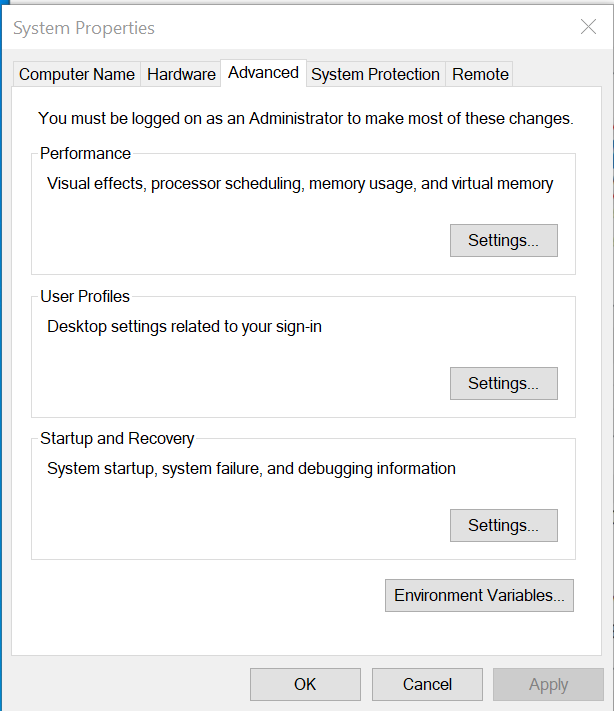
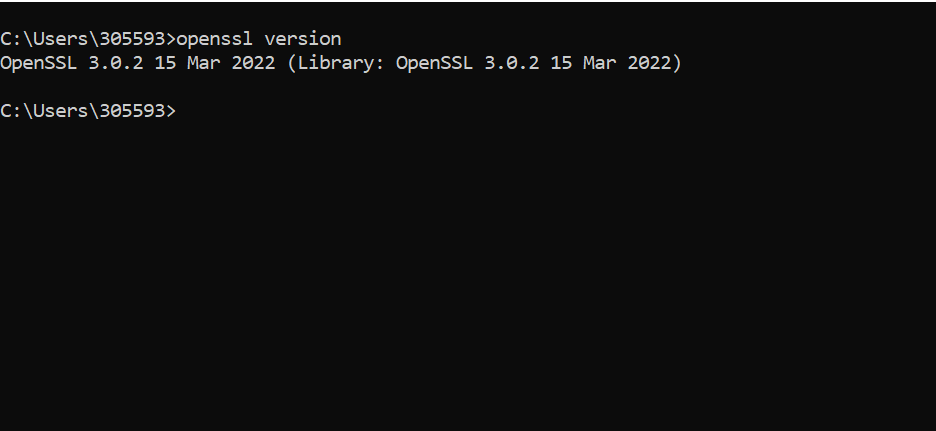
OpenSSL is an open-source command line tool which is used to generate Private Keys, create CSRs, implementation of the Secure Sockets Layer (SSL) and Transport Layer Security (TLS) protocols and identify certificate information.
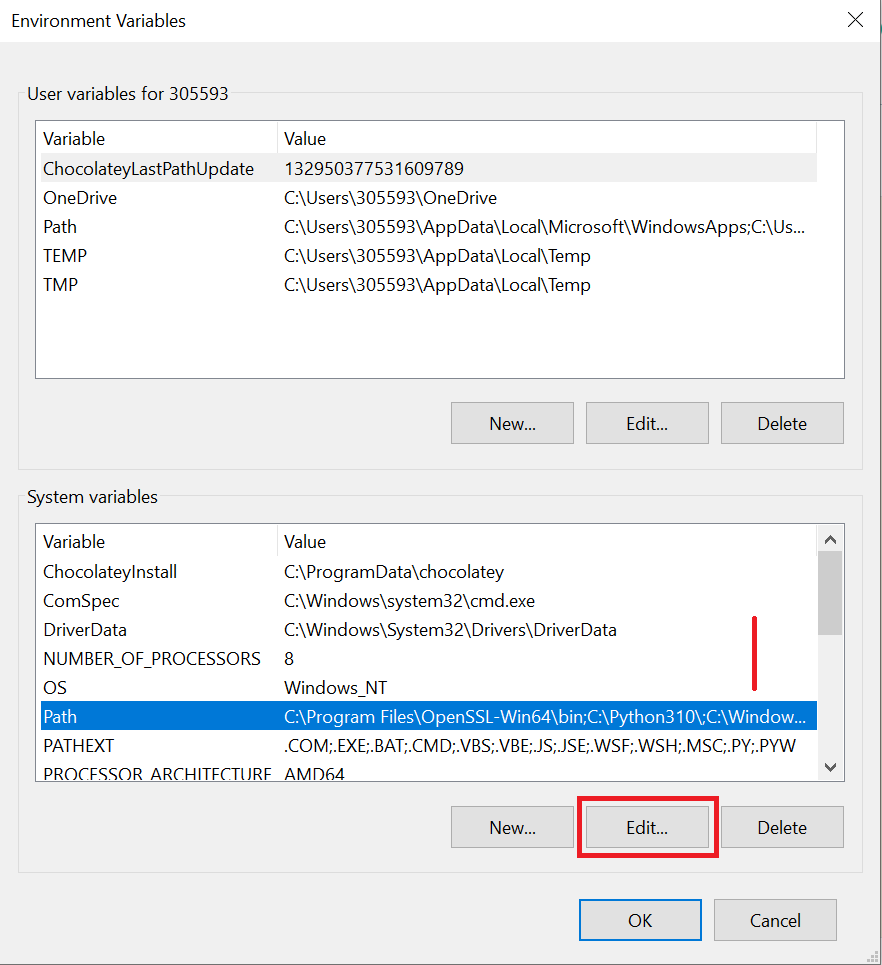
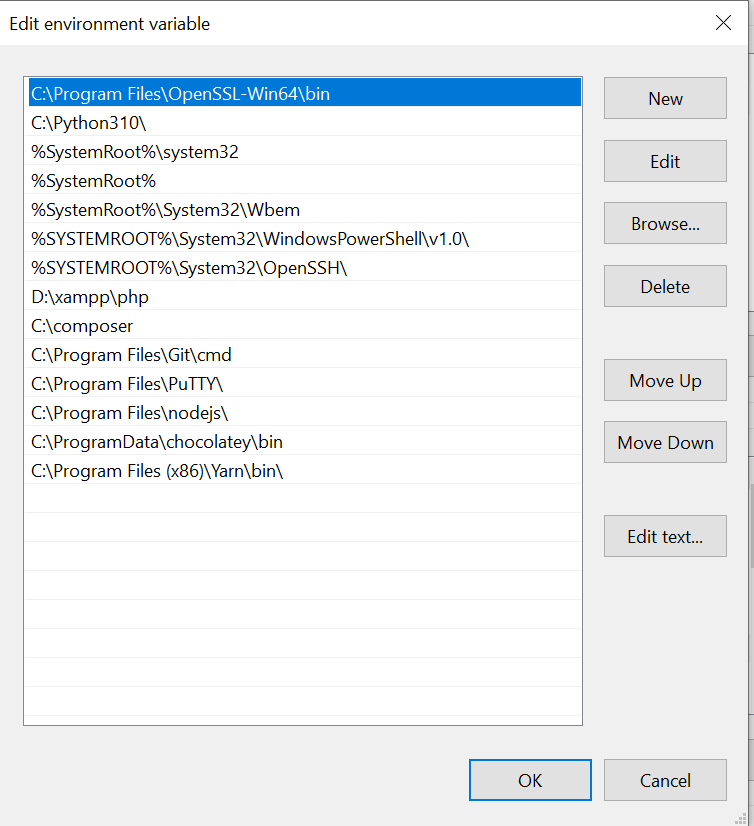
The following below steps need to follow to install OpenSSL in Windows 10
While Installing a Magento 2.x installation [Community Edition or Enterprise Edition or Commerce Cloud Edition ], you have seen that common blank page error [Storefront & Backend] that displays blank page.
Solution :: The following below steps need to follow
Step [1] – Go To ‘Validator.php’ file located at below path,
Business Tycoon Elon Musk & CEO of electric-car company Tesla and aerospace company SpaceX agreed to acquire Twitter for $44 billion on 26th April, 2022
The Following below reason, why acquired Twitter by Elon Musk
Reason [1] – Due To Free Speech, he wants to implement free speech on the platform so it can fulfil its potential as the world’s ‘Digital Town Square’.
Reason [2] – To make the company private is likely to have substantial ramifications for a service used by more than 300 million people, including many world leaders.
Reason [3] – To desire as safeguard Twitter as a free speech system rather than censorship, “Free speech is essential to a functioning democracy”
Reason [4] – To remove Fake Profile, & keeping genuine user & verified profiles
Reason [5] – To modify / moderate Twitter’s policies content, arguing that so be a genuine forum for free speech.
Reason [6] – To protect Twitter users from harmful content & keeping genuine content
Origins of Twitter::
The origins of Twitter date back to early 2006, when NYU student Jack Dorsey shared a new online communication idea with some of his coworkers at Odeo, a podcasting company. Dorsey’s idea was a platform that allowed users to share short messages with groups of people, similar to sending text messages.
First Tweet::
JackDorsey sent the first message on Twitter on 21st March 2006, 9:50 PM. It read, “just setting up my twttr.”
Twitter Trends Increased By 2007::
Twitter was introduced to the public on July 15th, 2006, . The website started watching around 20,000 tweets per day in the first months, but this number grew to 60,000 in 2007
Twitter Tweet Limit Increased from 140 characters to 140 characters::
Twitter was originally designed as an Mobile SMS-based platform in early days where limit was 140 characters, Twitter decided to increase Twitter limit from 140-character limit to 280 characters limit On 2017