The Following below admin setting required to add Table Rates method in Magento 2 Store.
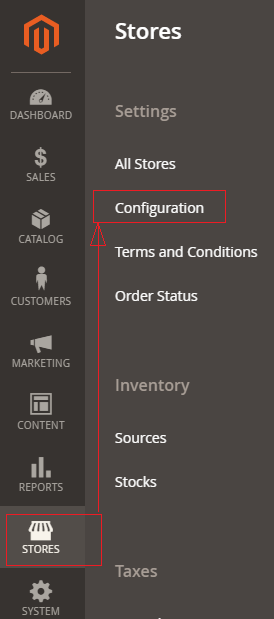
Step [1] – Go STORES > Configuration, redirects Configuration section.
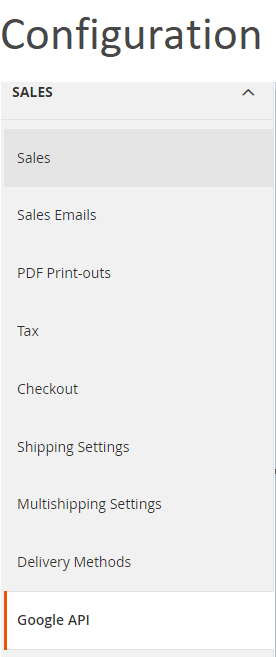
Step [2] – Left panel, choose SALES > Shipping Methods or Delivery Methods
Step [3] – Right panel, Expand the Table Rates section.
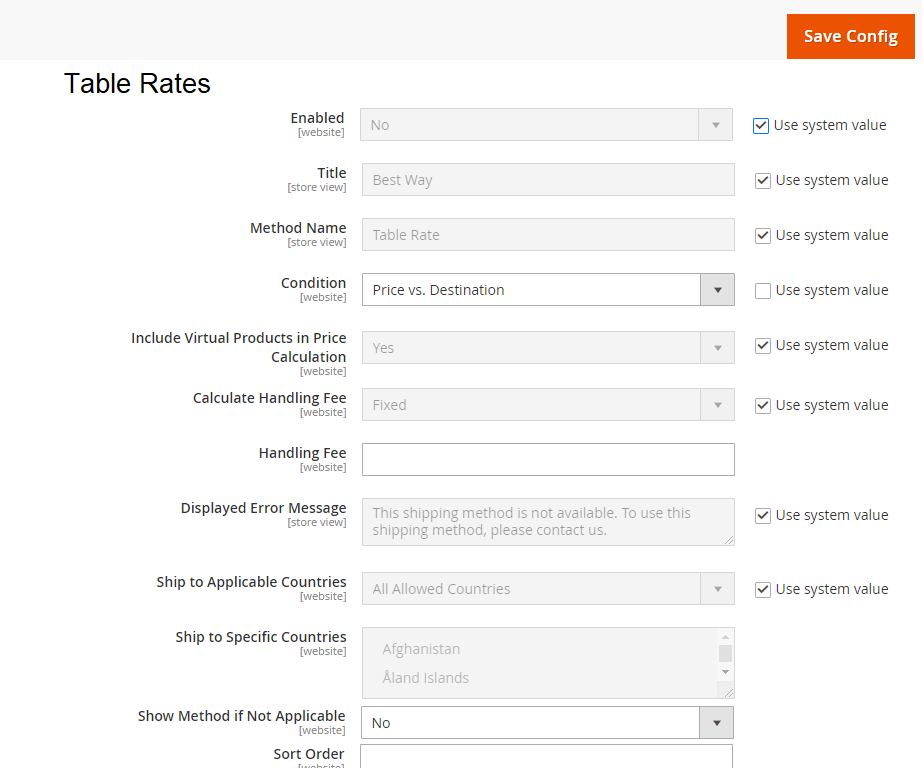
The Table Rates Shipping section having the following below fields
Enabled:: Select Yes from Select Drop Down box, to enable, by default No selected
Title:: Enter Title Name. By default, Flat Rate
Method Name:: Change Method Name, if required, by default Fixed
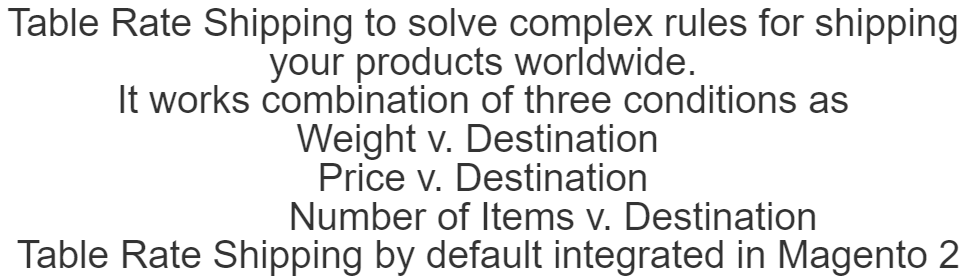
Conditions:: This having three options
Conditions–Weight v. Destination: This type means the shipping rate is zero, which is similar to free shipping method.
Conditions–Price v. Destination: It charges a flat shipping rate for the entire order.
Conditions–Number of Items v. Destination: It charges a flat shipping rate for each item. The final shipping cost is multiplied by the number of items in the cart.
Include Virtual Products in Price Calculation:: If you want to have a virtual product in the estimation then, select Yes, by default Yes selected
Price:: Enter shipping price, if you to charge for Flat Rate shipping
Calculate Handling Fee:: If you want to add some additional shipping handling charges select it either Percentage or Fixed, define these two options as below.
Calculate Handling Fee–Percentage:: Define Percentage option to add some additional shipping handling charges
Calculate Handling Fee–Fixed:: Define Fixed option to add some additional shipping handling charges
Calculate Handling:: Enter additional shipping handling charges, either Percentage or Fixed values, depends on Calculate Handling Fee
Displayed Error Message:: This display if Free shipping having any error, if you want to modify content, do it as per your store need.
Ship to Applicable Countries:: Free Shipping is supported for every country
Ship to Specific Countries:: Free Shipping is only supported for selected countries.
Show Method if Not Applicable:: Select Yes if you want to show Free Shipping all time, by default No selected
Sort Order:: Set the Sort Order on the Shipping Method on the checkout page
Step [4] – Click on Save Config button & run CLI command Flush
If you want to Estimate or Calculate Tables Shipping Rates Data, follow below steps.
Estimate or Calculate Tables Shipping Rates Data:: The following below steps define how to calculate Tables Shipping Rates Data
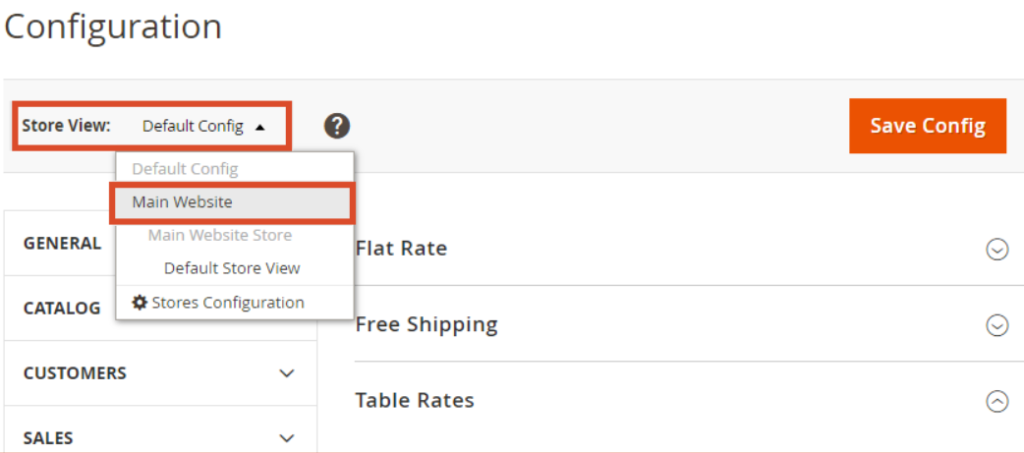
Step [1] – Click on Store View in the upper left corner and switch to Main Website or any other store where the configuration have to apply
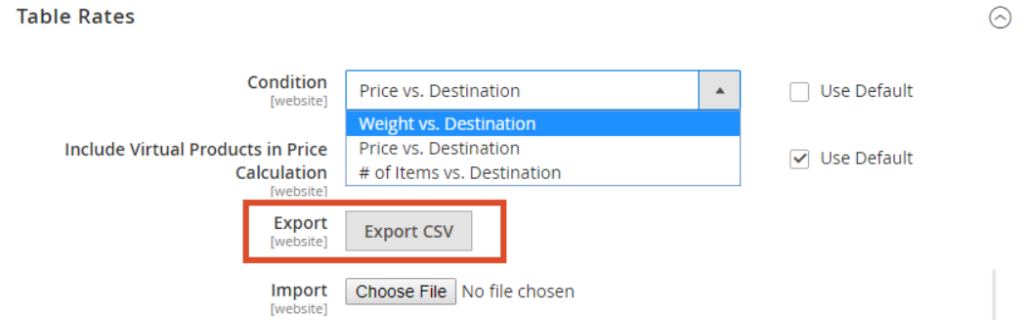
Step [2] – Once Step [1] setting done, You can see new Export and Import options available.
Step [2.1] – To change the Condition, clear Use Default Checkbox and select another.
Step [2.2] – Click Export CSV to download the tablerates.csv file.
Step [2.3] – Open the file tablerates.csv file in a spreadsheet & modify as your store shipping need
Use an asterisk (*) as a wildcard to represent all possible values in any category.
In the Country column, provide the Three Digit Country Code or Alpha-3 code for every country.
Sort the data by Region / State, so the specific locations are at the top of the list, and the wildcard locations at the bottom. This will process the rules with the absolute values first, and the wildcard values later.
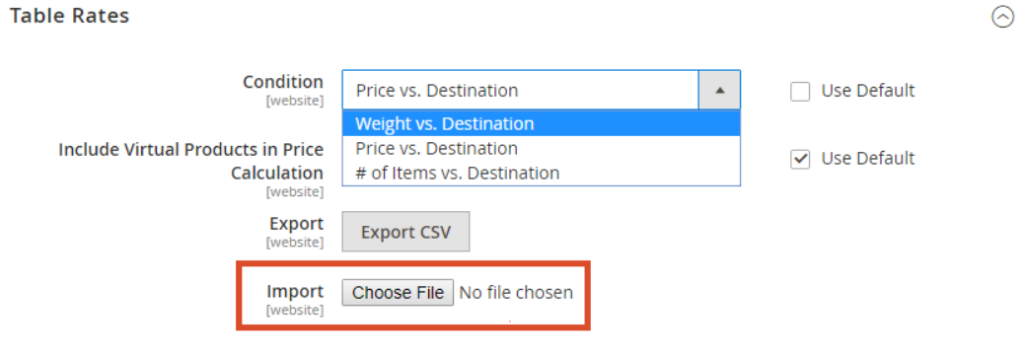
Step [3] –Import Tables Shipping Rates Data
Click Choose File next to import field. Select your completed tablerates.csv file, and import the rates.
Step [4] – Click on Save Config button & run CLI command Flush
To check Tables Shipping Rates Data working fine either yes or not, need to add products in the cart & conducting the payment process with different shipping addresses in the checkout. Finally, you can ensure that the calculation for the Tables Shipping Rates Data as well as handling rates are working fine as per your store.
Other Important Magento 2 Shipping / Delivery Methods
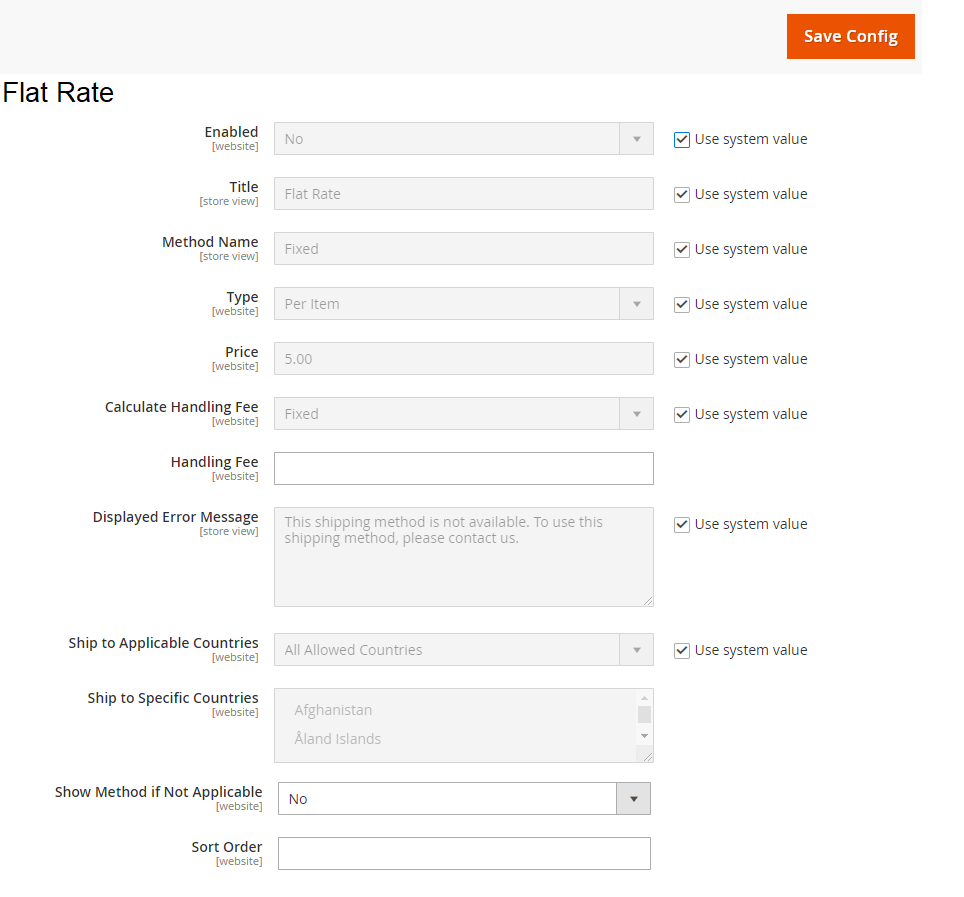
The Following below admin setting required to add Flat Rate method in Magento 2 Store.
Step [1] – Go STORES > Configuration, redirects Configuration section.
Step [2] – Left panel, choose SALES > Shipping Methods or Delivery Methods
Step [3] – Right panel, Expand the Flat Rate Shipping section.
The Flat Rate Shipping section having the following below fields
Enabled:: Select Yes from Select Drop Down box, to enable, by default No selected
Title:: Enter Title Name. By default, Flat Rate
Method Name:: Change Method Name, if required, by default Fixed
Type:: having three options
Type–None: This type means the shipping rate is zero, which is similar to free shipping method.
Type–Per Order: It charges a flat shipping rate for the entire order.
Type–Per Item: It charges a flat shipping rate for each item. The final shipping cost is multiplied by the number of items in the cart.
Price:: Enter shipping price, if you want to charge for Flat Rate shipping
Calculate Handling Fee:: If you want to add some additional shipping handling charges select it either Percentage or Fixed, define these two options as below.
Calculate Handling Fee–Percentage:: Define Percentage option to add some additional shipping handling charges
Calculate Handling Fee–Fixed:: Define Fixed option to add some additional shipping handling charges
Calculate Handling:: Enter additional shipping handling charges, either Percentage or Fixed values, depends on Calculate Handling Fee
Displayed Error Message:: This display if Free shipping having any error, if you want to modify content, do it as per your store need.
Ship to Applicable Countries:: Free Shipping is supported for every country
Ship to Specific Countries:: Free Shipping is only supported for selected countries.
Show Method if Not Applicable:: Select Yes if you want to show Free Shipping all time, by default No selected
Sort Order:: Set the Sort Order on the Shipping Method on the checkout page
Step [4] – Click on Save Config button & run CLI command Flush
Other Important Magento 2 Shipping / Delivery Methods