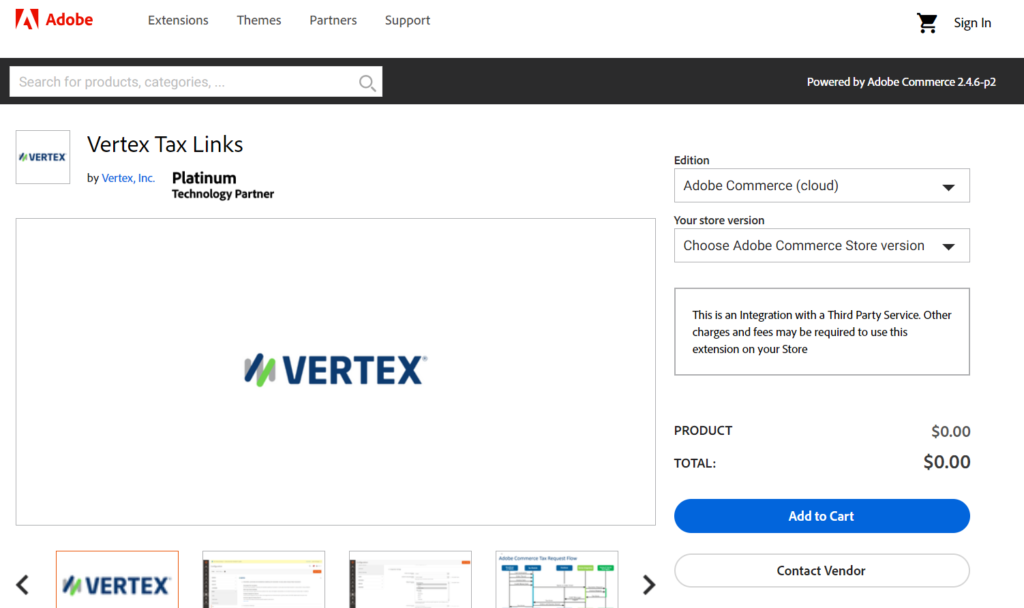
In Adobe Commerce to reduce streamline tax determination and compliance by automating tax calculations for every transaction—all backed by the global leader in tax technology
But these Sales Taxation Calculation changes time to time for every country & its region based , due to this we have to install Adobe Commerce API based Sales Taxation and accurate sales extension so that time to time country & its region-based Sales Taxation Calculation to be reflected in our system to generate correct country & its region-based Invoice with correct tax.
Vertex centralizes all the rates and rules required for product taxability and accurate sales and use tax calculation. No need to manage constantly changing tax content manually
The following below code need to put in your custom module controlller
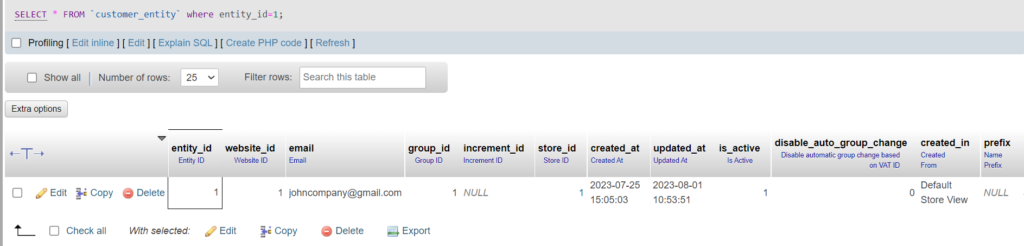
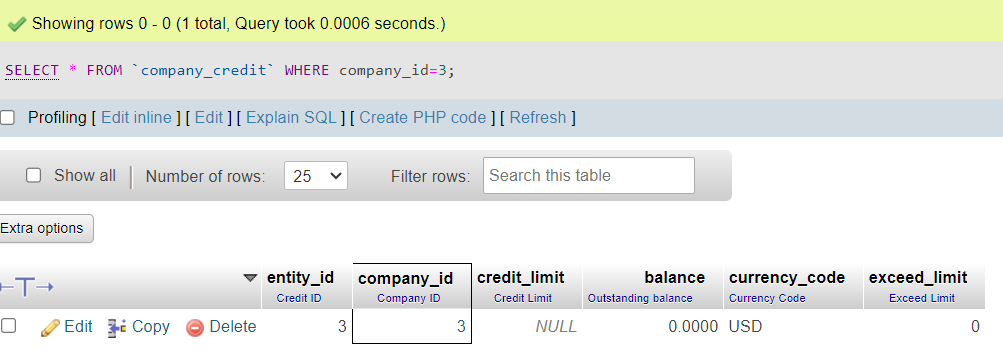
Here We are considering customer account has been already created in Adobe Commerce B2B & it entity_id=25, that is using here as super_user_id=25 & email = userwithoutcompany@gmail.com
<?php
/*
* John_Customercompanycreation
* @category Adobe Commerce B2B Customer Company Account Creation
* @package Customerregister Form
* @copyright Copyright (c) 2023 - Mage2DB.com
* @Email johndusa1021@gmail.com
* @version 1.0.0
*/
namespace John\Customercreation\Controller\Index;
use Magento\Backend\App\Action\Context;
use Magento\Framework\Controller\ResultFactory;
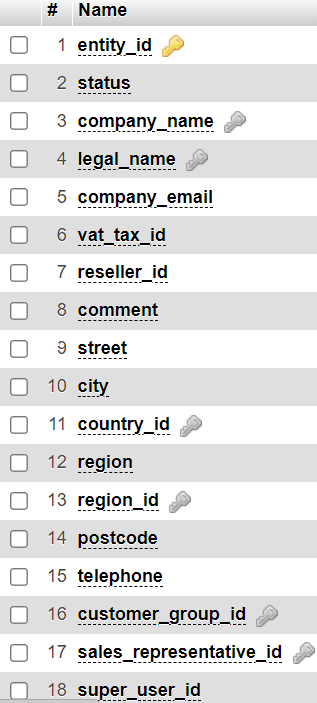
use Magento\Company\Api\CompanyRepositoryInterface;
use Magento\Company\Api\Data\CompanyInterface;
use Magento\Framework\Api\DataObjectHelper;
class Index extends \Magento\Framework\App\Action\Action
{
//protected $_modelDataFactory;
/**
* @var \Magento\Framework\App\Cache\TypeListInterface
*/
protected $_cacheTypeList;
/**
* @var \Magento\Framework\App\Cache\StateInterface
*/
protected $_cacheState;
/**
* @var \Magento\Framework\App\Cache\Frontend\Pool
*/
protected $_cacheFrontendPool;
/**
* @var \Magento\Framework\View\Result\PageFactory
*/
protected $resultPageFactory;
/**
* @var \Magento\Company\Api\CompanyRepositoryInterface
*/
protected $companyRepository;
/**
* @var \Magento\Company\Api\Data\CompanyInterface
*/
protected $companyInterface;
/**
* @var \Magento\Framework\Api\DataObjectHelper
*/
protected $objectHelper;
/**
* @param Action\Context $context
* @param \Magento\Framework\App\Cache\TypeListInterface $cacheTypeList
* @param \Magento\Framework\App\Cache\StateInterface $cacheState
* @param \Magento\Framework\App\Cache\Frontend\Pool $cacheFrontendPool
* @param \Magento\Framework\View\Result\PageFactory $resultPageFactory
* @param \Magento\Company\Api\CompanyRepositoryInterface $companyRepository
* @param \Magento\Company\Api\Data\CompanyInterface $companyInterface
* @param \Magento\Framework\Api\DataObjectHelper $objectHelper
*/
public function __construct(
\Magento\Framework\App\Action\Context $context,
\Magento\Framework\App\Cache\TypeListInterface $cacheTypeList,
\Magento\Framework\App\Cache\StateInterface $cacheState,
\Magento\Framework\App\Cache\Frontend\Pool $cacheFrontendPool,
\Magento\Framework\Message\ManagerInterface $messageManager,
\Magento\Framework\View\Result\PageFactory $resultPageFactory,
\Magento\Company\Api\CompanyRepositoryInterface $companyRepository,
\Magento\Company\Api\Data\CompanyInterface $companyInterface,
\Magento\Framework\Api\DataObjectHelper $objectHelper
) {
parent::__construct($context);
$this->_cacheTypeList = $cacheTypeList;
$this->_cacheState = $cacheState;
$this->_cacheFrontendPool = $cacheFrontendPool;
$this->resultPageFactory = $resultPageFactory;
$this->_messageManager = $messageManager;
$this->companyRepository = $companyRepository;
$this->companyInterface = $companyInterface;
$this->objectHelper = $objectHelper;
}
/**
* Flush cache storage
*
*/
public function execute()
{
$companyRepo = $this->companyRepository;
$companyObj = $this->companyInterface;
$dataObj = $this->objectHelper;
$company_email = "company@mage2db.com";
$company = [
"company_name" => "John",
"company_email" => "$company_email",
"street" => ["100 Big Tree Avenue"],
"city" => "New York",
"country_id" => "US",
"region" => "CA",
"region_id" => "12",
"postcode" => "1001",
"telephone" => "9999999999",
"super_user_id" => 25,
"customer_group_id" => 1,
];
//Here We are considering customer account has been already created & it entity_id=25
//It is using here as super_user_id=25
//Customer Registered Email userwithoutcompany@gmail.com
$dataObj->populateWithArray(
$companyObj,
$company,
\Magento\Company\Api\Data\CompanyInterface::class
);
try {
// save customer company details address
$companyRepo->save($companyObj);
$this->_messageManager->addSuccess(
__(
"Customer account with email %1 created successfully.",
$company_email
)
);
} catch (Exception $e) {
$this->_messageManager->addException(
$e,
__('We can\'t save the customer address.')
);
}
$this->resultPage = $this->resultPageFactory->create();
return $this->resultPage;
}
}
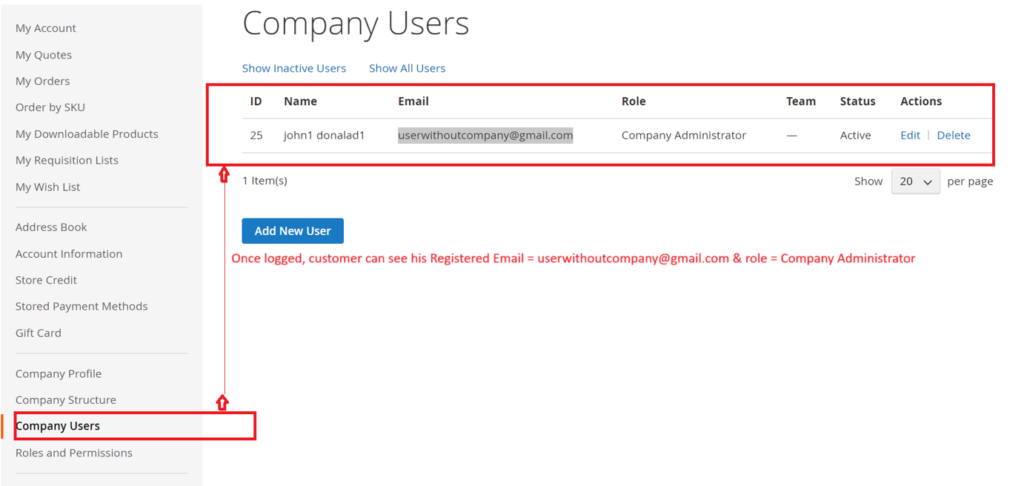
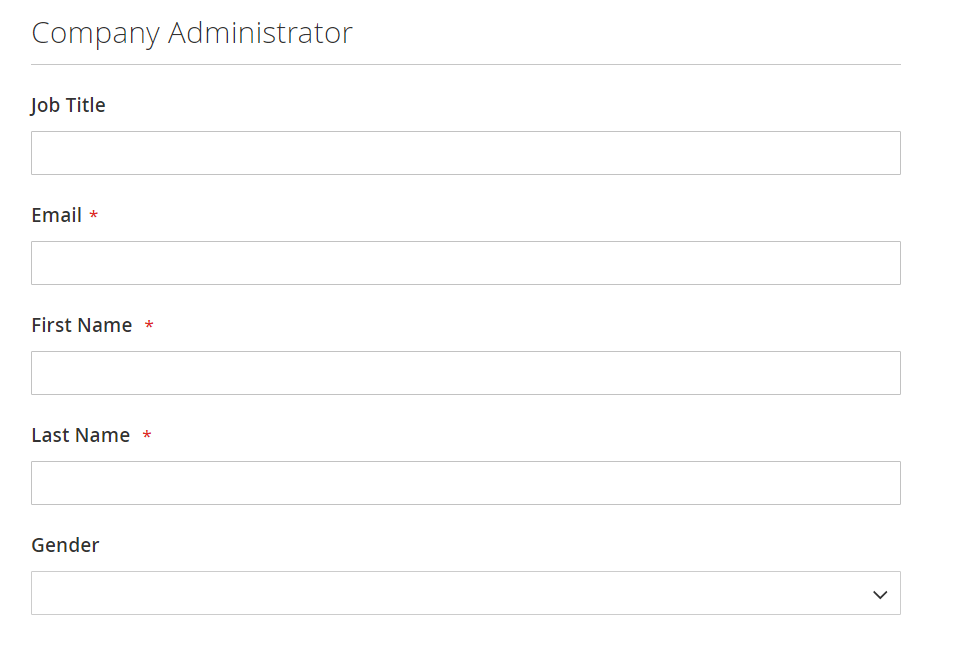
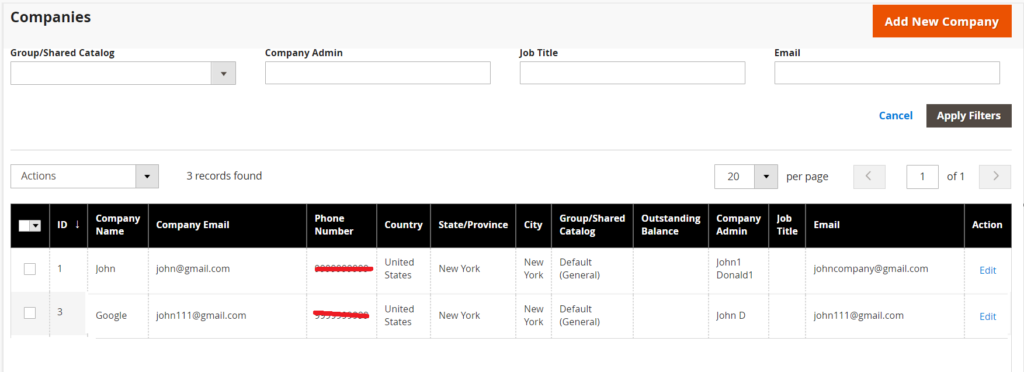
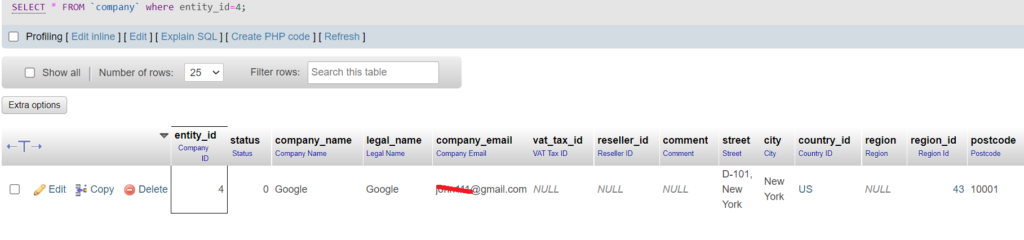
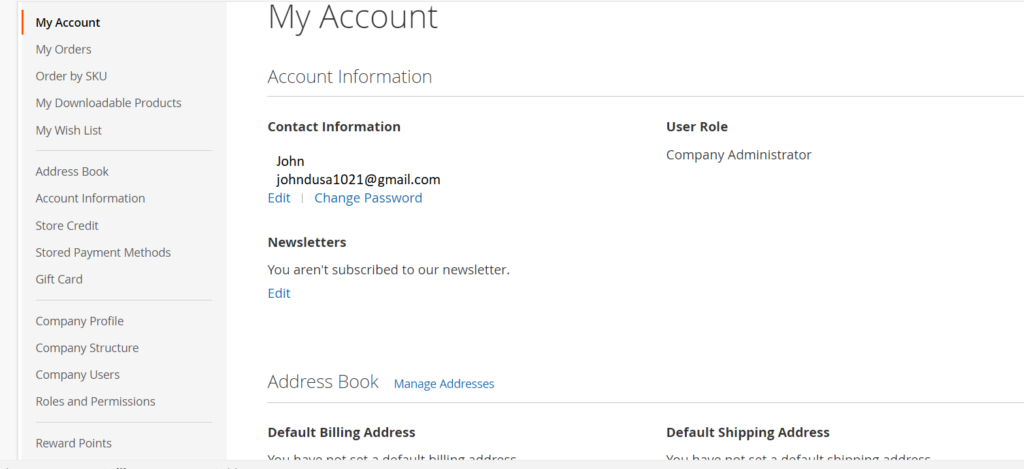
Once customer’s company created, need to be by using his registered email
[1] – Customer Registered Email / Password = userwithoutcompany@gmail.com / what you have set
[2] – Once logged, customer can see his Registered Email = userwithoutcompany@gmail.com & role = Company Administrator
[3] – Here, we have created customer registered account by using
Email = userwithoutcompany@gmail.com
Once Customer account created by userwithoutcompany@gmail.com
We have done Customer Company Account Programmatically
Company Email = company@mage2db.com
Finally Email = userwithoutcompany@gmail.com has Company Administrator His Company Email=company@mage2db.com
The Open Worldwide Application Security Project (OWASP) is a nonprofit foundation dedicated to improving software security. It operates under an “open community” model, which means that anyone can participate in and contribute to OWASP-related online chats, projects etc.
Sonarqube: It is main widely-known option for static code analysis. It incorporates thousands of automated code analysis rules, protecting code on multiple fronts, and guiding development teams toward quality. They also provide an IDE extension, Sonar lint which works well to supplement the CI offerings.
PHPStan:: It is a static code analysis tool that focuses on finding errors in the source code without having to actually run it. It catches whole classes of bugs even before you write tests for the code. PHPStan might be the most commonly used tool and also one of the newest.
PHP_CodeSniffer:: It is a very popular tool used for enforcing coding standards in PHP projects. It analyzes your PHP code and reports any violations of predefined standards, helping developers ensure consistent and readable code. It works by basically parsing your PHP code and checking it against a set of rules defined in coding standard rulesets. These rulesets can be based on popular coding standards such as PSR-1, PSR-2, and PSR-12 or customized according to specific project requirements. The tool detects deviations from the coding standards and provides detailed reports.
Pslam:: It is another great static code analysis tool for finding errors in PHP codebases. It was released in 2016 and has grown in popularity a little more slowly than others. This tool also fixes bugs automatically, allowing developers to improve their code without too much extra work.
PHPCheckstyle:: It is a static code analysis tool used in software development. Its main purpose is checking whether PHP source code complies with coding rules. It basically automates the lengthy process of checking code and helps PHP developers enforce coding standards.
Scrutinizer:: It is another widely used analysis tool. It seamlessly integrates into the software development workflow, and continuously builds and deploys application code. It’s free for open-source projects but is only available as a hosted solution. This makes Scrutinizer the most popular option for open-source development.
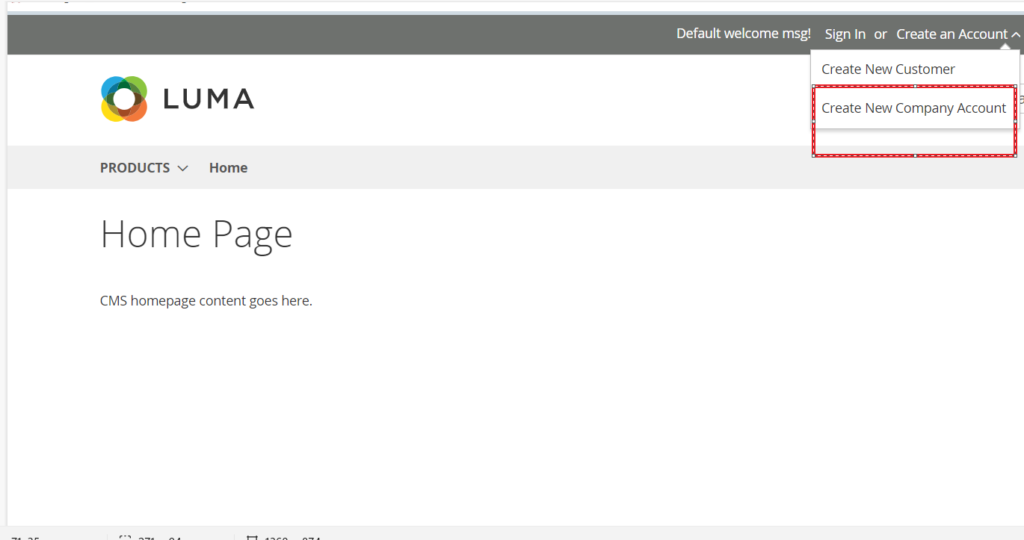
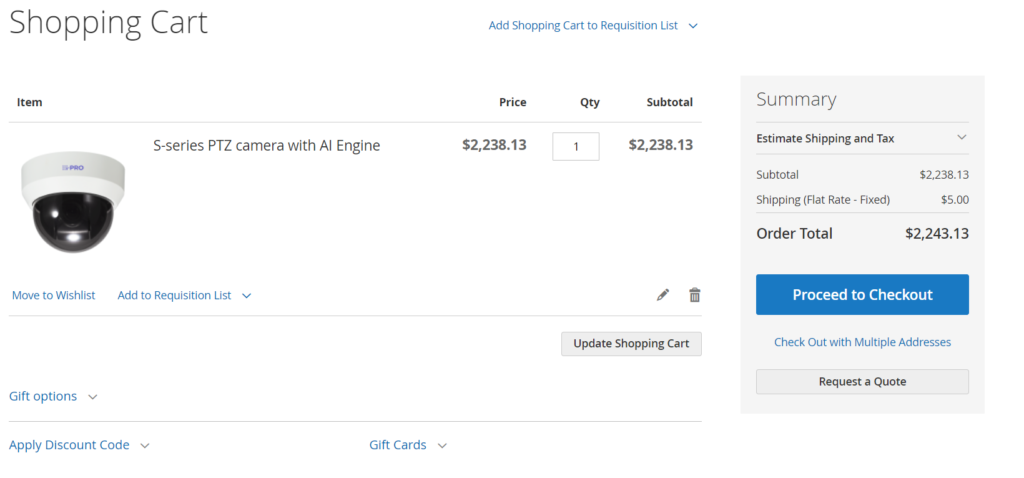
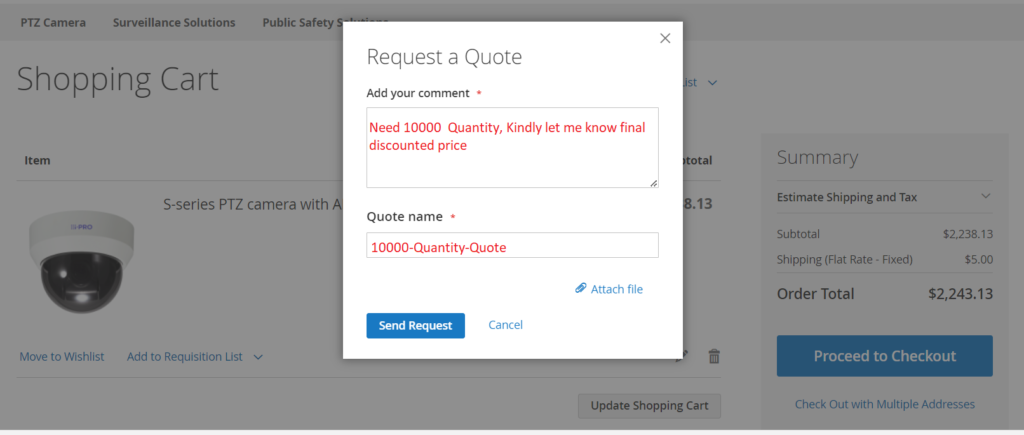
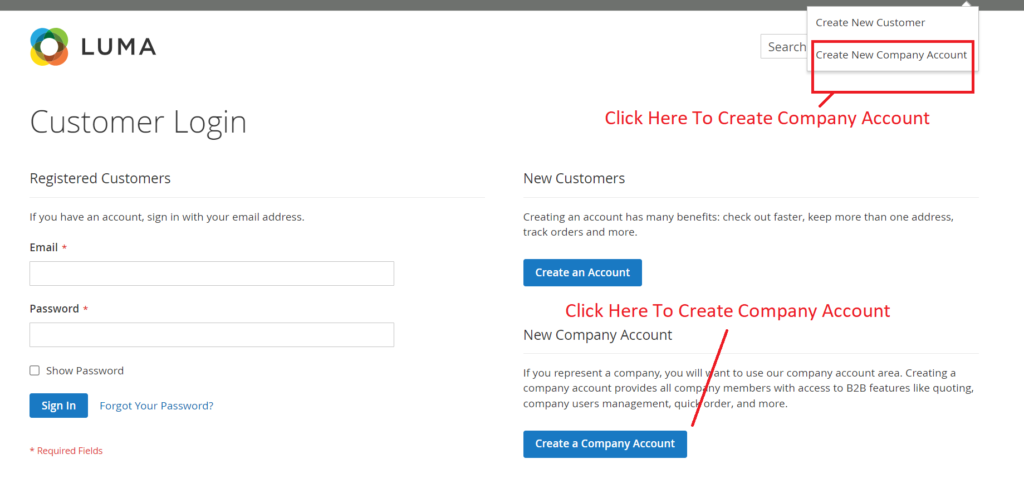
If quotes are enabled in the Adobe Commerce B2B Quote Enabled Features configuration, an authorized buyer from a company (User Must be registered as Company) can initiate the price negotiation process by requesting a quote from their shopping cart.
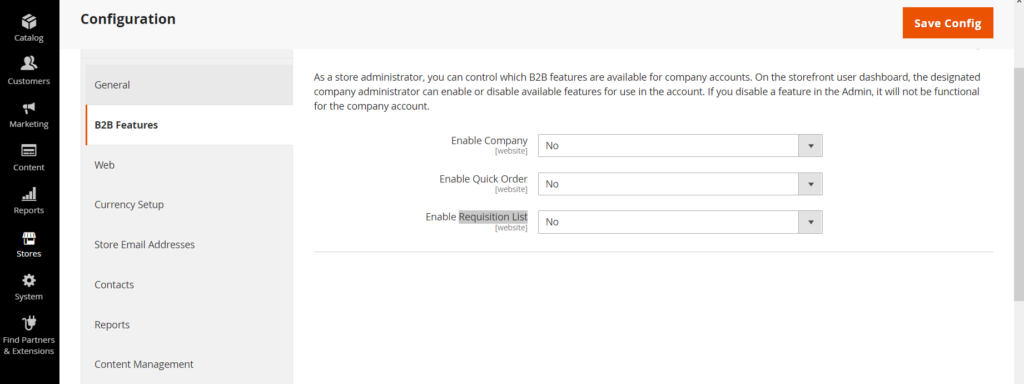
Step [1] – By Default Adobe Commerce B2B , below all things disabled
[a] – Company
[b] – Quick Order
[c] – Requisition List
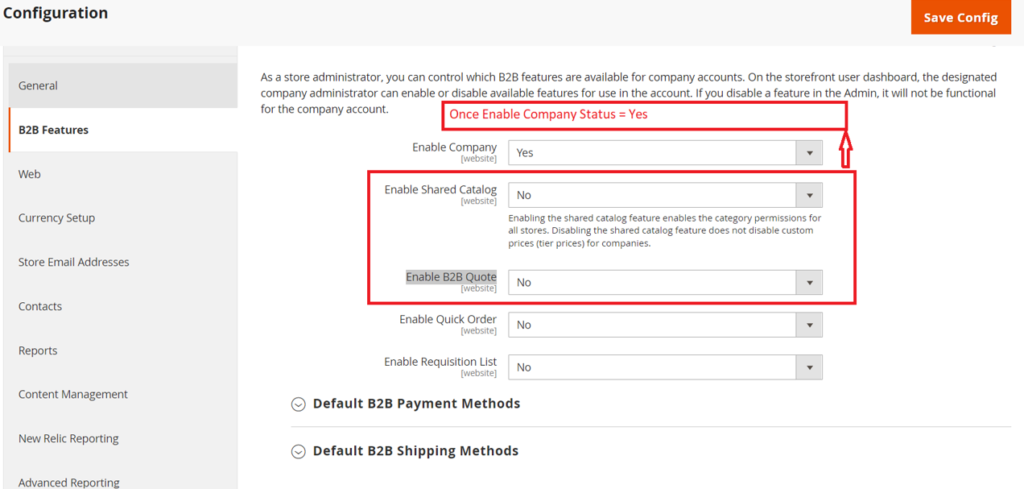
Step [2] – Once clicked on Enable Company, below two things will be auto displayed
      [a] - Enable Shared Catalog  - By Default Disabled
      [b] - Enable B2B Quote       - By Default Disabled

Enable Shared Catalog & Enable B2B Quote depends on Enable Company,  Once Enable Company Status = Yes
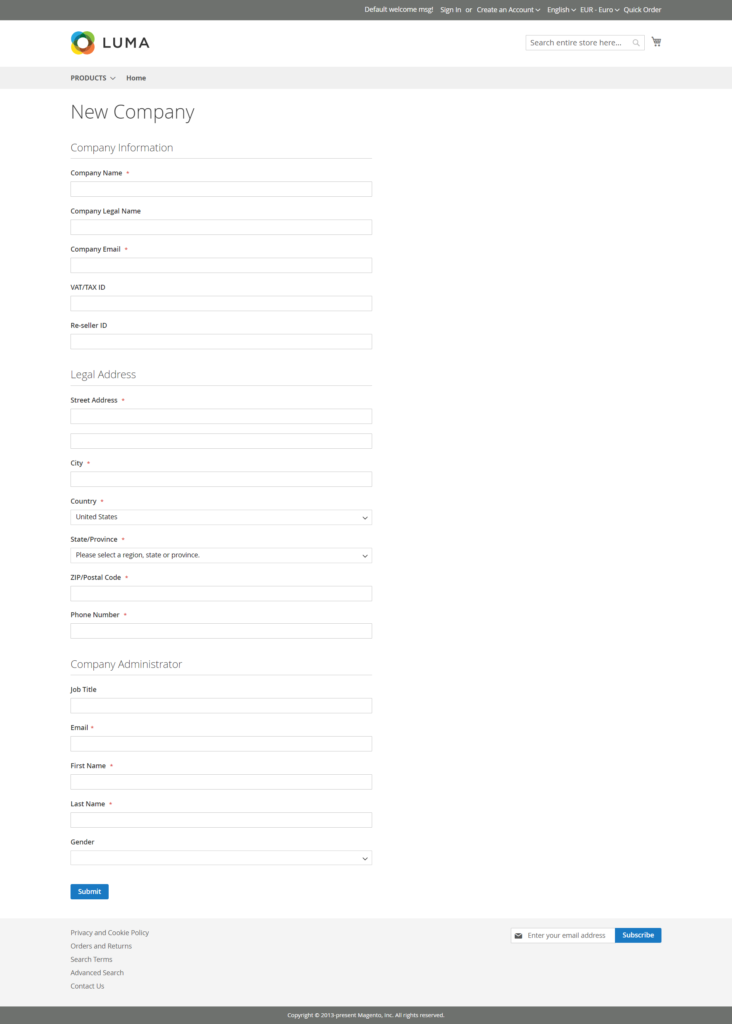
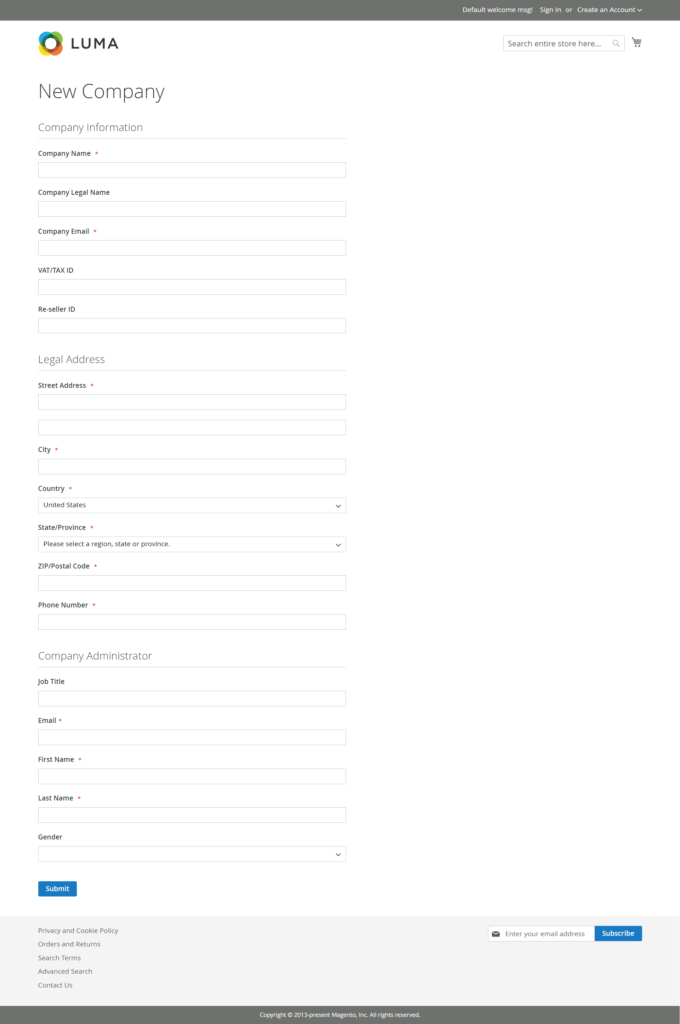
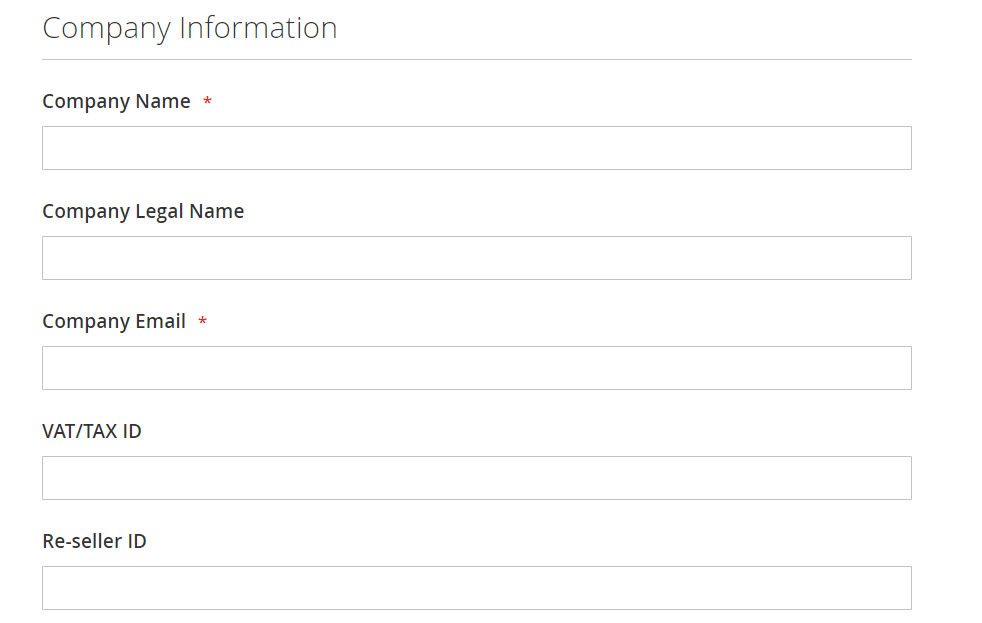
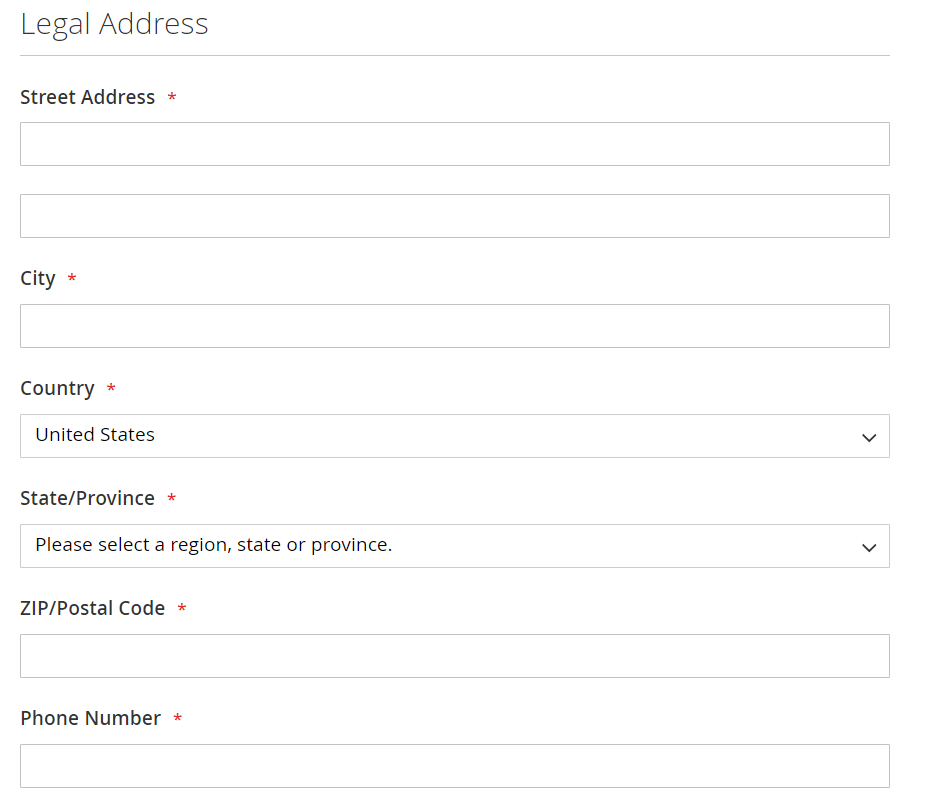
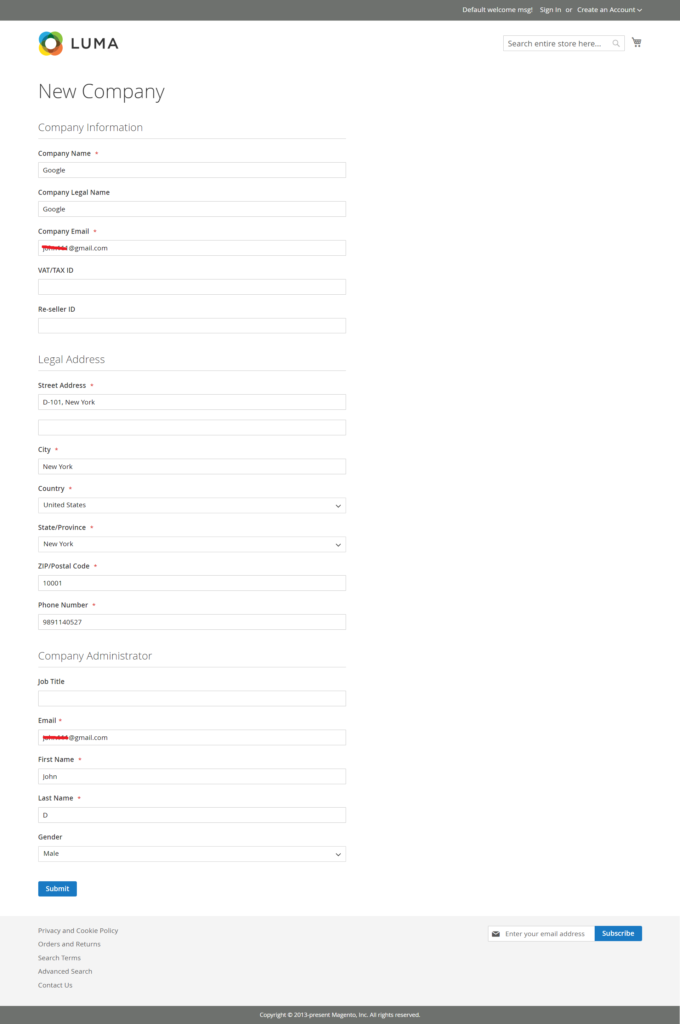
Step [3] – Registered as New user by Company registration as below
Step [4] – Customer quote request experience
[4.1] – The customer logs in to their user account as a buyer with permission to request a quote.
[4.2] – Adds the products that they want to be included in the quote to the shopping cart.
[4.3] – Clicks Request a Quote.
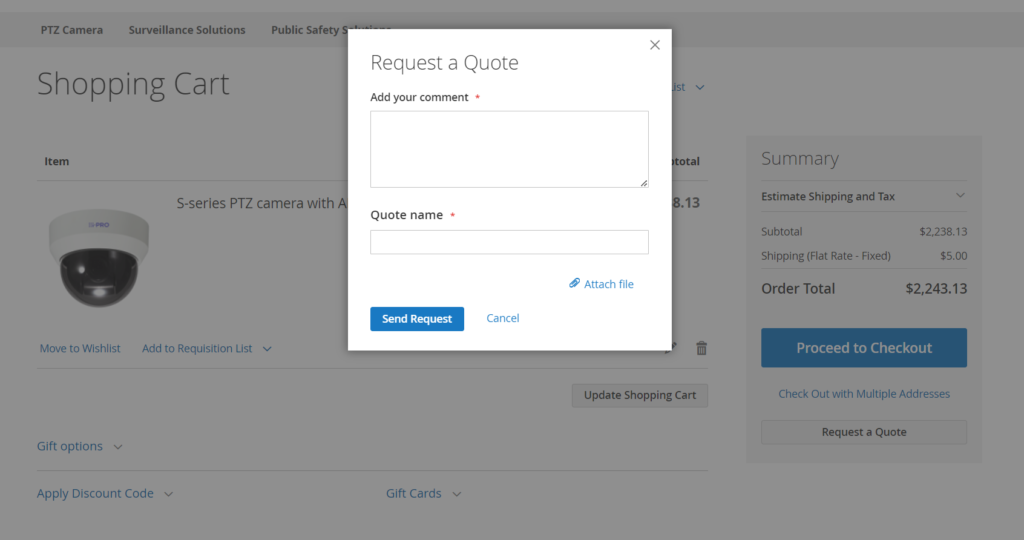
[4.4] – In the Add your comment box, enters a brief note that describes the request.
[4.3] – Enters a Quote Name.
[4.4] – If needed, attaches a supporting document or image to the quote:
Clicks Attach file.
Chooses the file from their system.
By default, an attached file can be up to 2 MB, in any of the following file formats: DOC, DOCX, XLS, XLSX, PDF, TXT, JPG or JPEG, PNG.
[4.5] Finally Clicked on Send Request Button
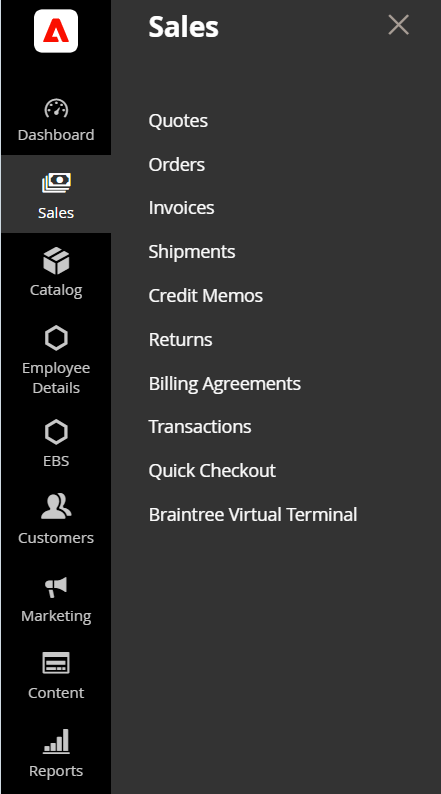
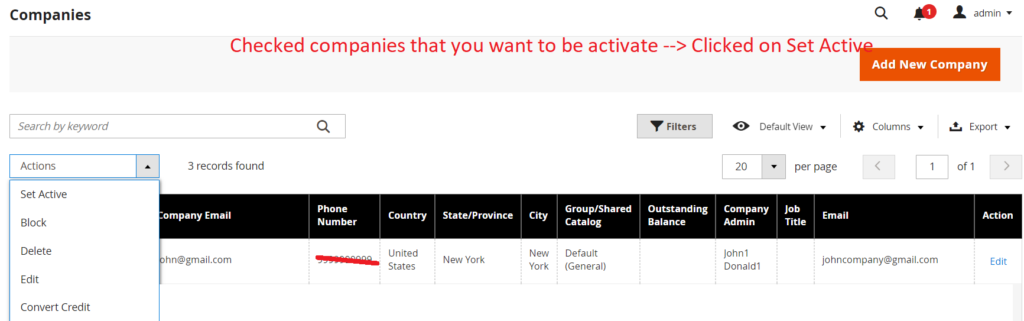
Step [5] – How To Check Request Quote From Admin End
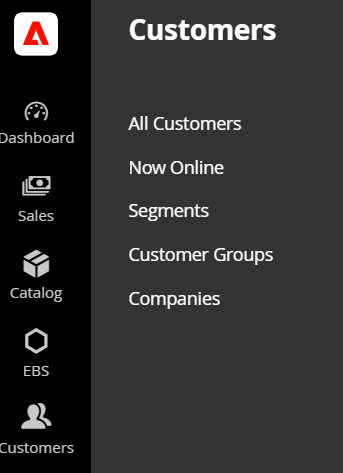
[5.1] – Go To Sales > Quotes
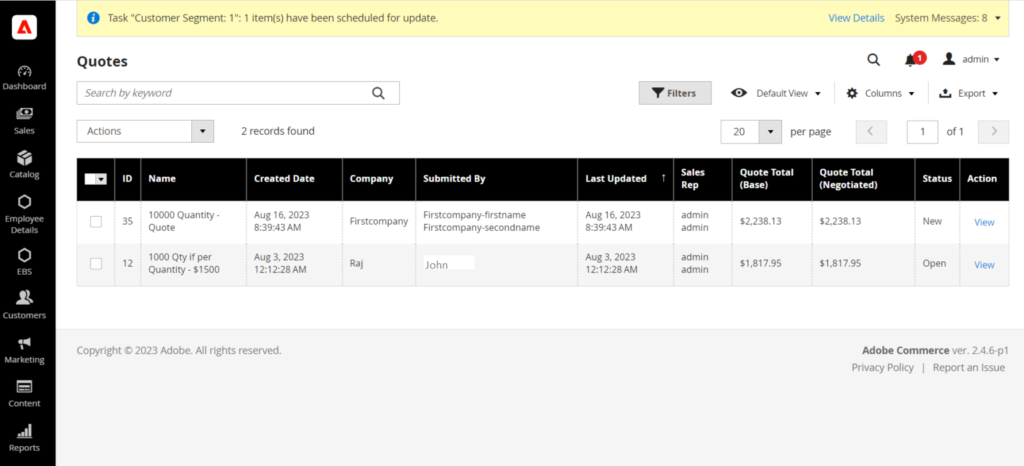
[5.2] – Once Clicked, display all Quotes Listing
[5.3] – Clicked on View to see full details
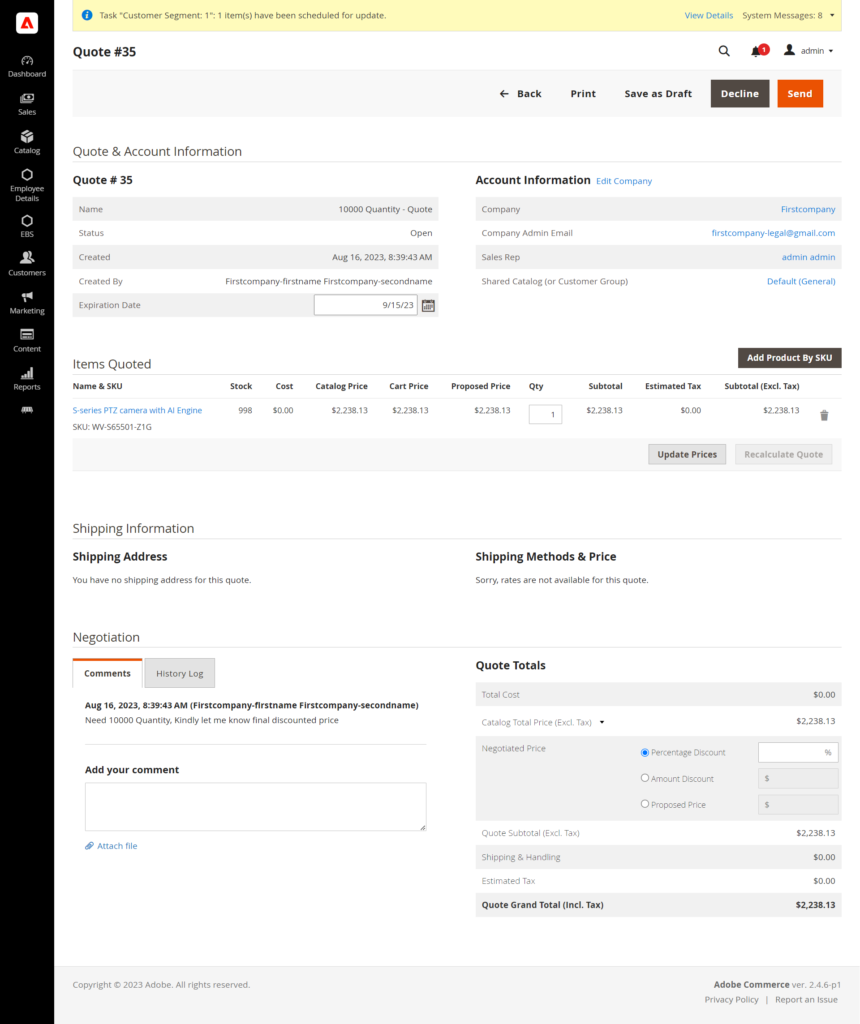
[5.4] – Finally admin can see each Quote details & reply as per business need.
Diagramming software allows users to create detailed diagrams – such as flow charts and floor plans – out of data and images. Diagramming tools often include templates for building diagrams in addition to enabling users to create diagrams from scratch
The following steps define Top Best Diagramming Software Architecture Tools
Step [1] – Diagrams.net:: Diagrams.net (formerly draw.io) is a collaborative online diagramming tool with an offline desktop app for added security.
It includes features such as:
Real-time collaboration
Offline desktop app
Store diagrams locally in the browse
Storage in Google Drive, Sharepoint, OneDrive, GitHub, GitLab, Dropbox or Notion
Support for UML, C4, ArchiMate, BPMN and SysML shapes
Step [2] – Lucidchart.com:: is a collaborative diagramming tool with templating and shape types to create many diagram types, such as flow charts, process flows, mind maps and more.
Available for both Free & Paid
Best for teams collaborating on quick and flexible diagrams.
It includes features such as:
Real-time collaboration to work with your team
Connect to data
Integrate with other tools in your stack
Templates to help guide you
A learning campus to learn what you can do in the tool
Step [5] – Gliffy.com is a collaborative drag-and-drop diagramming tool.
Best for larger teams who want to diagram software architecture and have enterprise requirements.
Available for Paid
It includes features such as:
Real-time collaboration Support for UML, ER, data flow, process and C4 modelling Cloud architecture diagrams Integration with Jira, Confluence and Google Drive
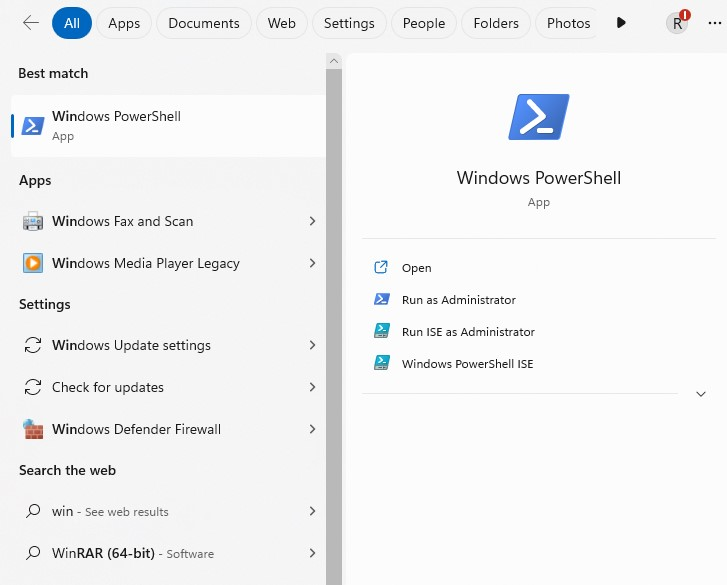
Follow the below steps to install WSL in Windows 10 or above version
Step [1] – Click on Windows Power Shell
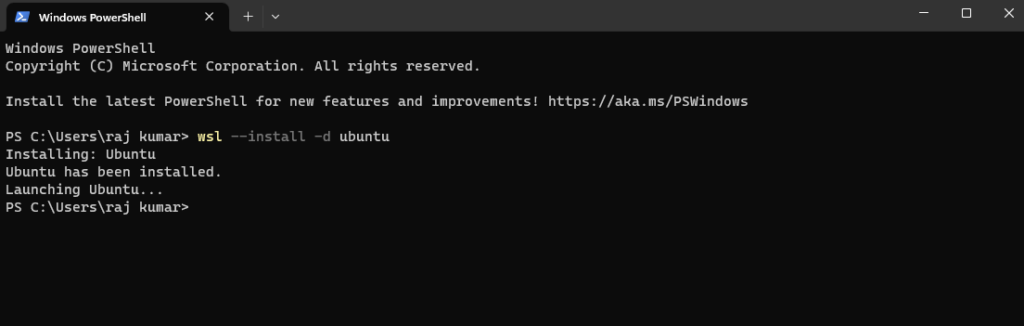
Step [2] – Once Windows Power Shell opened, run below command
wsl --install -d ubuntu
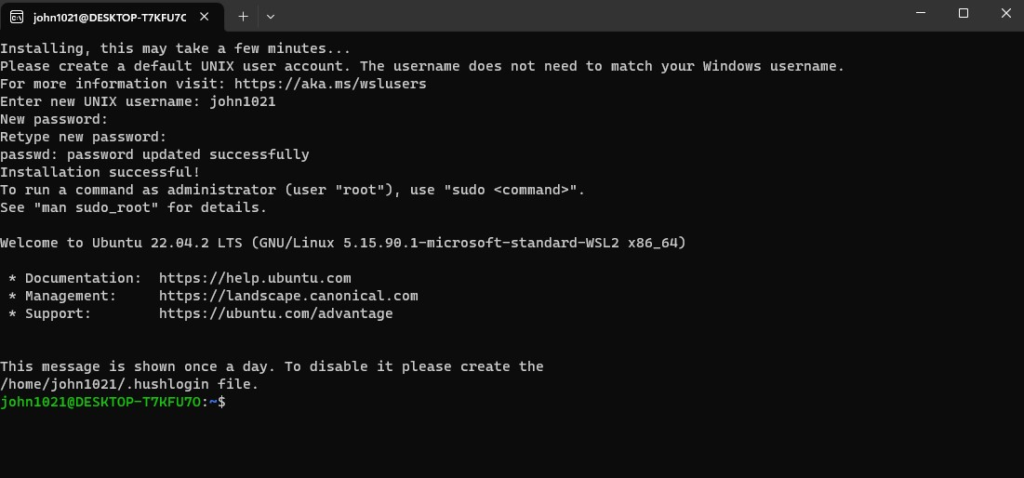
It will run another Windows Power Shell, where asking to create Unix Credentials (Username & Password) and once installed Message will be displayed on Both Window,
as created as
Enter new UNIX username: john1021
New Password: 1234@abcd
Retype new password: 1234@abcd
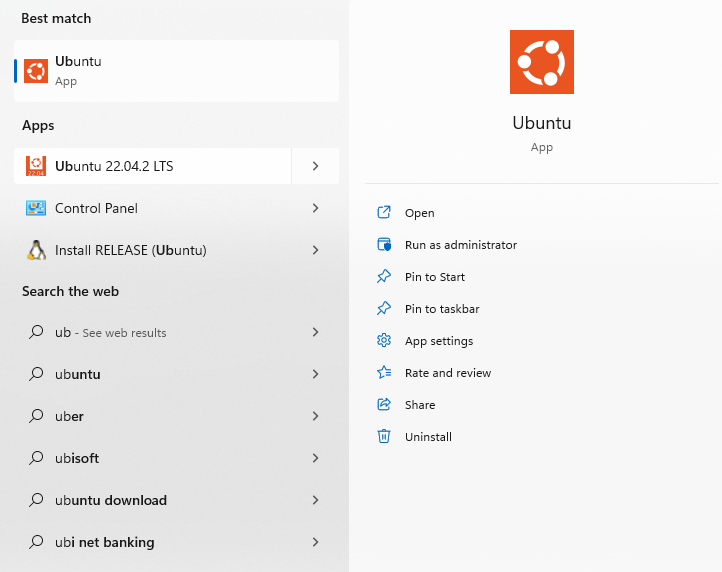
Step [3] – Once Installed, you can open as below Ubuntu
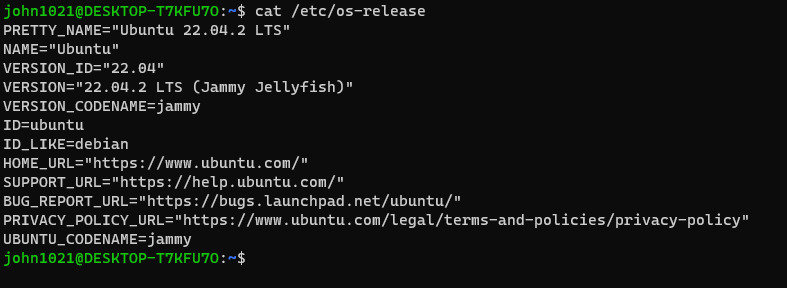
Finally check version as below command
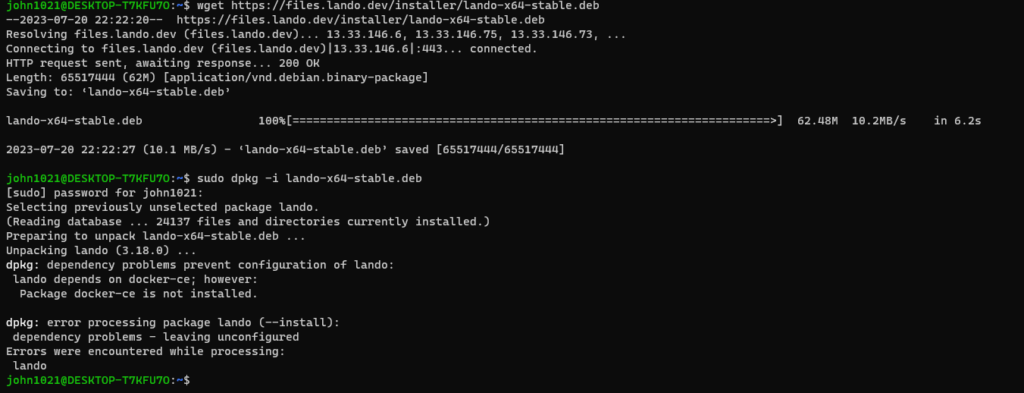
Step [4] –Installation of Lando Package
Once WSL Installed, need to install lando as below
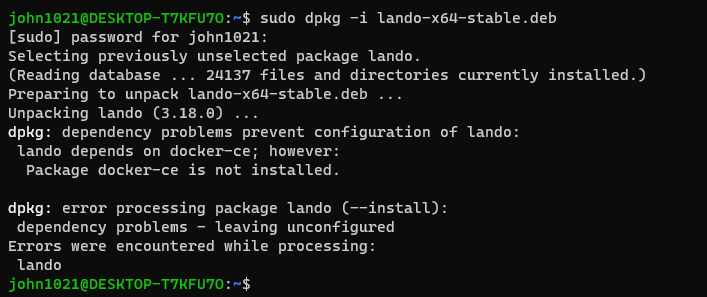
Step [5] – Once Lando Package has been installed, need to run below command
sudo dpkg -i lando-x64-stable.deb
After running this command error must be display as below
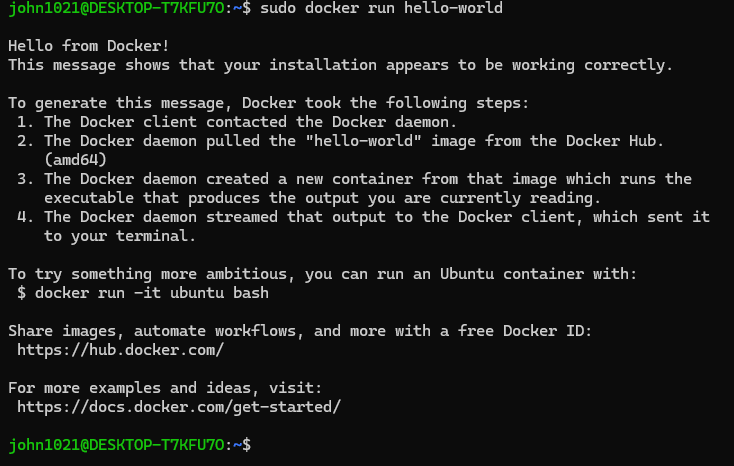
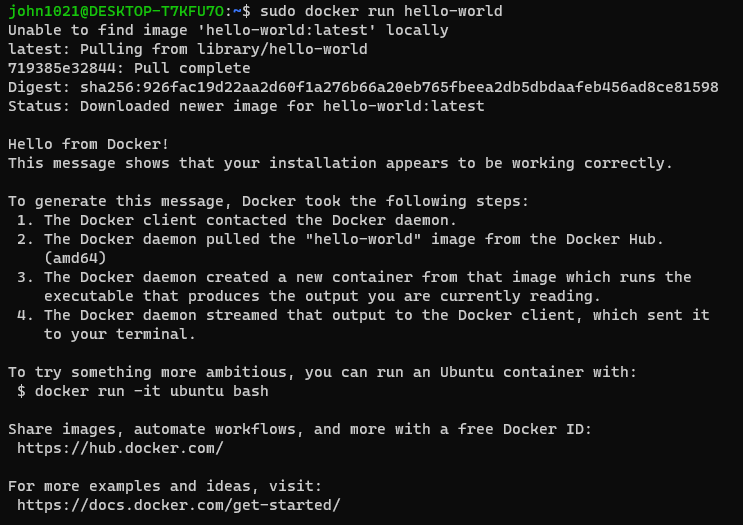
Error Indicates, Your Windows WSL System ready for Docker Installation
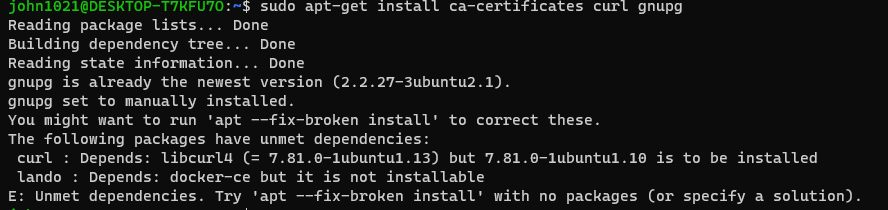
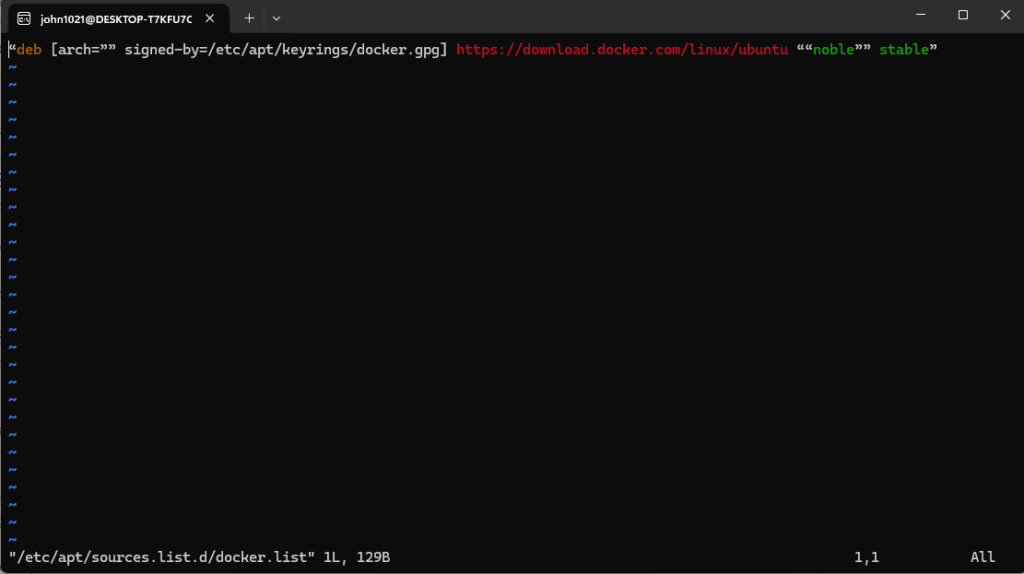
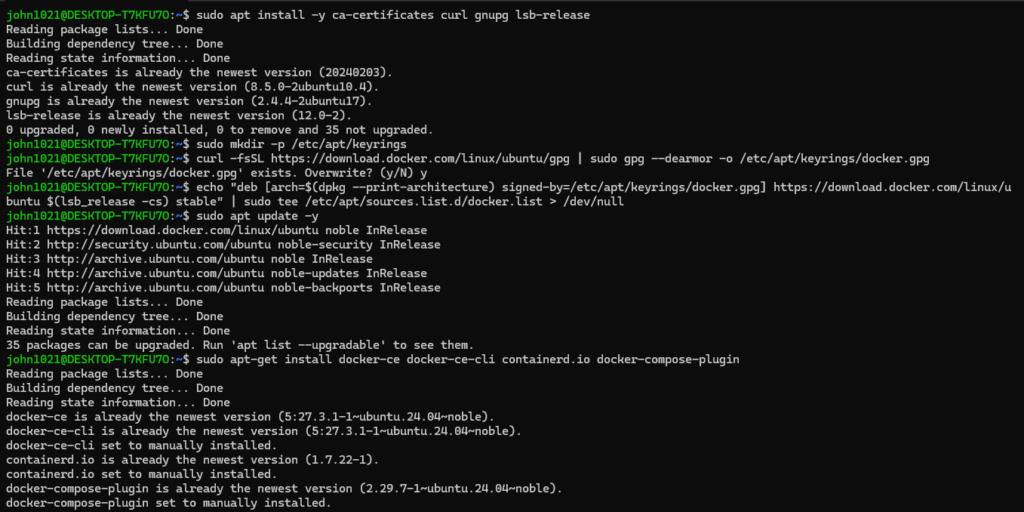
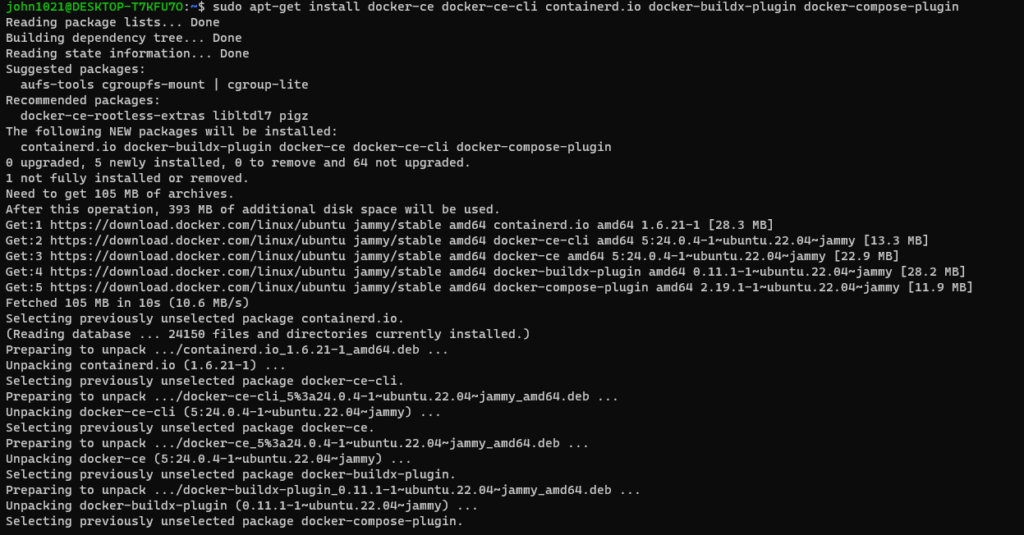
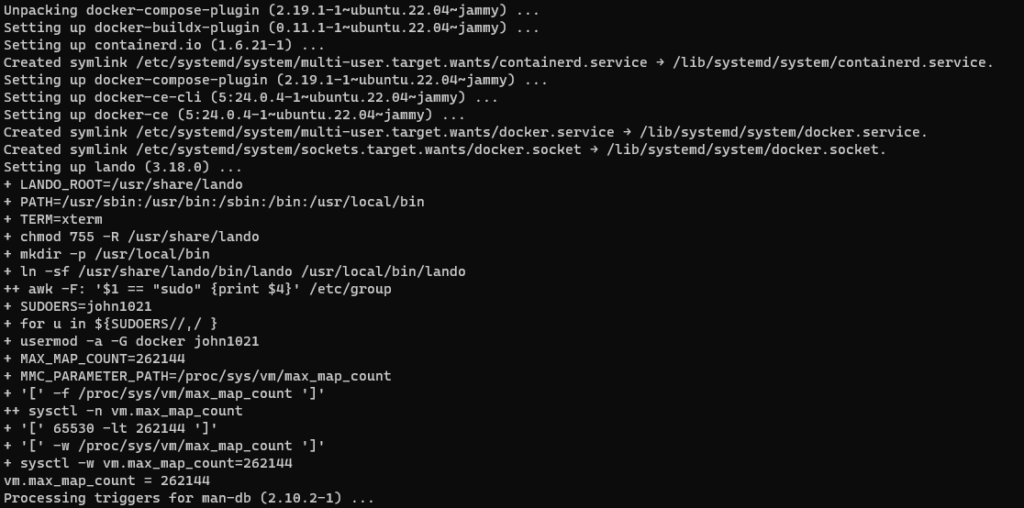
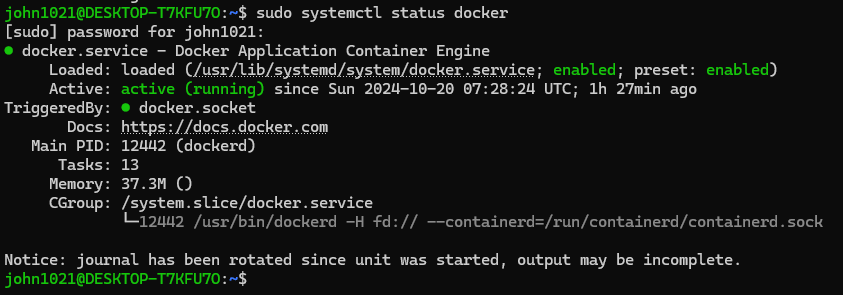
Step [6] – Installation of Docker Package
Step [6.1] – Update the apt package index and install packages to allow apt
sudo apt-get update
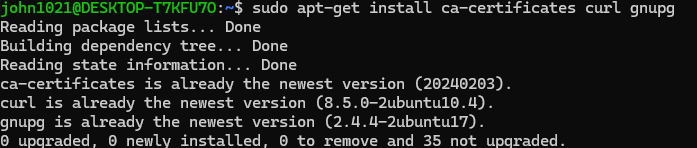
Step [6.2] – Install Docker CA Certificate
sudo apt-get install ca-certificates curl gnupg
Optional below in case any error while running command sudo apt-get install ca-certificates curl gnupg
In case any issue / error displaying while running command sudo apt-get install ca-certificates curl gnupg
Follow below command
# Download last stable version
wget https://files.devwithlando.io/lando-stable.deb
# Show information (Optional)
dpkg --info lando-stable.deb
# Install with Ignore docker
sudo dpkg -i --ignore-depends=docker-ce lando-stable.deb
# Show version
lando -v
Once all Four command done run ca Certificate Command