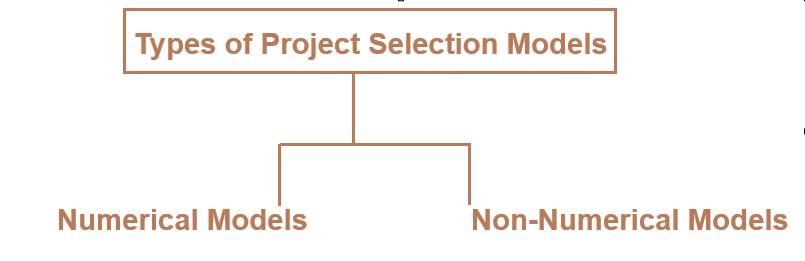
There are two basic types of project selection models, numeric and non-numeric. Both are widely used. Many organization use both at the same time or they use models that are combinations of the two
1. Numerical Models
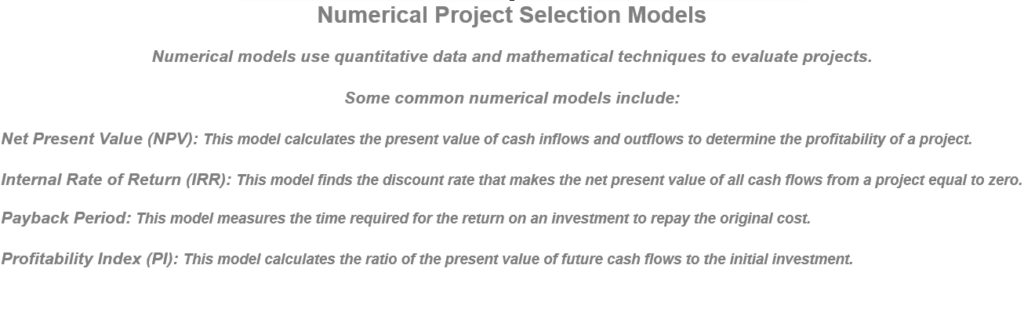
Numerical models are quantitative methods that use numerical data and calculations to evaluate and compare projects.
Characteristics:
Relies on measurable data (e.g., costs, revenues, time).
Objective and data-driven.
Focuses on financial or quantifiable outcomes.
Types of Numerical Models:
Profitability Models:
Evaluate financial viability.
Examples:
Net Present Value (NPV): Measures the present value of cash flows against investment costs.
Internal Rate of Return (IRR): Calculates the discount rate where NPV equals zero.
Payback Period: Time required to recover the project investment.
Benefit-Cost Ratio (BCR): Ratio of benefits to costs; a higher BCR is preferred.
Scoring Models:
Assigns weights to criteria based on importance and scores projects accordingly.
Example:
Weighted Scoring Model: Combines scores across criteria (e.g., risk, ROI, alignment with strategy).
Advantages:
Provides clear, comparable metrics.
Helps assess financial feasibility and return on investment.
Disadvantages:
May overlook non-quantifiable benefits (e.g., reputation, employee satisfaction).
2. Non-Numerical Models
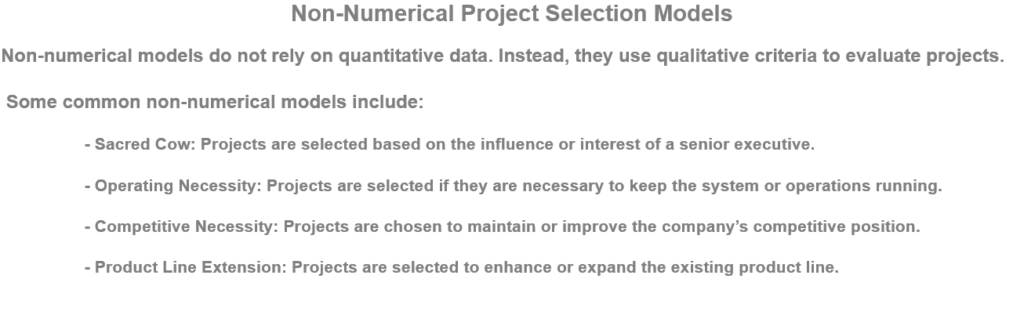
Non-numerical models are qualitative approaches that rely on subjective assessments and strategic considerations.
Characteristics:
Focuses on alignment with organizational goals and priorities.
Emphasizes qualitative factors like innovation, market trends, or social impact.
Less dependent on numerical data.
Types of Non-Numerical Models:
Checklist Model:
Projects are evaluated using a checklist of criteria (e.g., “Does it align with organizational goals?”).
Simple “yes” or “no” answers determine project viability.
Strategic Alignment Model:
Assesses how well a project aligns with the organization’s strategic objectives.
Profile Model:
Compares projects based on risk and return profiles.
Helps visualize trade-offs between risk and potential benefits.
Sacred Cow Model:
Projects are selected based on leadership preferences or strategic directives, regardless of other factors.
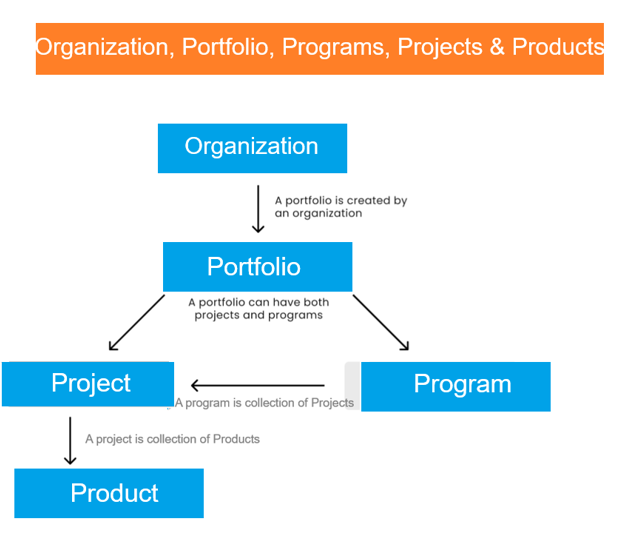
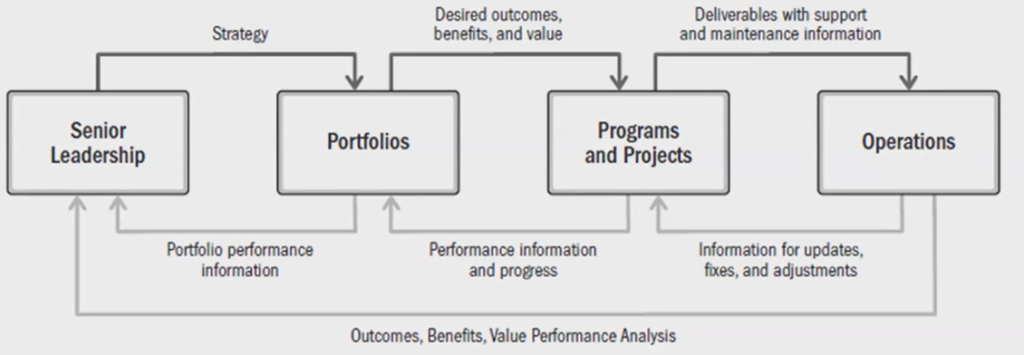
Organization: The highest level of the hierarchy. Defines strategic goals, vision, and mission.
“Allocates resources to portfolios, programs, and projects to achieve business objectives”
Portfolio: Portfolio is collection of Programs & Projects
Portfolio is A collection of programs, projects, and operations grouped together to align with organizational strategy.
Program: Program is collection of Projects.
Program is a group of related projects managed in a coordinated way to achieve benefits not achievable individually.
Project: Project is collection of Products.
A project is a temporary endeavor undertaken to create a unique product, service, or result. It is defined by specific goals, a start and end date, and constraints such as time, cost, and resources.
Products are often managed over their lifecycle to provide ongoing value to the organization.
Product: Product is The final deliverable or result of one or more projects, it’s both services or goods.
Products are often managed over their lifecycle to provide ongoing value to the organization.
Step [5] – Verify The Magent Cloud: Run the following command to check if the installation was successful or check magento cloud version
magento-cloud --version
Step [6] – Verify The List of Available Commands: To verify that the magento-cloud command is available, you can view list of available commands
magento-cloud list
Step [7] – magento-cloud login, once this command run below output URL
http://127.0.0.1:5000
If this URL normally does not work, follow below steps to API Token Authentication command to login inside Adobe Commerce Console.
Step [7.1] – Generate API Token in Adobe Commerce Console.
Step [7.2] – Run below command API Token Authentication command to login
magento-cloud-cli auth:api-token-login
Step [7.3] – Once above command run asking for token/password , need to put below token (Already Generated API Token in Adobe Commerce Console) & successfully login Magento cloud CLI & ready to selection different integration
EFcMEi-K6p5Mq9poSkrvqX4gWNBP9ValEG3krC2eTyc , This Already Generated API Token in Adobe Commerce Console)
Step [7.4] – To verify either inside Adobe Commerce Cloud login successfully
magento--cloud version
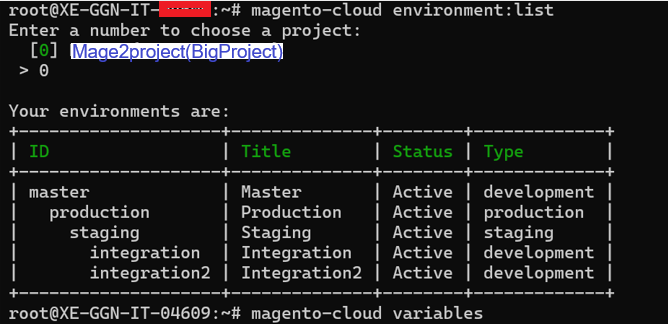
Step [7.5] – How To Check Lists the environments in the current project
magento-cloud environment:list
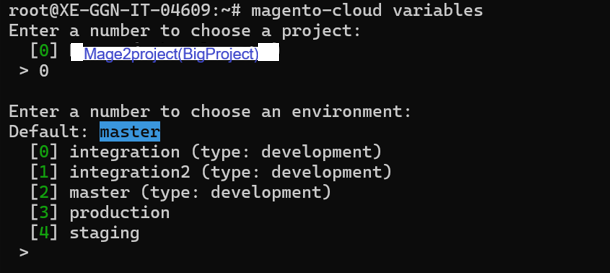
Step [7.8] – How To Check, Lists variables in the current environment
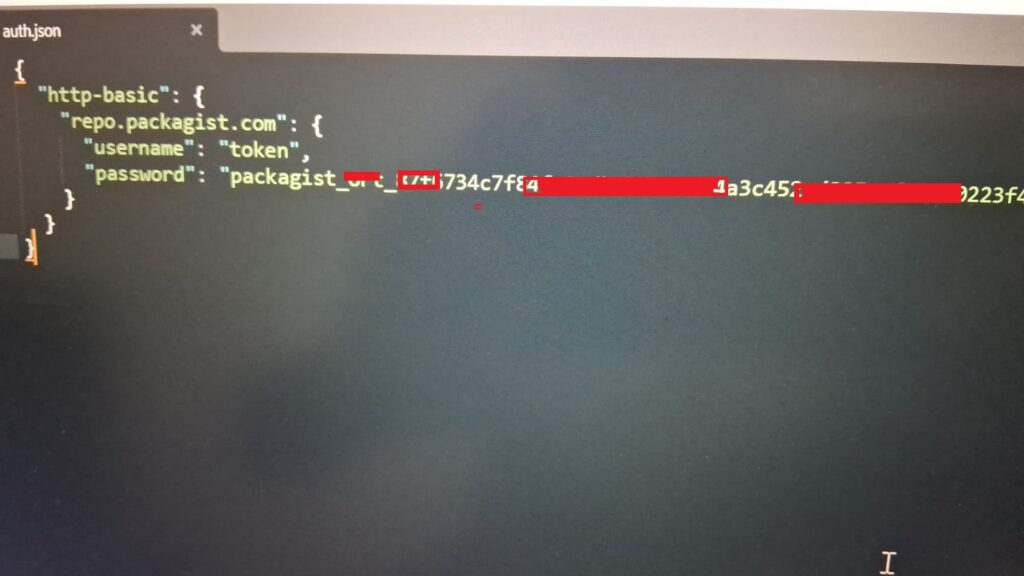
Packagist hosts a vast collection of PHP packages, from well-known libraries to smaller community-contributed ones. This repository includes libraries for tasks like authentication, database handling, routing, validation, and much more.
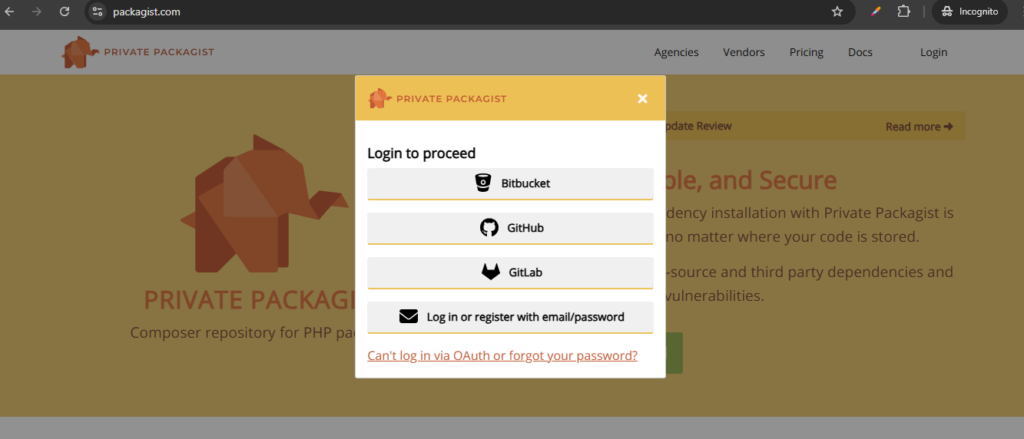
To configure files or repo from rom Private Repository packagist.com https://packagist.com follow below steps.
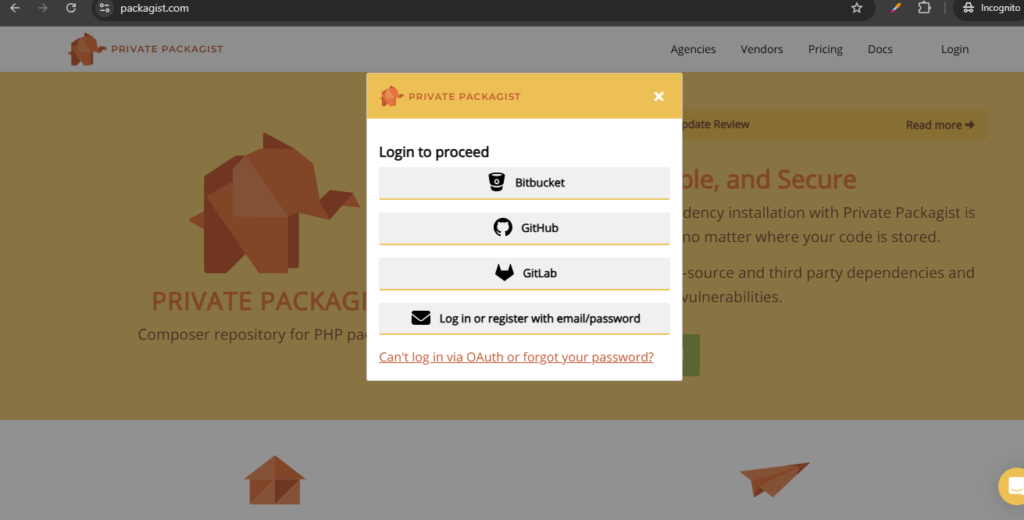
Step [1] –Login in rom Private Repository packagist.com by using your Butbucket / Github / GitLab
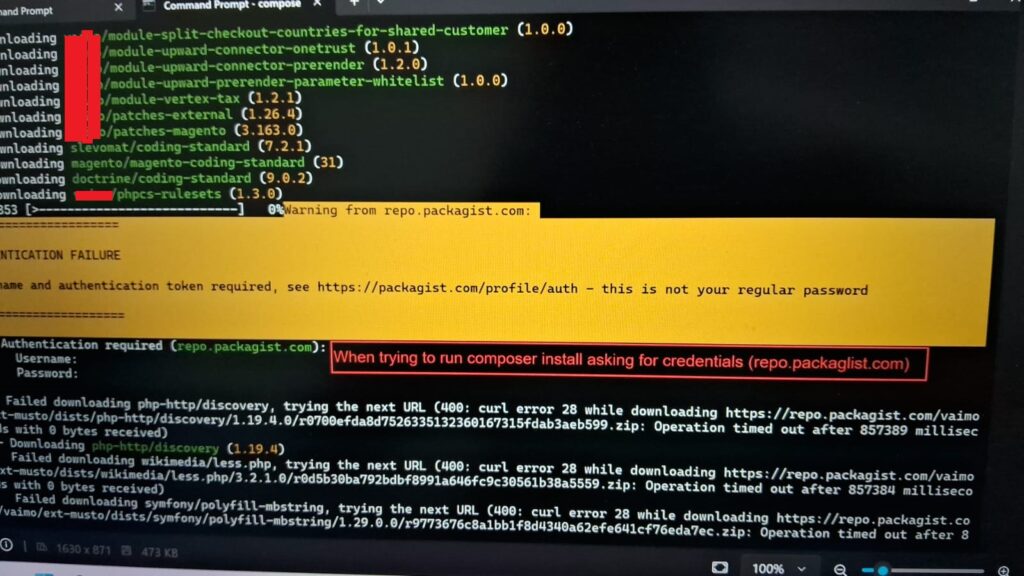
Run on root directory of your Magento 2 / Adobe Commerce
composer install
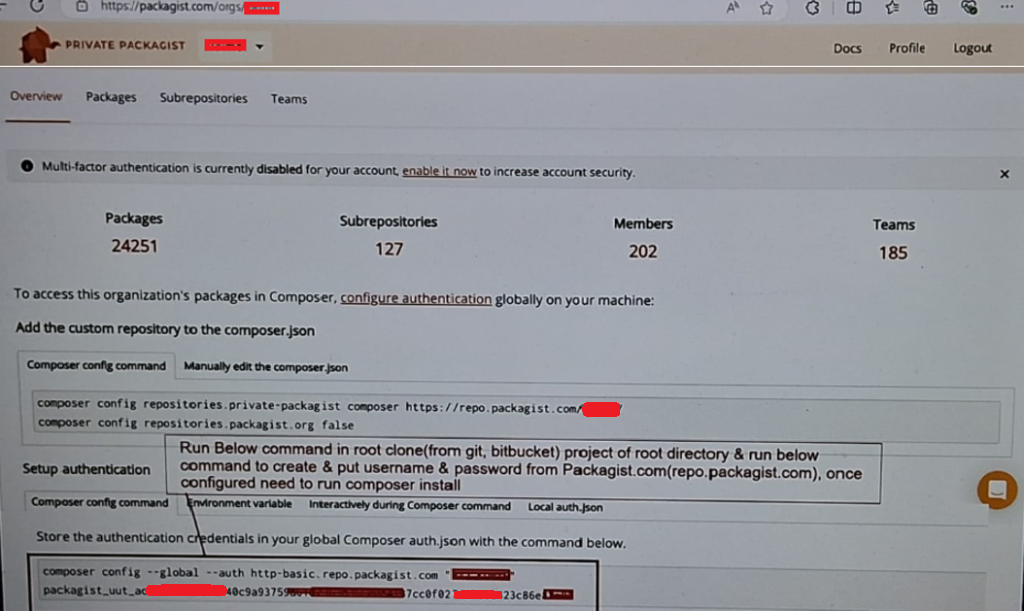
Step [2] – One logged inside, private repository https://packagist.com/
Go To Setup Authentication >> Composer Config Command
on the root directory of your Magento Clone Files run below command
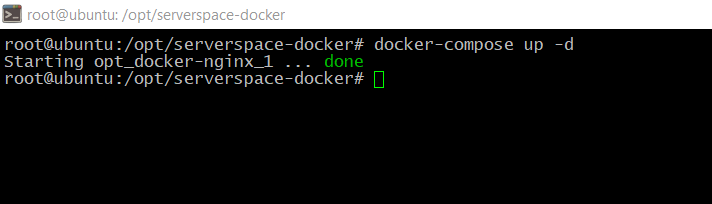
Step [1] – What is the docker-compose Up command The docker compose up command aggregates the output of each container (like docker compose logs –follow does).
Step [2] – What is the docker-compose stop command To stop containers running in the background, use the docker-compose stop command:
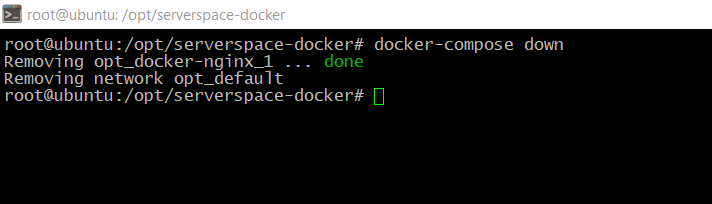
Step [3] – What is the docker-compose Down command Running this command in a terminal or within a script stops and removes all containers, networks, and volumes established by the docker-compose up command To use it, simply navigate to your project directory and execute docker-compose down.
Step [4] – What is docker command to check services name
docker-compose config --services
Step [5] – What is Docker command to check Mysql or MariaDB Version
docker-compose exec db mysql -V
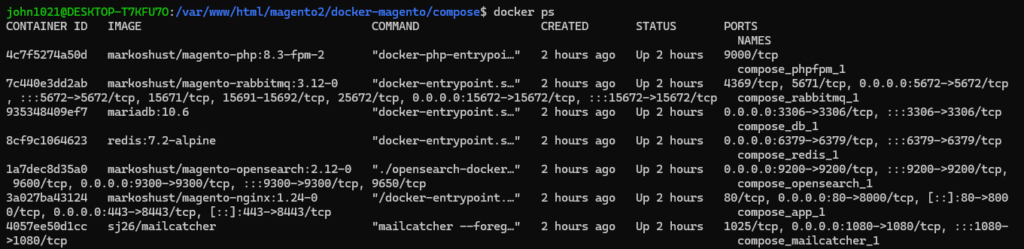
Step [6] – Which Command is being used to check total number of containers running right now
docker ps
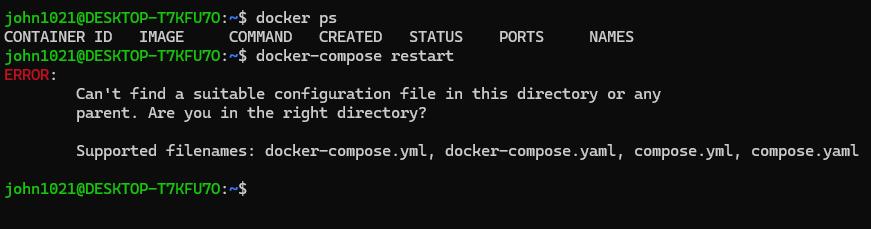
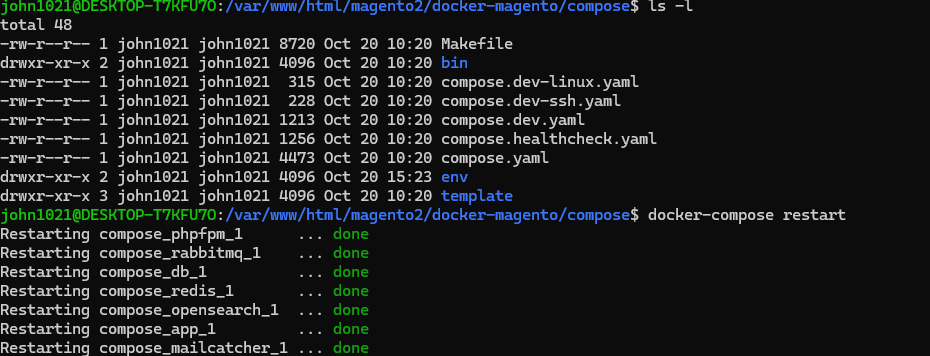
Step [7] – Which Docker Command used for Restart Services
docker-compose restart
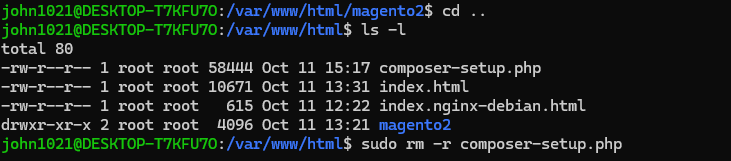
Step [8] – Linux command to check current path
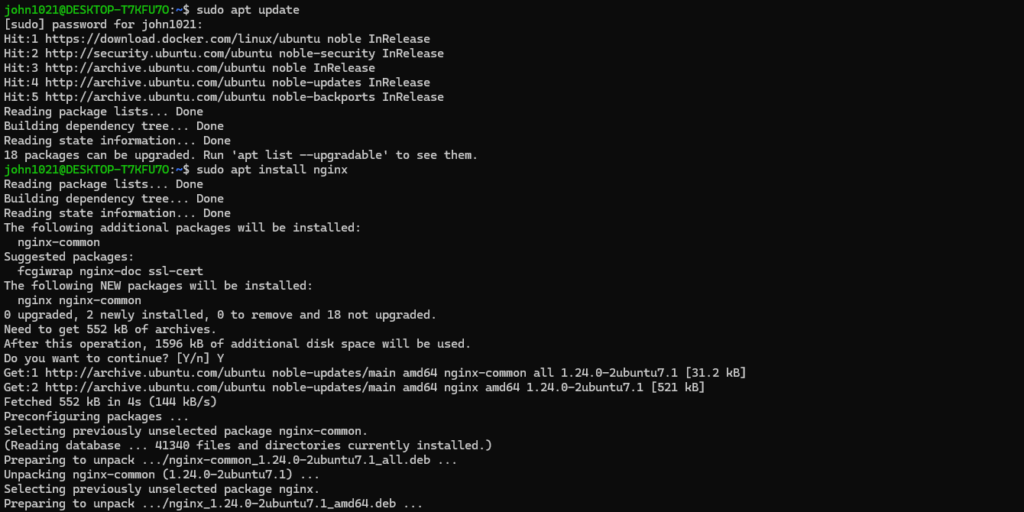
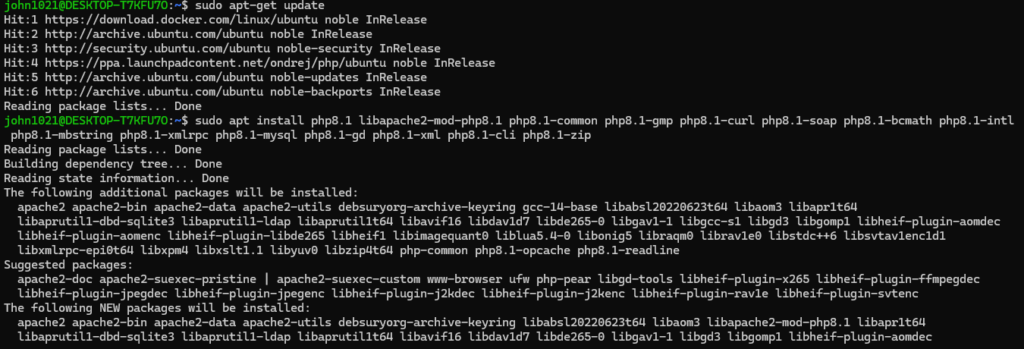
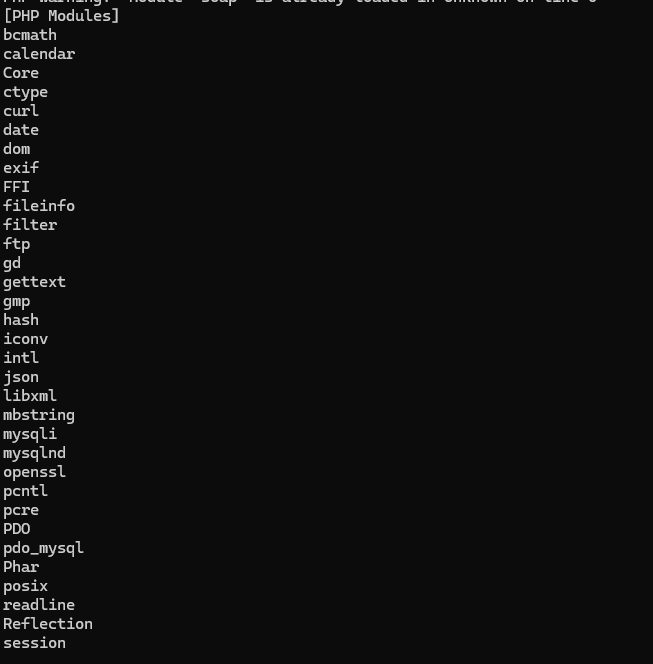
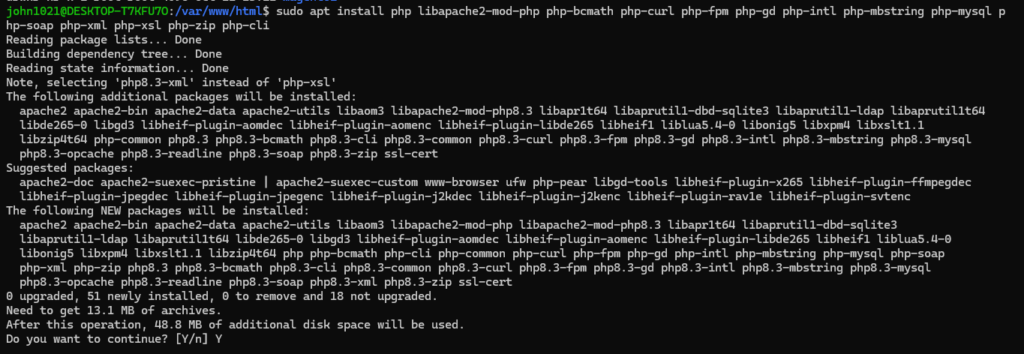
Step [9] – List of required PHP 8.3 Extension for Linux/Docker/WSL2 (Magento 2 Installation)
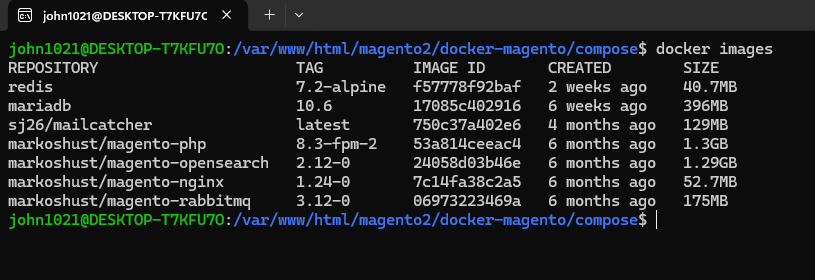
Step [9] – Docker Command to find all installed images
docker images
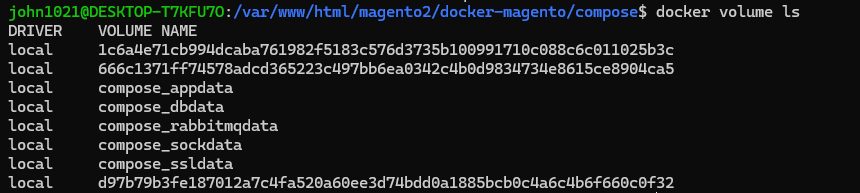
Step [10] – Docker Command to find all installed volumes
docker volume ls
Step [11] – What is purpose of command “docker exec -it php bash”
docker exec -it php bash
It allows you to start an interactive Bash shell inside a running php container.
Open a Bash shell inside the php container. Gain interactive access to the container, where you can:
Run Linux commands.
Explore or modify the file system.
Execute PHP commands or scripts.
Check log files, configurations, etc.
This is useful for debugging or managing running containers in real-time without stopping or recreating them.
Step [12] – What is purpose of docker-compose up -d --build
The docker-compose up -d --build command is used to start or rebuild Docker containers as defined in a docker-compose.yml file, with a few key actions:
Example Scenario
Let’s assume your docker-compose.yml file has the following services:
upstream fastcgi_backend {
  server  unix:/run/php/php8.2-fpm.sock;
}

server {

  listen 80;
  server_name www.magento-dev.com;
  set $MAGE_ROOT /var/www/html/magento2;
  include /var/www/html/magento2/nginx.conf.sample;
}
Step [3] – To Create nginx virtual host symbolic link