There are following below methods to add X-Frame-Options Security Header in Apache or NGINX or .HTACCESS
[1] How to add in Nginx configuration file

There are following code need to add in Nginx configuration file

add_header set X-Frame-Options "sameorigin";


[2] How to add in Apache configuration file

There are following code need to add in Apache configuration file

header always set X-Frame-Options "sameorigin"


[3] How to add in .htaccess file

There are following code need to add in .htaccess configuration file

<IfModule mod_headers.c>
Header set X-Frame-Options "sameorigin"
<IfModule mod_headers.c>
There are following below methods to add X-XSS-Protection Security Header in Apache or NGINX or .HTACCESS
[1] How to add in Nginx configuration file

There are following code need to add in Nginx configuration file

add_header set X-XSS-Protection "1; mode=block";


[2] How to add in Apache configuration file

There are following code need to add in Apache configuration file

header always set X-XSS-Protection "1; mode=block"


[3] How to add in .htaccess file

There are following code need to add in .htaccess configuration file

<IfModule mod_headers.c>
Header set X-XSS-Protection "1; mode=block"
<IfModule mod_headers.c>
There are following below methods to add HTTP Strict Transport Security Header in Apache or NGINX or .HTACCESS
[1] How to add in Nginx configuration file

There are following code need to add in Nginx configuration file

add_header set Strict-Transport-Security "max-age=31536000; includeSubDomains; preload";


[2] How to add in Apache configuration file

There are following code need to add in Apache configuration file

header always set Strict-Transport-Security "max-age=31536000; includeSubDomains; preload"


[3] How to add in .htaccess file

There are following code need to add in .htaccess configuration file

<IfModule mod_headers.c>
Header set Strict-Transport-Security "max-age=31536000; includeSubDomains; preload"
<IfModule mod_headers.c>
There are following below methods to add Referrer Policy Security Header in Apache or NGINX or .HTACCESS
[1] How to add in Nginx configuration file

There are following code need to add in Nginx configuration file

add_header set Referrer-Policy "strict-origin-when-cross-origin";


[2] How to add in Apache configuration file

There are following code need to add in Apache configuration file

header always set Referrer-Policy "strict-origin-when-cross-origin"


[3] How to add in .htaccess file

There are following code need to add in .htaccess configuration file

<IfModule mod_headers.c>
Header set Referrer-Policy "strict-origin-when-cross-origin"
<IfModule mod_headers.c>
Referrer-Policy header security is a request header that indicates the site which the traffic originated from. If there is no adequate prevention in place, the URL itself, and even sensitive information contained in the URL will be leaked to the cross-site.
The Referrer-Policy header is a fairly new header that has been a W3C Candidate Recommendation since January 26, 2017. It makes it possible to control which referrer information is included in requests. When viewing a page, the referrer information indicates the origin of the request. Because this can lead to privacy and security issues when passing on the URL, the Referrer-Policy header was created to control how this information is sent from a referring page to the target page in the course of browsing.
Referrer-Policy is important because it addresses the following issues:
• Unexpected cross-origin information leakage hinders web users’ privacy. A protective referrer policy can help.
• Consider setting a referrer policy of strict-origin-when-cross-origin. It retains much of the referrer’s usefulness, while mitigating the risk of leaking data cross-origins.
• Don’t use referrers for Cross-Site Request Forgery (CSRF) protection. Use CSRF tokens instead, and other headers as an extra layer of security
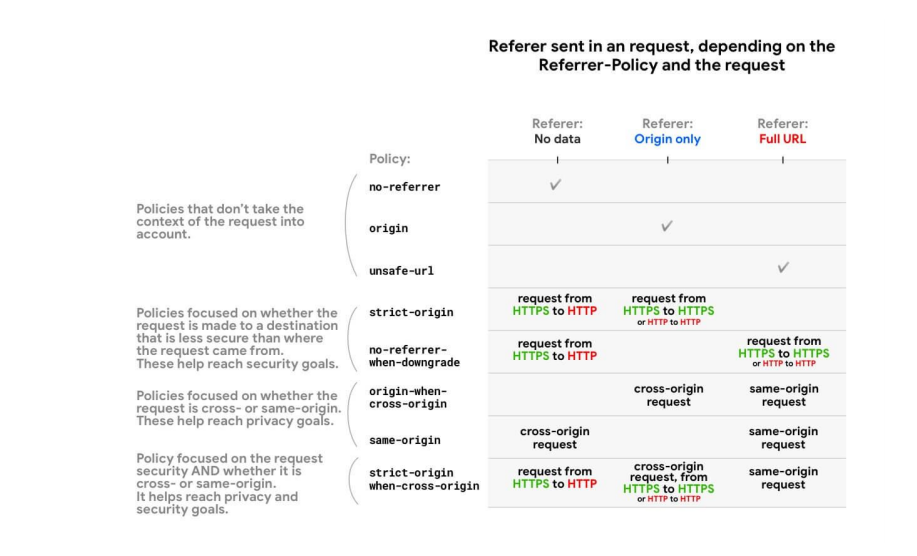
Referrer-Policy Header Security Working Model
All Referrer policies that take the scheme (HTTPS vs. HTTP) as (strict-origin, no-referrer when-downgrade and strict-origin-when-cross-origin) treat requests from an HTTP origin to another HTTP origin

The same way as requests from an HTTPS origin to another HTTPS origin—even if HTTP is less secure.

That's because for these policies, what matters is whether a security downgrade takes place, as if the request can expose data from an encrypted origin to an unencrypted one.

An HTTP → HTTP request is unencrypted all
along, so there is no downgrade. HTTPS → HTTP requests, on the contrary, present a downgrade.

If a request is same-origin, this means that the scheme (HTTPS or HTTP) is the same; hence there is no security downgrade
How to integrate Referrer-Policy Header Security
The Referrer-Policy HTTP header governs which referrer information, sent in the Referer header should be included with requests made. How to integrate Referrer-Policy Header Security give as below
[1] How to add in Nginx configuration file

There are following code need to add in Nginx configuration file

add_header Referrer-Policy "strict-origin-when-cross-origin";


[2] How to add in Apache configuration file

There are following code need to add in Apache configuration file

header Referrer-Policy "strict-origin-when-cross-origin"


[3] How to add in .htaccess file

There are following code need to add in .htaccess configuration file

<IfModule mod_headers.c>
Header  set Referrer-Policy "strict-origin-when-cross-origin"
<IfModule mod_headers.c>
There are following steps, where each Referrer-Policy has been described detailed view

• no-referrer: This sends no referrer information along with the request made.

• no-referrer-when-downgrade: This sends complete URL information to a potentially trustworthy URL from modern HTTPS State or from not modern HTTPS state to any origin . Information is sent for HTTPS -> HTTPS and HTTP -> HTTPS transition . This is the default
Referrer-Policy.

• origin: It only sends the origin value of the request client when making either same origin (same website) or cross-origin (different website) requests.

• strict origin: This only sends origin information to potentially trustworthy URL from modern HTTPS State or from not modern HTTPS state to any origin.

• origin-when-cross-origin: It sends complete URL information when making requests on same origin but only origin information when making cross-origin requests.

• strict-origin-when-cross-origin: It sends complete URL information when working on request from same origin. It sends only origin information to potentially trustworthy URL from modern HTTPS State or from not modern HTTPS state to any origin. No referrer
information is sent to a potentially non-trustworthy URL.

• same-origin: It sends referrer information when origin is on same website but no information is sent for cross origin.

• unsafe-url: It sends complete URL information irrespective of any criteria.
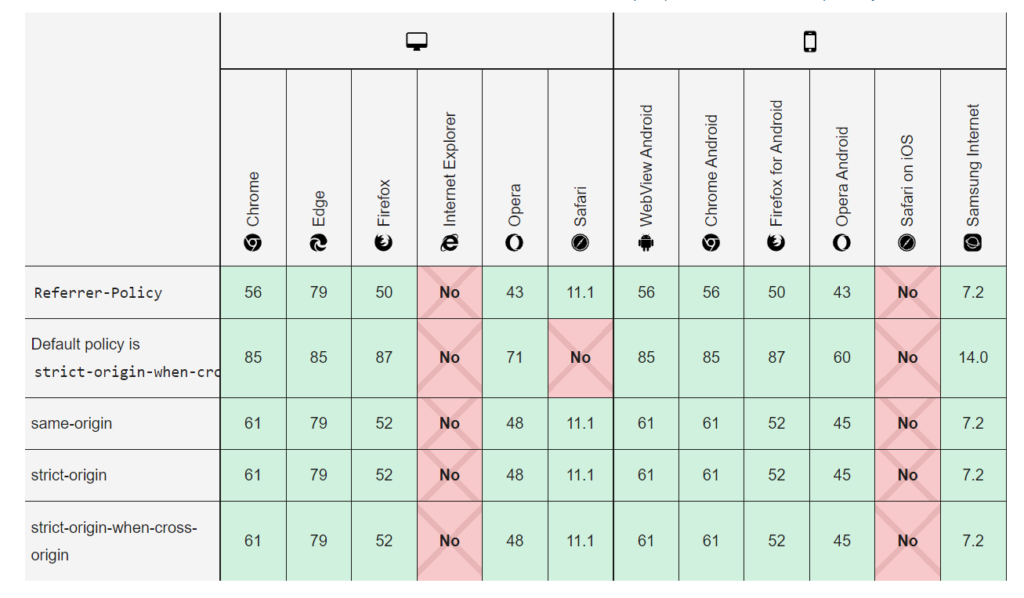
There are following list of Referrer-Policy’s Browser compatibility, that is why Referrer-Policy must be integrate
There are following below advantages after integrating Referrer-Policy Header Security
HTTPS sites will never transmit referrer information to non-HTTPS sites.
Referrer Policy is used to determine what information is sent along with the requests.
The Referrer-Policy header on your server to control what information is sent through the Referrer header security. For example, a directive of no-referrer would omit the Referrer header security entirely.
The Referrer HTTP request header contains an absolute or partial address of the page making the request.
The Referrer Policy HTTP header sets the parameter for amount of information sent along with Referer Header while making a request.
Referrer policy is used to maintain the security and privacy of source account while fetching resources or performing navigation
This could also be a way to increase the integrity for the users of the website. For example, if a user reads a news article about cats and the article has a link to a cat shelter website.
Chatbot or bot: – It is a human’s language conversation software, Users communicate with a chatbot via the chat interface (text format) or by voice, like how they would talk to a real person. Chatbots process & instantly reply via the chat interface (text format) or by voice.
“Chatbot based on AI-powered Intelligent Virtual Assistant solution”
eCommerce chatbot : – An eCommerce chatbot is an AI-powered Intelligent Virtual Assistant solution that can be implemented by online retailers /shoppers to engage customers at every stage of their shopping steps.
“An eCommerce chatbot is an AI-powered Intelligent Virtual Assistant solution that can be implemented by online retailers /shoppers to engage customers at every stage of their journey.”
“eCommerce chatbots serve as a powerful lead generation tool for online retailers /shoppers. Using this AI-powered Intelligent, they engage visitors on a retailer’s website, app, or other digital shop media and converts them into shopping deals.”
Robots meta directives (sometimes called “meta tags”) are pieces of code that provide crawlers instructions for how to crawl or index web page content. Whereas robots.txt file directives give bots suggestions for how to crawl a website’s pages
There are two types of robots meta directives: Those that are part of the HTML page (like the meta robotstag) and those that the web server sends as HTTP headers (such as x-robots-tag).
[1] Using the robots meta tag: The robots meta tag lets you utilize a granular, page-specific approach to controlling how an individual page should be indexed and served to users in Google Search results. Place the robots meta tag in the <head> section of a given page, like this:
There are following ways for Indexing & No Indexing in Search Engine like Google , Yahoo or Bing
[a] For No Indexing Web Pages: This method used in website developer mode
Syntax as –
[b] For Indexing Web Pages: This method used in website production mode,
Syntax as –
[2] Using the X-Robots-Tag HTTP header: The X-Robots-Tag can be used as an element of the HTTP header response for a given URL. Any directive that can be used in a robots meta tag can also be specified as an X-Robots-Tag. Here’s an example of an HTTP response with an X-Robots-Tag instructing crawlers not to index a page:
HTTP/1.1 200 OK
Date: Tue, 25 May 2010 21:42:43 GMT
(…)
X-Robots-Tag: noindex
(…)

Multiple X-Robots-Tag headers can be combined within the HTTP response, or you can specify a comma-separated list of directives. Here's an example of an HTTP header response which has a noarchive X-Robots-Tag combined with an unavailable_after X-Robots-Tag.


HTTP/1.1 200 OK
Date: Tue, 25 May 2010 21:42:43 GMT
(…)
X-Robots-Tag: noarchive
X-Robots-Tag: unavailable_after: 25 Jun 2010 15:00:00 PST
The different robots meta tag values
The following values (‘parameters’) can be placed on their own, or together in the content attribute of tag (separated by a comma), to control how search engines interact with your page.
index: Allow search engines to add the page to their index, so that it can be discovered by people searching.Note: When there are no directives relating to indexing, this is assumed to be the default.
noindex: Disallow search engines from adding this page to their index, and therefore disallow them from showing it in their results.
follow: Tells the search engines that it may follow links on the page, to discover other pages.
nofollow: Tells the search engines robots not to ‘endorse’ (pass equity through) any links on the page. Note that this includes all links on the page, including, e.g., those in navigation elements, links to images or other resources, and so on.
none: A shortcut for noindex, nofollow.
all: A shortcut for index, follow.
noimageindex: Disallow search engines from indexing images on the page.
noarchive: Prevents the search engines from showing a cached copy of this page in their search results listings.
nocache: Same as noarchive, but only used by MSN/Live.
nosnippet: Prevents the search engines from showing a text or video (as meta description) of this page in the search results, and prevents them from showing a cached copy of this page in their search results listings.
nositelinkssearchbox: Prevents the search engine from showing an inline search box for your site.
nopagereadaloud: Prevents the search engine from reading your page’s content aloud via voice services/results.
notranslate: Prevents search engines from showing translations of the page in their search results.
max-snippet:[number]Sets a maximum number of characters for the meta description.
max-video-preview:[number]Sets a maximum number of seconds for a video in a preview.
max-image-preview:[setting]Sets a maximum image size for use in a preview (none, standard or large).
rating: Indicates that a page contains adult material.
unavailable_after: Tells search engines a date/time after which they should not show it in search results; a ‘timed’ version of noindex.
noyaca: Prevents the search results snippet from using the page description from the Yandex Directory.
noydir: Blocks Yahoo from using the description for this page in the Yahoo directory as the snippet for your page in the search results.
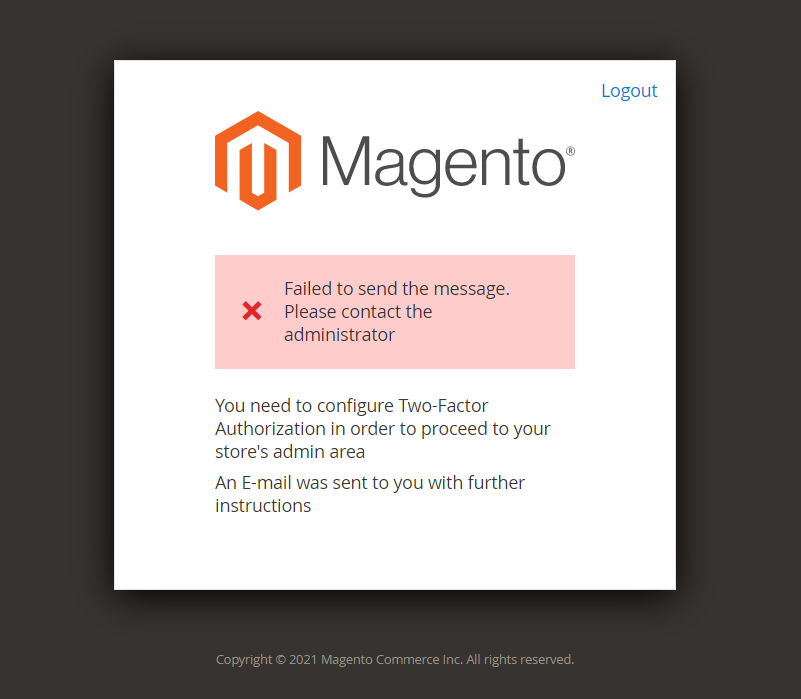
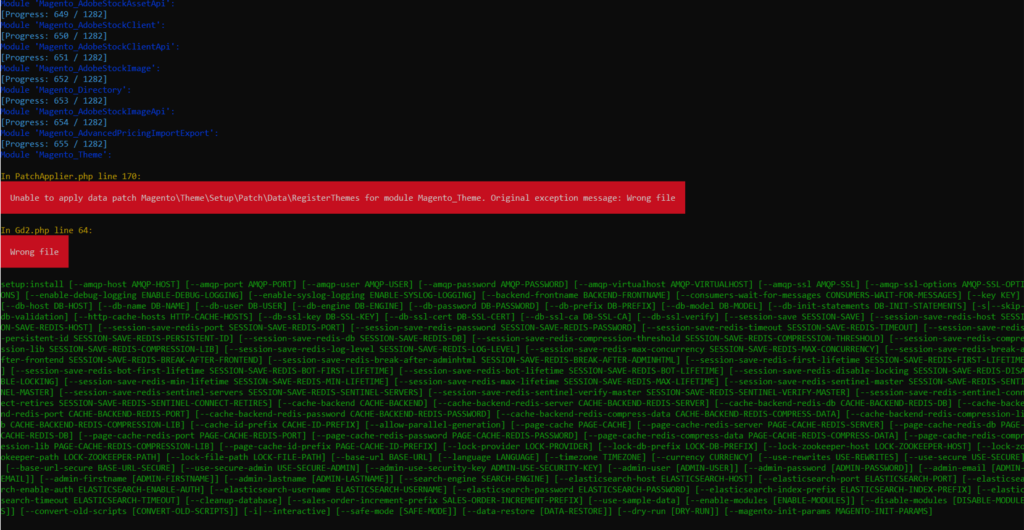
Unable to apply data patch Magento\Theme\Setup\Patch\Data\RegisterThemes for module Magento_Theme. Original exception message: Wrong file
In Gd2.php line 64:
Wrong file
Error format as below
Solution: Find validateURLScheme function in vendor\magento\framework\Image\Adapter\Gd2.php file. at line 96. Replace function with this: !file_exists($filename)
Replace existing validateURLScheme function with modified validateURLScheme function as per below code